background image

Maintenance, Service, and Repair

Tires and Wheels

Page 3

REPLACE THE TIRE/WHEEL

6. Raise the wheel to be replaced off of the ground

and support with jack stands.

7. Remove the 4 or 5 wheel nuts and remove the

wheel.

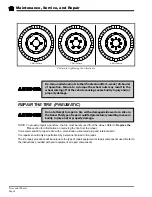
8. Install in reverse order.

9. Following the pattern shown on the following

page, cross tighten the wheel nuts in two stages
as follows:

1st stage to approximately 20 ft-lbs.

2nd stage to 80-90 ft-lbs.

10. Reconnect the main positive and negative cables

at the batteries.

11. Lower the wheel to the ground.

12. Remove the blocks from behind the wheels.

13. Release the parking brake and test drive the

vehicle.

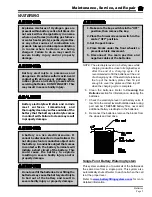
1. Make sure the key-switch is in the “OFF”

position, then remove the key.

2. Place the forward-reverse switch in the

center “OFF” position.

3. Set the park brake.
4. Place blocks under the front wheels to

prevent vehicle movement.

5. Disconnect the main positive and

negative cables at the batteries.

REPLACE THE TIRE
(PNEUMATIC)

NOTE; To replace the tire, the tire/wheel assembly

must be removed from the vehicle. Refer to

Replace the Tire/Wheel

 section for

information on removing the tire/wheel
assembly.

Tire replacement should only be performed by personnel
trained in tire replacement.

The tire replacement procedure will be unique to the
type of replacement equipment being used. Refer to the
instructions provided with your equipment.

Always use a new valve stem when replacing a tire.

1. Remove the tire from the wheel.

2. Cut the old valve stem off of the wheel.

3. Remove the valve stem cap from the new valve

stem.

4. Lubricate the valve stem with liquid soap.

5. Install a new valve stem using a valve stem tool.

NOTE: The valve stem tool is available at most auto

repair shops.

6. Install the tire onto the wheel following the

instructions provided with your tire replacement
equipment.

7. Inflate the tire to the proper pressure and check

for leaks.

8. Install the valve stem cap.

Explosion Hazard. Fully deflate the tire

before attempting to remove the tire from

the wheel.  Do not over inflate the tire when

seating the bead. Failure to deflate the tire

or over inflating the tire to seat the bead

may cause explosive failure of the tire

resulting in severe bodily  injury or death.

Содержание ET-015-00

Страница 1: ...T 015 72 109240 134256 ET 015 74 118001 Current Production ET 015 48 108591 Current Production MANUAL MZ 150 05 Operation Troubleshooting and Replacement Parts Manual Models Inlcuded ET 015 00 72 Volt...

Страница 2: ......

Страница 3: ...nn Mfg All rights reserved No part of this work may be reproduced or transmitted in any form or by any means electronic or mechanical including photocopying and recording or any information storage or...

Страница 4: ...B2 48 With Dump Bed Option B2 10 Ambulance B2 48 with Steel Cab Foldaway 4 Passenger Seat and Stake Sides ET 3000 ET1 50 Full Size Truck P2 50 30 000 Pound Tow Tractor...

Страница 5: ...n Model HB Series 10 Signet Charger Operation Model HBS series 10 Lestronic II Charger Operation 11 New Battery Break in 11 Charging Time 11 Storing Returning to Service 11 Storing Your Vehicle 11 Ret...

Страница 6: ...Tires and Wheels Tire Inflation 2 Tire Inspection 2 Replace the Tire Wheel 3 Replace the Tire pneumatic 3 Repair the Tire pneumatic 4 Replace the Tire pneumatic 5 Electrical Troubleshooting Symptoms...

Страница 7: ...s for Standard Hardware 3 Hardware Identification 3 Standard Head Markings 3 Hex Bolts 3 Other Bolts 3 Hex Nuts 4 Hex Lock Nuts stover 4 Other Nuts 4 Suggested Torque Values non critical hardware 5 Su...

Страница 8: ...B2 48 With Stake Side Dump Bed Option SC1 00 Stock Chaser E4 55 Sit Down Tow Tractor C4 25 Sit Down Tow Tractor...

Страница 9: ...Introduction About this manual 2 Who Should Read This Manual 2 Responsibilities 2 How To Use This Manual 3 Conventions 3 How to Identify Your Vehicle 4 Taking Delivery of Your Vehicle 5 Shown with opt...

Страница 10: ...pplicable models and serial numbers on the front cover Please be aware of all cautions warnings instructions and notes contained in this manual RESPONSIBILITIES Of the Owner The owner of this or any T...

Страница 11: ...entions Symbols and or words that are used to define warnings cautions instructions or notes found throughout this manual Refer to the examples below Note Alerts the reader to additional information a...

Страница 12: ...s vehicle conforms to requirements for Type E vehicles as described in O S H A Standard Section 29 CFR 1910 178 Powered Industrial Trucks and with all applicable portions of the American National Stan...

Страница 13: ...Dunn vehicle is a factory authorized service technician Repairs made by unauthorized personnel may result in damage to the vehicles systems which could lead to an unsafe condition resulting in severe...

Страница 14: ...TAYLOR DUNN...

Страница 15: ...Battery Disconnect 5 Steering 6 Seat Interlock Switch 6 1 Accelerator Pedal 6 2 Foot Brake Pedal 6 3 Park Brake Hand 6 Vehicle Operational Guidelines 7 Safety Guidelines 7 Starting 7 While driving 7 L...

Страница 16: ...Differential ET 015 72 Direct Drive to Automotive Differential ET 015 74 Transaxle Assembly Chain Drive to Automotive Differential Motor DC ET 015 00 14 9 kW 20 Horse Power ET 015 48 11 1 kW 15 Horse...

Страница 17: ...h in the center OFF position 3 Set the park brake 4 Place blocks under the front wheels to prevent vehicle movement 5 Disconnect the main positive and negative cables at the batteries DRIVER TRAINING...

Страница 18: ...complete charge cycle is completed A complete charge cycle is defined as battery voltage exceeding 2 35 volts per cell for a minimum of 6 minutes 5 Turn Signal Lever The turn signal lever is located o...

Страница 19: ...itch is located to the right of the driver seat To disconnect the battery from the control system push down on the knob Pull up on the knob to reconnect the battery Odometer Trip Odometer VDO model sp...

Страница 20: ...similar to the accelerator pedal in an automobile Depress the pedal to increase speed and release the pedal to decrease speed 3 Park Brake Hand The parking brake is actuated with a hand lever which i...

Страница 21: ...he foot brake 4 Rotate the Start switch to the ON position 5 Place the forward off reverse shift lever in the desired direction of travel 6 Release the parking brake 7 Release the foot brake 8 Slowly...

Страница 22: ...quipment stairways or exits Towing This Vehicle To tow this vehicle attach a tow strap to the front bumper tow bar NOTE If the vehicle is equipped with an automatic electric brake do not tow the vehic...

Страница 23: ...fety Rules Page 9 FUSE PANEL The fuse panel is located under the dash to the left of the steering column Fuse Panel Standard fuses shown Other fuses may be installed depending on options installed on...

Страница 24: ...table below 2 Error condition All three LED s flashing is an indication of a charging problem charger will also be beeping Refer to the Charger Troubleshooting section for information on error codes...

Страница 25: ...tteries if the battery electrolyte is low Charging when the electrolyte is low will damage the batteries and shorten their life span Only authorized personnel should perform battery maintenance includ...

Страница 26: ...RULES AND OPERATING INSTRUCTIONS Safety Rules Page 12 PERIODIC MAINTENANCE CHECKLIST NOTE A full page copy of the Periodic Maintenance Checklist is on the Vehicle Documentation CD under the Misc sub...

Страница 27: ...inclusive of a severe duty application Extreme temperature Bumpy dusty or ill maintained roads Excessively wet areas Corrosive or contaminated areas Frequent loading of vehicle at near capacity Use on...

Страница 28: ...TAYLOR DUNN...

Страница 29: ...Table of Contents General Maintenance Maintenance Guidelines 2 Troubleshooting Guide 3 Lubrication Chart 4 Model E 4 55 Tow Tractor Model C 4 25 Tow Tractor...

Страница 30: ...or cleaning parts Only properly trained and authorized technicians should perform maintenance or repairs to this vehicle Periodic maintenance and service must be performed on this vehicle Failure to c...

Страница 31: ...n Drive Gears Front End Out of Alignment Defective Speed Control Abnormal Noise Worn Drive Gears or Bearings Worn Front Rear Axle Bearings Loose Lug Nuts Motor Bearings Worn Oil Leak in Rear Bearing A...

Страница 32: ...re Wheel Bearing Grease 3 Ball Joints 6 General Purpose Grease 4 Leaf Springs 8 General Purpose Grease 5 Drive Shaft universal Joint 2 General Purpose Grease see note 6 King Pins 2 General Purpose Gre...

Страница 33: ...TABLE OF CONTENTS Inspect the Front Wheel Bearings and King Pin 2 Adjust Front Wheel Bearings 3 Front Axle Removal and Installation 4 Removal 4 Installation 4 Front Axle Service...

Страница 34: ...for any grinding noise Any grinding noise may be an indication of worn or damaged wheel bearings 1 Make sure the key switch is in the OFF position then remove the key 2 Place the forward reverse switc...

Страница 35: ...ings 11 Install a new cotter pin 12 Install the dust cap 13 Lower the vehicle 14 Reconnect the main positive and negative cables at the batteries 15 Remove the blocks from behind the wheels 16 Release...

Страница 36: ...ion 3 Confirm the electric park brake is set 4 Place blocks under the front wheels to prevent vehicle movement 5 Disconnect the main positive and negative cables at the batteries Installation 6 Raise...

Страница 37: ...nd Alignment 2 Inspect Ball Joints 5 Adjust the Steering Gear 6 Replace the Ball Joints Tie Rods and Drag Link 7 Replacing the Drag Link 8 Replacing the Tie Rod 9 Center the Steering Gear 9 Repair the...

Страница 38: ...nds of adequate capacity to lift and support the vehicle Failure to use lifting and support devices of rated load capacity may result in severe bodily injury 7 Turn the front wheels so that they are i...

Страница 39: ...nt clamps 28 32 ft lbs or the rod end jam nuts on the drag link 16 Untie the steering wheel and the front wheels 17 Reconnect the main positive and negative cables at the batteries 18 Rotate the steer...

Страница 40: ...evices of rated load capacity may result in severe bodily injury 1 Make sure the key switch is in the OFF position then remove the key 2 Place the forward reverse switch in the center OFF position 3 C...

Страница 41: ...int for information regarding replacing ball joints 10 Untie the front wheels 11 Reconnect the main positive and negative cables at the batteries 12 Remove the blocks from behind the wheels 13 Release...

Страница 42: ...ailure to use lifting and support devices of rated load capacity may result in severe bodily injury 1 Make sure the key switch is in the OFF position then remove the key 2 Place the forward reverse sw...

Страница 43: ...ns required to remove the rod end from the steering sleeve This will make it easier to realign the wheels 10 Install the new rod end into the steering sleeve Screw it into the sleeve the same number o...

Страница 44: ...amp at this time 12 Install the ball joint into the steering arm Tighten the ball joint nut to 40 45 ft lbs and install a new cotter pin 13 Realign the front wheels NOTE Refer to the Steering section...

Страница 45: ...t and jack stands of adequate capacity to lift and support the vehicle Failure to use lifting and support devices of rated load capacity may result in severe bodily injury 1 Make sure the key switch i...

Страница 46: ...of turns in the original direction 2 Remove the worm bearing adjuster locking ring and the worm bearing adjuster 3 Remove the side cover pitman shaft assembly by removing the three side cover bolts an...

Страница 47: ...r worm bearing on the worm shaft and install the worm shaft ball nut assembly into the housing being careful not to damage the worm shaft seal 10 Install the assembled worm bearing adjuster into the h...

Страница 48: ...Maintenance Service and Repair Steering Page 12 Exploded View of Steering Gear...

Страница 49: ...4 Install 4 Rear Axle 5 Remove and Install 5 Replace the Axle Bearing 5 Chain Case 6 Disassemble 6 Assemble 6 Differential Assembly 3rd Member 8 Disassemble 8 Assemble 9 Re shimming the Pinion Housin...

Страница 50: ...ement 5 Disconnect the main positive and negative cables at the batteries 10 Tie the vehicle in place so that it cannot move 11 Reconnect the batteries 12 Close all safety interlock switches turn the...

Страница 51: ...e housing level plug 9 A small amount of oil should come out This indicates the correct oil level NOTE If a large amount of oil comes out then let it drain to the proper level and replace the level pl...

Страница 52: ...nd up with the drive sprocket locking up the transmission Should this happen the chain may have to 1 Make sure the key switch is in the OFF position then remove the key 2 Place the forward reverse swi...

Страница 53: ...Do not reuse the axle bearing retainer Reinstalling the original bearing retainer may result in the axle falling out of the transmission resulting in severe bodily injury or property damage REAR AXLE...

Страница 54: ...the oil to drain from the housing and then reinstall the drain plug 8 Remove the brake drum Refer to section Brakes Replace the Brake Drum for information regarding removing the brake drum 9 Remove th...

Страница 55: ...brake band alignment bracket s Do not tighten the bolts at this time 12 Install the brake drum Torque to 175 ft lbs 13 Tighten the brake adjusting bolt to 25 ft lbs 14 Tighten the brake assembly mount...

Страница 56: ...ion housing and pinion gear from the 3rd member NOTE Do not lose the spacers and shims in the pinion housing or the pinion housing shim s 10 If required remove the rear tapered bearing from the pinion...

Страница 57: ...the pinion gear into the 3rd member 4 Install the pinion housing onto the 3rd member 5 Install the pinion bearing spacers shims and front bearing 6 Install a spacer on the pinion shaft so that the pin...

Страница 58: ...ion to loosen a nut 1 hole back off 2 holes and then tighten 1 hole The ring gear should be rotated any time the nuts are being adjusted 18 Loosen the right side nut 19 Tighten the left nut until all...

Страница 59: ...0 001 Locate the number printed on the flat surface of the pilot bearing shaft of the pinion gear It should be a number ranging from 5 to 5 This is the amount in 0 001 increments to add to the standa...

Страница 60: ...Maintenance Service and Repair F2 F3 Transmission Page 12 EXPLODED VIEW...

Страница 61: ...otor 2 Brake Shoes 3 Brake Drum 3 Inspect the Parking brake 4 Adjust the Service Brakes 4 Adjust the Parking Brake 5 Primary Adjustment 5 Secondary Adjustment 5 Check Master Cylinder Fluid 6 Bleed the...

Страница 62: ...less than the rotor service limit then the rotor must be replaced Front Disc Brake Pads NOTE The brake pad must be removed to accurately measure the lining thickness Refer to Replace the Front or Rea...

Страница 63: ...uld be handled as if they contain asbestos Refer to Appendix C for recommended handling precautions Brake Drum Drum Service Limit The minimum drum inner diameter will be stamped in the drum See exampl...

Страница 64: ...tem should be inspected 6 Release the park brake 7 Inspect the brake shoes The parking brake shoes are the same as the service brake shoes Refer to Inspect the Service Brake section to inspect the bra...

Страница 65: ...procedure 10 Set the park brake 11 Reconnect the main positive and negative cables at the batteries 12 Remove the blocks from the wheels 13 Release the park brake and test drive the vehicle There are...

Страница 66: ...es Always wear protective clothing and a face shield when working with or around brake fluid SKIN CONTACT Flush area immediately with water for several minutes If a rash or skin irritation develops ge...

Страница 67: ...brake cylinder 12 Depress the foot pedal to the floor and then close the bleeder valve Do not release pressure on the brake pedal until the bleeder valve is closed Do not ingest brake fluid or allow...

Страница 68: ...15 Repeat this process with each of the other wheels NOTE When finished top off the master cylinder with fluid See Check Master Cylinder Fluid for information on filling the master cylinder 16 Reconn...

Страница 69: ...place the Wheel Cylinder section for information regarding removing the wheel cylinder 10 Attach a clear hose to the bleeder valve on each of the wheel cylinders and route the hoses into a container f...

Страница 70: ...h jack stands 7 Remove the rear wheel and brake drum 8 Remove Springs 1 6 12 9 Remove park brake cable 10 cam 9 and guide 15 10 Remove brake shoe hold down cups springs and pins 4 11 Remove the brake...

Страница 71: ...Maintenance Service and Repair Brakes Page 11 Rear Brake left side shown...

Страница 72: ...TAYLOR DUNN...

Страница 73: ...TS Inspecting the Motor Brushes 2 Motor Inspection 2 Motor Removal and Installation 4 Replacing the Brushes 5 Replacing the Bearings 6 Repairing the Commutator 6 Service Limits 7 Motor Service Typical...

Страница 74: ...e top of the brush holder If it is even with or below the top of the brush holder then the brushes should be removed and measured Refer to Replacing the Brushes section for information regarding remov...

Страница 75: ...liably test for a shorted armature 6 Inspect the commutator for raised segments Raised segments could be a result of a stalled motor or shorted armature A tool called a growler is required to reliably...

Страница 76: ...replace the armature shaft seal any time the motor is disassembled 1 Push the motor brushes just far enough out of the brush holder so that the brush springs hold them in place away from the commutato...

Страница 77: ...nd the brush holder assembly In this case the brush holder assembly must be removed to replace the brushes NOTE The motor must be removed from the vehicle for this procedure Refer to Transmission Serv...

Страница 78: ...Limits then the motor must be replaced 5 Thoroughly clean all copper debris from between the commutator segments Do not press against the outer race of the bearing Pressing against the outer race will...

Страница 79: ...1 5 5BC58JBS6129C 0 635 0 025 66 75 2 625 19 05 0 75 38 1 1 5 5BC49JB399C 0 635 0 025 78 97 3 109 19 05 0 75 5BC58JBS6110C 0 635 0 025 78 97 3 109 19 05 0 75 38 1 1 5 5BT1326B262A 0 635 0 025 78 97 3...

Страница 80: ...TAYLOR DUNN...

Страница 81: ...tery Service Cleaning 2 Testing 3 Charging 4 Watering 5 Single Point Battery Watering System 5 Replacing 6 volt batteries only 6 Moist Charge Batteries 7 Storage and Returning to Service 8 Storage 8 R...

Страница 82: ...may result in severe bodily injury and or property damage Battery electrolyte will stain and corrode most surfaces Immediately and thoroughly clean any surface outside of the battery that the battery...

Страница 83: ...ctrolyte is poisonous and dangerous It contains sulfuric acid Avoid contact with skin eyes or clothing Wear rubber gloves and safety glasses while servicing batteries DO NOT INGEST This may result in...

Страница 84: ...ger accepting a charge and should be replaced NOTE Refer to Charger Troubleshooting for information on checking the charging system The highest reading will be the cell that is accepting the most char...

Страница 85: ...y injury and or property damage Battery electrolyte is poisonous and dangerous It contains sulfuric acid Avoid contact with skin eyes or clothing Wear rubber gloves and safety glasses while servicing...

Страница 86: ...be replaced 9 Remove all battery jumpers from both posts of the battery or batteries being replaced NOTE It is recommended to replace the battery jumpers when replacing the batteries 10 Remove the bat...

Страница 87: ...that is formulated to be used in wet lead acid batteries and is available at most automotive parts distributors that carry batteries When torquing battery hardware use a backup wrench on the battery...

Страница 88: ...l source It cannot be disconnected or neutralized Do not drop any tool or conductive object onto the battery A conductive object that comes in contact with the battery terminals will initiate a short...

Страница 89: ...tion for information regarding checking the electrolyte level 8 Test the batteries Refer to Testing section for information on testing the batteries 9 The batteries are now ready to be put back into s...

Страница 90: ...TAYLOR DUNN...

Страница 91: ...TABLE OF CONTENTS Throttle Linkage Adjustments 2 Magnetic Module 2 Pot Box module 3 Throttle Linkage...

Страница 92: ...of two micro switches and a magnetic sensor that detects the position of the throttle pedal Switch FS 3 is a normally open switch that is held closed by the throttle pedal return spring The vehicle w...

Страница 93: ...le is used on vehicles that are to be operated in areas with large magnetic fields The linkage to the pot box should be adjusted so that the FS 1 switch closes just as the pedal is depressed and the o...

Страница 94: ...TAYLOR DUNN...

Страница 95: ...TABLE OF CONTENTS Tire Inflation 2 Tire Inspection 2 Replace the Tire Wheel 3 Replace the Tire pneumatic 3 Repair the Tire pneumatic 4 Replace the Tire pneumatic 5 Tires and Wheels...

Страница 96: ...tread as the tire approaches its wear limit see illustration below Replace the tire if any tread depth indicator can be seen or any part of the tread depth is 1 16 inch or less Refer to Replace the Ti...

Страница 97: ...emoved from the vehicle Refer to Replace the Tire Wheel section for information on removing the tire wheel assembly Tire replacement should only be performed by personnel trained in tire replacement T...

Страница 98: ...severe bodily injury and or property damage REPAIR THE TIRE PNEUMATIC NOTE To properly repair a puncture the tire must be removed from the wheel Refer to Replace the Tire section for information on r...

Страница 99: ...eplacement should only be performed by personnel trained in tire replacement The tire replacement procedure will be unique to the type of replacement equipment being used Refer to the instructions pro...

Страница 100: ...TAYLOR DUNN...

Страница 101: ...Equipment Required 3 IMPORTANT NOTES and INSTRUCTIONS 3 Definitions 4 Forward Reverse Switch 6 Throttle Module 7 Motor Windings 8 Contactors 9 Contactor Negative Return 10 UNUSUAL SYMPTOM TROUBLESHOO...

Страница 102: ...slowly and exceeds normal speed in the opposite direction with high armature current only NOTE Field current will be very low in the opposite direction Accelerates slowly and exceeds normal speed in b...

Страница 103: ...troubleshooting guide Start at the beginning and complete each test in the order that they are written Do not skip any test unless instructed to do so Once a problem is found stop testing and repair t...

Страница 104: ...cle before lowering the drive wheels to the ground Failure to retest the vehicle could result in unexpected movement of the vehicle resulting in severe bodily injury and or property damage The rear dr...

Страница 105: ...ould be full battery voltage If correct go to Controller Output If test failed go to Contactors ISO Contactor test Controller Output Connect the test light to the controller M and controller B termina...

Страница 106: ...Volts nominal During this procedure voltages will be measured at F R switch Green Black wire White Black wire cathode of D4 NO terminal of reverse switch Turn the key switch ON select FORWARD directi...

Страница 107: ...run while the test harness is connected This illustration shows the test end of the harness and the orientation of the terminals The terminal numbers shown are exactly as on the test harness NOTE Perf...

Страница 108: ...dition will also have open armature windings Clicking noise from motor Most likely due to one or more raised commutator segments This could be a result of a damage due to a stalled condition If not ac...

Страница 109: ...tacts Normally Open NO and Normally Closed NC When a direction is selected and one of the contactors picks up current will pass through the NO contacts on the energized contactor and the NC contacts o...

Страница 110: ...inal Connect a test light from the contactor negative buss to the B terminal on the controller NOTE MUST USE TWO TEST LIGHTS Close the seat interlock switch and turn the key switch ON The test light c...

Страница 111: ...irection CONTACTORS P 13 Accelerates slowly and exceeds normal speed in both directions plus high armature current NOTE Field current will be very low CONTACTORS P 13 Does not run in either direction...

Страница 112: ...prevent vehicle movement 5 Disconnect the main positive and negative cables at the batteries The rear drive wheels may rotate during some of the following tests Block the front wheels raise the rear d...

Страница 113: ...d loose clothing away from the rear drive wheels while conducting tests Failure to do so may cause serious bodily injury Contactors There have been a few isolated instances of a specific failure of a...

Страница 114: ...TAYLOR DUNN...

Страница 115: ...ehicle wiring diagram is too large to be legible when printed at this size A full size diagram 22 x 16 is included on the CD in PDF format You can access the diagram from a button on the CD menu The d...

Страница 116: ...TAYLOR DUNN...

Страница 117: ...ase 12 Rear Axle 14 Rear Brakes 14 Rear Suspension 16 Drive Shaft 16 Motor direct drive 18 Motor Mount direct drive 18 Motor chain drive 20 Brake Lines 22 Brake linkage parking brake 24 Instrument Pan...

Страница 118: ...e and Brake 9 10 20 21 22 23 24 27 Felt washer 27 Bushing 27 Bushing 27 Shims 27 Thrust Bearing 25 Use red Loctite 17 18 19 7 Align flat spot with the set screw 25 27 King pin 27 Cup washer 26 1 Use r...

Страница 119: ...02 Brake bracket right 1 8 41 239 00 Brake assembly 2 9 88 159 86 Nut 4 10 55 130 86 Nut 4 11 41 349 13 Rotor 2 12 80 514 00 Bearing 2 13 97 125 00 Washer 2 14 88 527 14 Cotter pin 2 15 88 239 85 Nut...

Страница 120: ...Illustrated Parts Parts Page 4 Steering Linkage 1 2 2 2 3 4 5 5 6 4 1 7 8 9 1 1 7 7 18 4 1 1 10 11 12 13 14 15 16 17...

Страница 121: ...86 501 99 Ball joint right 3 6 18 045 00 Steering link right 1 7 88 527 14 Cotter pin 6 8 21 009 15 Pivot bolt 1 9 18 104 31 Steering pivot 1 10 20 031 55 Steering shaft 1 11 18 308 21 Steering gear...

Страница 122: ...Illustrated Parts Parts Page 6 Steering Gear 10 9 17 16 2 3 14 15 12 11 13 6 8 7 5 4 1 Steering Column...

Страница 123: ...11 18 308 82 Gasket 1 12 18 308 76 Pitman shaft 1 13 18 308 75 Gear lash adjuster 1 14 18 308 85 Shim kit 1 15 18 308 84 Side cover 1 16 18 308 86 Jam nut 1 17 18 308 83 Bolt side cover 3 Steering Co...

Страница 124: ...Illustrated Parts Parts Page 8 Front Suspension 1 2 2 3 4 5 5 4 6 6 7 7 8 8 9 10 11 12 10 9 9 10 13 11 14 14 9 13 10 13 11...

Страница 125: ...sher 4 3 86 000 00 Shock 2 4 88 189 81 Hex nut 2 5 88 180 18 Hex bolt 2 6 88 180 31 Hex bolt 2 7 00 243 11 Spring plate 2 8 88 109 81 Hex nut 8 9 96 248 01 Spring bolt 6 10 32 213 00 Bushing 6 11 88 1...

Страница 126: ...ted Parts Parts Page 10 Transmission Chain Case 27 28 26 21 Motor 2 3 4 6 7 9 13 14 15 16 17 20 22 23 24 1 25 10 11 12 8 5 3rd Member ET 015 48 and ET 015 74 only Seal with 94 430 03 RTV SILICON GSKT...

Страница 127: ...et F2 Axle 440 Thick 1 11 30 093 00 81 Tooth Single Pinion Sprocket ET 015 74 1 30 066 00 66 Tooth Single Pinion Sprocket ET 015 74 12 30 508 20 Drive Chain ET 015 48 1 30 507 10 Drive chain ET 015 74...

Страница 128: ...Illustrated Parts Parts Page 12 Transmission Differential Case Seal with 94 430 03 RTV SILICON GSKT SLR BLUE...

Страница 129: ...on Gear Set 3 00 ET 015 48 ET 015 74 1 31 239 50 Ring and Pinion Gear Set 6 50 ET 150 72 1 7 41 997 00 Oil Plug 3 8 41 292 20 Rear End Housing ET 015 72 1 41 292 10 Rear End Housing ET 015 48 ET 015 7...

Страница 130: ...Illustrated Parts Parts Page 14 Rear Axle Axle tube 4 5 6 7 3 2 Rear Brakes...

Страница 131: ...rt No Description Qty 41 312 88 Brake Assembly left 1 41 312 89 Brake assembly right 1 41 533 00 Brake drum 2 1 Spring 2 N A Link 3 85 000 02 Spring 4 Retainer cup 2 Retainir spring 2 Retainer pin 2 5...

Страница 132: ...Illustrated Parts Parts Page 16 Rear Suspension 1 2 3 4 5 6 7 8 9 10 11 12 13 14 Drive Shaft...

Страница 133: ...69 82 Hex nut 6 8 16 871 02 Spring hanger 4 9 32 213 00 Bushing 6 10 96 248 01 Spring bolt 6 11 00 243 06 Spring plate 2 12 88 159 84 Hex nut 8 13 88 189 81 Hex nut 4 14 85 515 00 Spring 6 leaf used u...

Страница 134: ...Illustrated Parts Parts Page 18 Motor direct drive Motor Mount direct drive...

Страница 135: ...ture 1 7 80 211 00 Front bearing 1 Motor Mount direct drive Item No Part No Description Qty 1 88 080 10 Bolt 3 2 88 088 32 Lock washer 3 3 02 155 03 Motor support front 1 4 88 149 81 Hex nut 2 5 88 14...

Страница 136: ...Illustrated Parts Parts Page 20 Motor chain drive 1 2 3 4 5 7 8 9 7006100 DWG 70 055 00 SPEC 5BT1326B262A 70 061 00 SPEC 5BT1326B96 11 10 6...

Страница 137: ...m No Part No Description Qty 1 70 210 64 Terminal 2 2 85 402 02 Brush spring 4 3 70 175 02 Brush holder 1 4 70 123 00 Brush 4 5 70 209 20 Field coil 1 6 80 504 05 Bearing rear 1 7 97 100 00 Woodruff k...

Страница 138: ...Illustrated Parts Parts Page 22 Brake Lines 1 2 3 4 5 1 6 7 6 7 6 6 Front Brakes Rear Brakes To rear brakes 8 9 10 11 12 13 14 15 4 16 To brake hose 17 18 19 20 21 19...

Страница 139: ...0 31 Bolt banjo 2 8 99 607 57 Brake line formed 1 9 99 575 20 Adaptor 1 10 99 511 50 Master cylinder 1 11 88 109 81 Hex nut 2 12 88 100 15 Hex bolt 2 13 99 591 00 T fitting 1 14 71 110 00 Switch brake...

Страница 140: ...Illustrated Parts Parts Page 24 Brake linkage parking brake 1 2 3 4 5 6 7 8 9 Spacer Included with 1...

Страница 141: ...rake Item No Part No Description Qty 1 51 340 00 Brake handle 1 2 88 109 81 Hex nut 2 3 88 108 60 Washer 4 4 88 100 15 Hex bolt 2 5 88 527 14 Cotter pin 1 6 96 820 01 Brake cable 1 7 96 773 00 Clevis...

Страница 142: ...Illustrated Parts Parts Page 26 Instrument Panel dash...

Страница 143: ...lete 1 94 303 12 Right dash assembly complete 1 1 71 038 10 Switch 1 2 71 038 10 Switch 1 3 74 000 72 Hour meter 1 4 74 009 48 Battery status gauge 1 5 71 141 20 Turn switch 1 6 7 74 020 00 Speedomete...

Страница 144: ...Illustrated Parts Parts Page 28 Speed Control Panel 1 2 3 4 5 6 7 8 9 10 11 12 4...

Страница 145: ...1 1 4NC NYL INS LOCKNUT PLTD 4 8 01 155 79 Mounting bracket 1 9 79 844 20 Circuit breaker 200A up to 9 2007 1 79 829 10 325A fuse after 9 2007 1 88 818 06 8 X 1 2 PAN HD SCR TYPE B THD 2 10 71 300 10...

Страница 146: ...Illustrated Parts Parts Page 30 11 12 13 7 8 5 15 4 16 6 14 9 10 1 2 3 17 Concave side of belleville washer 6 faces 14 F R Switch Assembly...

Страница 147: ...1 Lock Nut 1 4 88 019 86 Nut 4 5 88 014 13 Screw 4 6 97 183 00 Washer beleville 1 7 88 100 14 Bolt 1 8 88 108 61 Washer 1 9 32 207 00 Bushing 1 10 88 517 11 Cotter pin 2 11 96 773 10 Clevis pin 2 12 8...

Страница 148: ...62 033 56 Throttle module assembly includes 11 1 11 85 295 00 Spring extension for 10 1 12 71 303 01 Relay reverse light 1 13 73 012 80 DC DC converter 1 14 74 050 00 Wiper motor 1 15 74 051 10 Wiper...

Страница 149: ...mestic 1 10 98 254 30 Mount accelerator module 1 11 01 110 38 Accelerator pedal 1 12 90 815 00 Windshield 1 13 90 825 15 Tint strip windshield 1 14 90 850 20 Window rear 1 15 02 155 30 Front bumper 1...

Страница 150: ...Illustrated Parts Parts Page 34 Doors 1 2 3 4 5 6 7 8 9 10 11 12 13 14 15 16 17 18 19 20 Inside part of Window Frame Included with window 21 22 23 24 Door striker on cab...

Страница 151: ...1 91 015 91 PLATE RIGHT LATCH COVER 1 13 89 060 13 M6 X 1 0 X 25 HEX HEAD SCREW 2 14 88 079 86 1 4 28 LOCKNUT NYL INSERT 2 15 91 012 39 Door restraint 2 16 88 060 18 1 4 X 2 1 2 NC HEX HD SCR 2 17 97...

Страница 152: ...Illustrated Parts Parts Page 36 Charger 2 1 15 12 11 4 3 5 8 10 6 7 9 13 14 16...

Страница 153: ...N A N A 6 Mounting plate 01 155 57 01 155 57 01 155 57 01 155 57 7 Hex nut 88 069 81 88 069 81 88 069 81 88 069 81 8 Washer 88 068 60 88 068 60 88 068 60 88 068 60 9 Hex bolt 88 060 11 88 060 11 88 06...

Страница 154: ...Illustrated Parts Parts Page 38 Batteries Main Negative Main Positive 12v Tap 72 Volt battery configuraation Main Negative Main Positive 12v Tap 48 Volt battery configuraation...

Страница 155: ...Qty 77 047 00 Battery 244 Ah 77 042 00 Battery T 217 Ah 50 243 10 Battery rod 50 250 00 Clamp Bat Loc 75 237 00 Jumper 9 75 149 99 Harness for 48v dual pack 03 155 10 Locator rear battery pack 48 vol...

Страница 156: ...Illustrated Parts Parts Page 40 Decals...

Страница 157: ...ARNING 3 5 94 313 20 DECAL SAFETY WARN 1 6 94 376 00 DECAL KILL SWITCH 1 7 94 384 01 DECAL NOT MOTOR VEHICLE 1 8 94 384 08 DECAL DANGER HIGH VOLTAGE 6 9 94 384 14 DECAL WARNING WHEN LEAVING VEHICLE 1...

Страница 158: ...ide pockets 1 6 02 155 45 Deck frame support right 1 7 02 155 46 Deck frame support left 1 8 02 155 55 DECK PLYWOOD 42 000 X 61 000 2 Diamond plate deck option 9 00 155 67 PLATE DMD DECK 42 X 61 2 10...

Страница 159: ...ed Torque Limits for Standard Hardware 3 Hardware Identification 3 Standard Head Markings 3 Hex Bolts 3 Other Bolts 3 Hex Nuts 4 Hex Lock Nuts stover 4 Other Nuts 4 Suggested Torque Values non critica...

Страница 160: ...ntenance is completed 96 500 43 Sevcon Handset Analyzer read only Used to test the Sevcon control systems and reset the Smart View display includes instructions 62 027 61 Sevcon Handset Analyzer with...

Страница 161: ...Carriage Bolt grade 2 unless marked as above Other Bolts NOTE Torque value used should be for lowest grade of hardware used If a grade 2 nut is used on a grade 8 bolt use grade 2 torque value NOTE Toq...

Страница 162: ...as S A E Grade 2 Lock nuts use a letter to indicate the grade of the nut Grade A locknuts would be the equivelent of Grade 2 hex nuts Grade B as Grade 5 and Grade C as Grade 8 NOTE Nuts with no marki...

Страница 163: ...2 13 39 59 60 90 85 128 95 1 2 20 44 66 68 102 96 144 110 9 16 12 56 84 87 131 123 184 140 9 16 18 63 94 97 146 137 206 160 5 8 11 78 117 120 180 170 254 195 5 8 18 88 132 136 204 192 288 225 3 4 10 1...

Страница 164: ...center section Dana F N R 25 35 300 420 34 47 6 Carrier cap bolts Dana 100 120 1200 1440 136 163 2 Differential Cover plate Dana H12 18 25 216 300 24 5 34 Drain plug Dana H12 25 40 300 480 34 54 4 Dra...

Страница 165: ...um cleaner or any alternate method approved by OSHA to minimize the hazard caused by airborne asbestos fibers and brake dust Do not grind sand break or chisel the brake pads shoes as this will cause u...

Страница 166: ...Taylor Dunn Mfg 2114 W Ball Rd Anaheim CA 92804 800 688 8680 714 956 4040 FAX 714 956 0504 Visit our Website www taylor dunn com...

Отзывы: