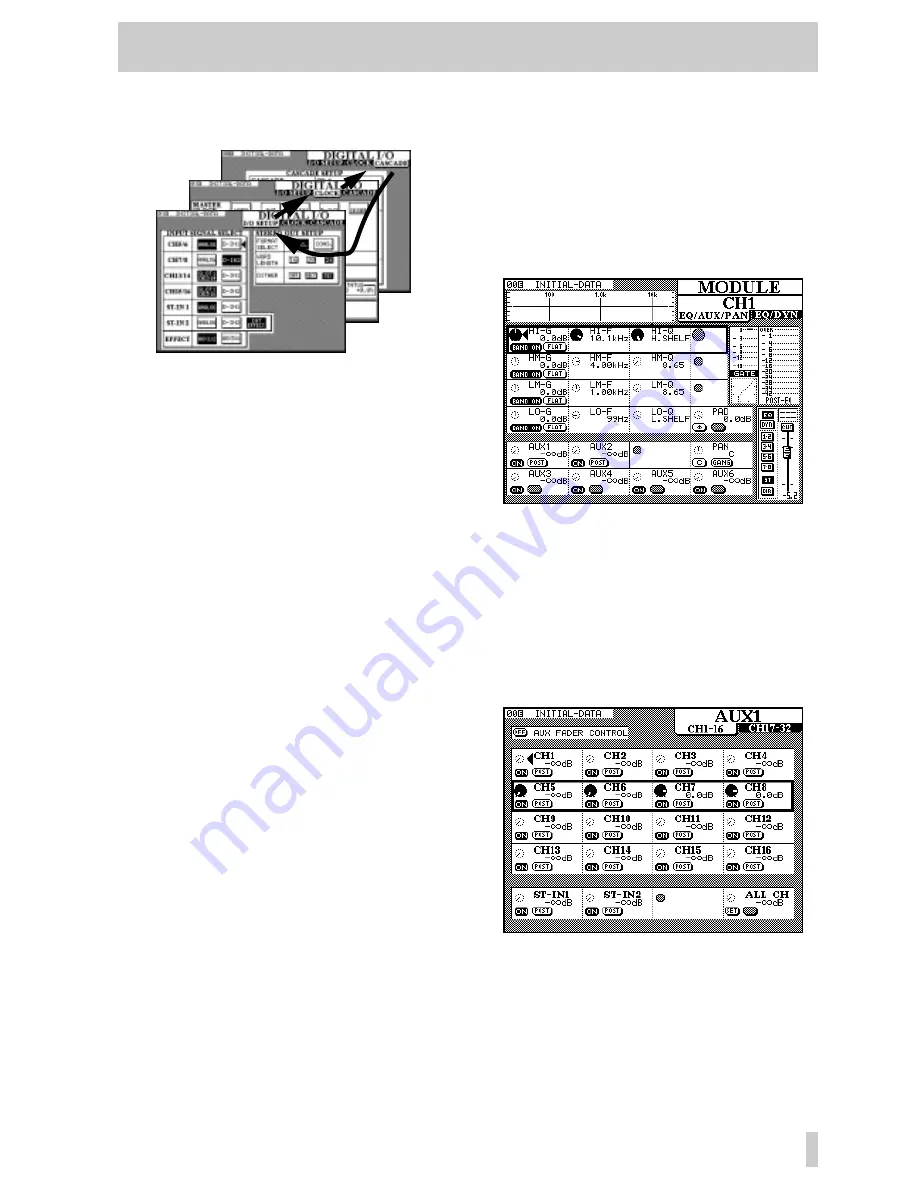
2 - Principles of operation—Using the PODs
2–3
more time will bring
I/O SETUP
to the front
once more.
2.3.2 Navigation in screens
In the screens above, there are no POD-selectable
parameters. In these cases, it is necessary to use
another method of working.
This is provided by the cursor keys and the
ENTER
key beside the
JOG/SHUTTLE
dial.
Use the cursor keys to move the cursor (
å
) from field
to field, and the
ENTER
key to select a value from
one of a number of options.
2.3.3 Using the JOG dial
Sometimes there are numerical values to be set.
These can be entered using the
JOG
dial (when the
JOG/SHUTTLE
indicator is off and the Dial Edit
option is checked—see 3.3.7, “Dial edit”).
The
JOG
dial can also be used to change the values
of a highlighted item which can also be edited by a
POD (in the screen above, there are no such values,
but the
MODULE
screen in 2.3, “Using the PODs”
contains many such values). Note that the
JOG
dial
can be used to control the values of a parameter that
is not in the currently active POD row.
In some screens, the
JOG
dial may be used instead of
the cursor keys to move the cursor around the screen.
The instances where this can be performed are usu-
ally obvious and therefore will not be described in
detail.
In certain special screens, the outer
SHUTTLE
wheel
is used to change the function of a screen (for
instance in library screens, it changes the function of
the
JOG
dial from a device selector to a character
selector.
The numeric keypad may also be used for the direct
entry of numeric values in certain cases.
2.3.4 One channel or one parameter?
The TM-D4000 provides two options for the setting
of module-based (as opposed to system-based)
parameters.
If one module (or stereo linked pair of modules) is to
have many parameters changed, at one time, the
channel is selected (see 2.3.5, “Selecting channels”
below) and the
MODULE
screen is used, as shown
below:
In fact, the
MODULE
“screen” is two screens
(
EQ/AUX/PAN
and
EQ/DYN
(dynamics
processor)). Pressing the
MODULE
key will change
between these two screens (see 2.3.1, “Selecting
screens” for more information on multiple screens).
Sometimes, though, it makes more sense to view and
adjust a single parameter on many modules simulta-
neously. For instance, here is the screen to adjust the
levels for Aux send 1, accessed by pressing the
AUX 1
key:
Note that again, this “screen” is actually two screens,
the first for the channels 1 through 16, and the second
for channels 17 through 32. Repeated presses of the
AUX 1 key will cycle between these two screens.


