Recording & Editing Functions
TASCAM 788 Operational Tutorial • 8/2000 Edition
14
Section III
Recording & Editing Functions
(Continued)
Silk screened around
the main transport
keys are a couple of
combination functions.
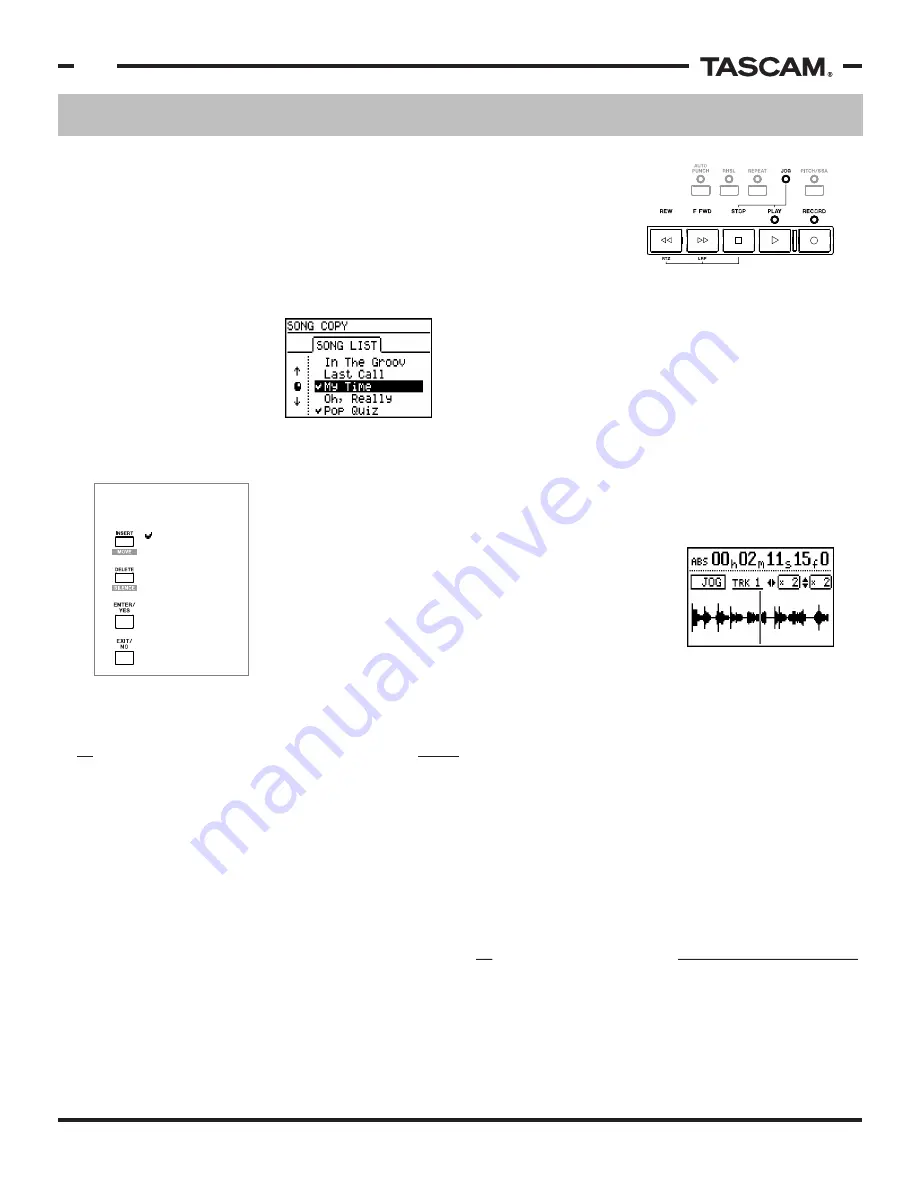
RTZ
- Pressing STOP
and REW together
functions as Return to
Zero. That will bring you to 00:00:00:00:0 in the time
window (the very beginning of the project).
LRP
- Pressing STOP and FFWD together will take you
to the beginning of your last recorded passage. This is
helpful in getting right back to the same point on a
punch in, or even for finding your IN point for an edit
removing extra space in front of a region.
Keep in
mind that LRP can go backwards or forwards to the
last recording point. Don't let the fact that it is on the
FFWD button confuse you.
JOG
- Pressing STOP and PLAY together will enter audio
jog/scrub mode, allowing you to scrub a track in the
song by turning the JOG/DATA wheel. The display will
show you the waveform
display of any track to assist
in finding a sparse part
visually.
If you need to zoom in or out
of the waveform, you can use
the LEFT and RIGHT CURSOR
keys to select the zoom aspect for time (horizontal).
The UP and DOWN CURSOR keys can increase the
height of the waveform, offering a better view of softer
passages. Pressing STOP will take you back out of the
waveform screen.
You can also choose which track you are viewing the
waveform of by pressing the select button above that
track. In other words, to view the waveform of track
3, press STOP and PLAY to get to JOG mode, then
press SELECT over channel 3.
One other item of note - if you use the RIGHT CURSOR
key to take you to 32x zoom, you are scrubbing at the
subframe level giving you more resolution than the other
resolutions which only scrub to the frame.
Locate points can be used to directly recall a particular
time location in the song, allowing faster and more
accurate project navigation than the traditional fast
forward and rewind. The 788 can store up to 999
locate points for each song, so you won't run short on
memory points.
that should be clearly pointed out to avoid any
confusion over simple items.
Some SONG MENU functions apply only to the current
(opened) song and other functions will show you a list
of all the songs on the selected drive. For instance,
DELETE UNUSED and PROTECT will only affect the song
that is currently opened. However, ERASE and COPY
will show you a list of songs on the selected drive.
The reason ERASE and COPY
show you the song list is
because they can process
multiple songs at the same
time. If you only want to
ERASE or COPY one song,
simply scroll with the
JOG/DATA wheel to the song and press ENTER/YES.
If you want to select multiple songs, dial to the song
and want to get out of the whole thing, just press
EXIT/NO and you will be returned to the SONG MENU.
you want and press
INSERT; a check mark will
appear to the left of the
song title. Keep selecting
all the songs you want the
same way. To remove a
check mark from a
marked song, press
DELETE. Once you've
marked all the songs you
want, press ENTER/YES.
If you changed your mind
BASIC RECORDER FUNCTIONS
LOCATE POINTS
Routing to the recorder is simple. Whatever comes
from channel 1 on the mixer goes to track 1 on the
recorder. Channel 2 feeds track 2, channel 3 feeds
track 3, etc. There is no routing matrix here, which
keeps things very simple.
The tracks are armed by the REC READY buttons
just above the channel faders. The lights will flash
to indicate they are armed for recording, and will go
solid when they are recording.
"The Big Buttons"
Don't skip this part! While the primary functions of
the big buttons labeled PLAY and REC seem fairly
straight-forward, there are some very cool key-
combination commands available in there to help
you fly through your project with the greatest of
ease.
SONG COPY/ERASE
COMMAND KEYS
marks the song
for COPY/ERASE
removes mark
for COPY/ERASE
starts COPY/ERASE
exits the screen


