Testmodes and Troubleshooting
Troubleshooting
4-9
4.2.3
Printer Malfunctions
without any Message at
the LCD Display
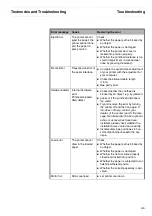
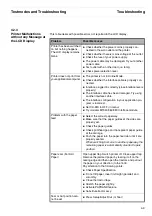
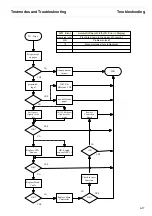
This table deals with possible errors not reported in the LCD display.
Problem
Possible causes
Printer has been switched
on but nothing happens.
The LCD display remains
blank.
Check whether the power cord is properly con-
nected to the wall outlet and the printer.
Check whether there is mains voltage at the outlet.
Check the fuse of your power supply.
The power cable may be damaged. Try out another
power cable.
Test outlet with an other load (i.e. lamp)
Check power selection lever
Printer does not print from
your application/computer.
The printer is not in Online Mode.
Check whether the interface cable is properly con-
nected.
Interface plugged in correctly (close interface levers
properly)
The interface cable has been damaged. Try using
another interface cable.
The interface configuration in your application pro-
gram is incorrect.
Set CX-BID to OFF (in menu)
Try modular MT350/360/380 Interface module
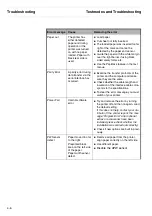
Problem with the paper
feed
Select the correct paperway.
Make sure that the paper guides at the sides are
properly set.
Check the paper guides.
Check printhead gap and transparent paper guide
at the carriage.
Push the paper into the paper feed slot until it are
properly seated.
When switching from one to another paperway, the
remaining paper is automatically diverted to park
position.
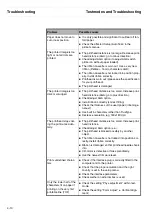
Paper Jam (Fanfold
Paper)
Open upper flap. Switch printer off. Close upper flap.
Remove the jammed paper by tearing it off on the
tearing edge and then open the tractors and pull out
the paper in your direction (to the front).
Pay attention to the following points:
Check Paper Specification.
Do not tilt paper, insert it straight (parallel) and
smoothly.
Close the tractor flaps.
Stretch the paper slightly.
Activate PAPHAND feature.
Substitute tractor assy.
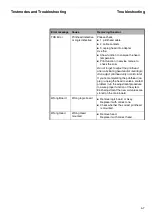
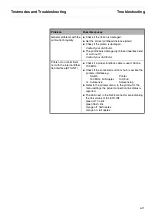
Tear or Cut position can-
not be set
Press Setup/Adjust/Cut (or Tear)
Содержание 2365
Страница 1: ...Maintenance manual Matrix printer 2365 2380...
Страница 2: ...This page intentionally left blank...
Страница 8: ...This page intentionally left blank...
Страница 10: ...This page intentionally left blank...
Страница 20: ...This page intentionally left blank...
Страница 32: ...Mechanical Functions Functional Description 3 12 right mark mark mark...
Страница 35: ...Functional Description Electronic Functions 3 15 2365 2380 Electronic groups...
Страница 128: ...This page intentionally left blank...
Страница 134: ...Mechanical Adjustments Adjustments 6 6...
Страница 136: ...Electrical Adjustments Adjustments 6 8...
Страница 142: ...Housing Spare Parts and Schematics 7 2 7 1 Housing 7 1 1...
Страница 144: ...Basic Printer Spare Parts and Schematics 7 4 7 2 1 Basic Printer 1 3 36...
Страница 145: ...Spare Parts and Schematics Basic Printer 7 5 Basic Printer 2 3 462646...
Страница 146: ...Basic Printer Spare Parts and Schematics 7 6 Basic Printer 3 3...
Страница 147: ...Spare Parts and Schematics Basic Printer 7 7 7 2 2 Carriage RMS and Platen 72 125 138 139 136 62 11 137...
Страница 151: ...This page intentionally left blank...
Страница 152: ...Standard Tractor Assy Spare Parts and Schematics 7 12 7 3 Standard Tractor Assy 462646 134 140 17...
Страница 162: ...PMS Double Sensor Spare Parts and Schematics 7 22 7 8 PMS Double Sensor T R T R T Transmit R Receive...
Страница 164: ...Option Recognition Spare Parts and Schematics 7 24 7 10 Option Recognition...
Страница 168: ...This page intentionally left blank...
Страница 170: ...Tractor Complete Rear Tractor 2T Model 8 2 8 2 Tractor Complete 4 1...
Страница 172: ...This page intentionally left blank...
Страница 174: ...Cutting Device Option Specifications 9 2 14 6 4 12 1 5 6 11 7 13 7 8 17 2 9 3 16 15 4...
Страница 176: ...This page intentionally left blank...
Страница 177: ...2nd Front Tractor option 10 1 10 2nd Front Tractor option...
Страница 179: ...Printer Stand Overview 11 1 11 Printer Stand 11 1 Overview...
Страница 180: ...Installing the Printer Stand Printer Stand 11 2 11 2 Installing the Printer Stand 1 2 3 4...
Страница 181: ...Printer Stand Installing the Printer Stand 11 3 6 8 7 5...
Страница 182: ...Installing the Printer Stand Printer Stand 11 4 9 10...


