Adjustments
Mechanical Adjustments
6-5
6.1.3
Adjusting Parallelism
Printhead/Platen
You must adjust parallism of printhead and platen if the printout is not satisfactory
(one side of the printed matter is smudged or too light) or in case of changing/repla-
cing the horizontal system (carriage etc.)
Necessary tool: Feeder gauge 0.05 -1.5 mm
– Remove top case (see chapter 5.1.1).
– Remove ev. Paper and Color ribbon.
– Remove transparent Paper Guide at the carriage.
– Push manually the thoothed segment on the right side to the most backward
position (in direction to the technician).
– Place the printhead at the most right position.
– Check the clearance head/platen (should be 1.4 mm; if not do adjustment
Head/Platen Gap, chapter 6.1.2)
– Move head to the most left position.
– Check the clearance head/platen by means of a feeler gauge.
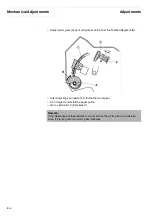
– Turn the eccentric lever “A” (see illustration on next page) on the left side wall.
Turn the lever backwards if the clearance (1.4 mm) is too big. Turn the lever to the
front if the clearance (1.4 mm) is too small.
– Install transparent Paper Guide at the carriage.
– Install the top case.
– Install the ribbon.
– Make a test printout.
Optional:
– Set AGA = Off.
– To run a visual check of the parallelism printhead/platen increase the clearance
until only a little of the printout is still to see. Compare the left with the right part of
the printout. There should only be a little difference in the blackening of the
printed matter.
– Switch printer off.
– Set AGA = ON (see chapter 4 “Testmodes and Troubleshooting”) if required.
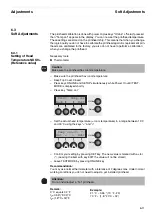
– Adjust AGA as described in chapter 6.3.2.
Important:
The tolerance allowed is 0.05 mm.
Содержание 2365
Страница 1: ...Maintenance manual Matrix printer 2365 2380...
Страница 2: ...This page intentionally left blank...
Страница 8: ...This page intentionally left blank...
Страница 10: ...This page intentionally left blank...
Страница 20: ...This page intentionally left blank...
Страница 32: ...Mechanical Functions Functional Description 3 12 right mark mark mark...
Страница 35: ...Functional Description Electronic Functions 3 15 2365 2380 Electronic groups...
Страница 128: ...This page intentionally left blank...
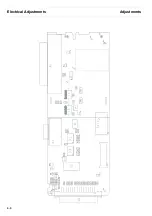
Страница 134: ...Mechanical Adjustments Adjustments 6 6...
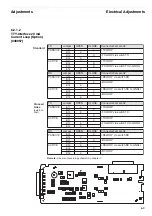
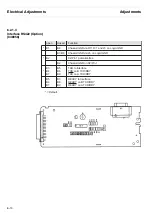
Страница 136: ...Electrical Adjustments Adjustments 6 8...
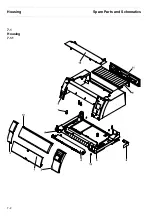
Страница 142: ...Housing Spare Parts and Schematics 7 2 7 1 Housing 7 1 1...
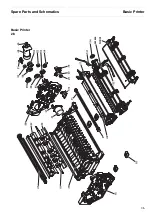
Страница 144: ...Basic Printer Spare Parts and Schematics 7 4 7 2 1 Basic Printer 1 3 36...
Страница 145: ...Spare Parts and Schematics Basic Printer 7 5 Basic Printer 2 3 462646...
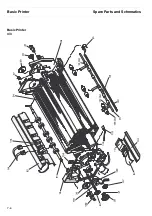
Страница 146: ...Basic Printer Spare Parts and Schematics 7 6 Basic Printer 3 3...
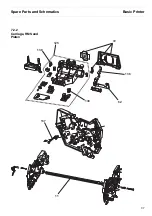
Страница 147: ...Spare Parts and Schematics Basic Printer 7 7 7 2 2 Carriage RMS and Platen 72 125 138 139 136 62 11 137...
Страница 151: ...This page intentionally left blank...
Страница 152: ...Standard Tractor Assy Spare Parts and Schematics 7 12 7 3 Standard Tractor Assy 462646 134 140 17...
Страница 162: ...PMS Double Sensor Spare Parts and Schematics 7 22 7 8 PMS Double Sensor T R T R T Transmit R Receive...
Страница 164: ...Option Recognition Spare Parts and Schematics 7 24 7 10 Option Recognition...
Страница 168: ...This page intentionally left blank...
Страница 170: ...Tractor Complete Rear Tractor 2T Model 8 2 8 2 Tractor Complete 4 1...
Страница 172: ...This page intentionally left blank...
Страница 174: ...Cutting Device Option Specifications 9 2 14 6 4 12 1 5 6 11 7 13 7 8 17 2 9 3 16 15 4...
Страница 176: ...This page intentionally left blank...
Страница 177: ...2nd Front Tractor option 10 1 10 2nd Front Tractor option...
Страница 179: ...Printer Stand Overview 11 1 11 Printer Stand 11 1 Overview...
Страница 180: ...Installing the Printer Stand Printer Stand 11 2 11 2 Installing the Printer Stand 1 2 3 4...
Страница 181: ...Printer Stand Installing the Printer Stand 11 3 6 8 7 5...
Страница 182: ...Installing the Printer Stand Printer Stand 11 4 9 10...


