3
Installing the 4-port Adapter
3-10 Sylantro 4-Port Adapter Installation Guide
Making the Network Connections
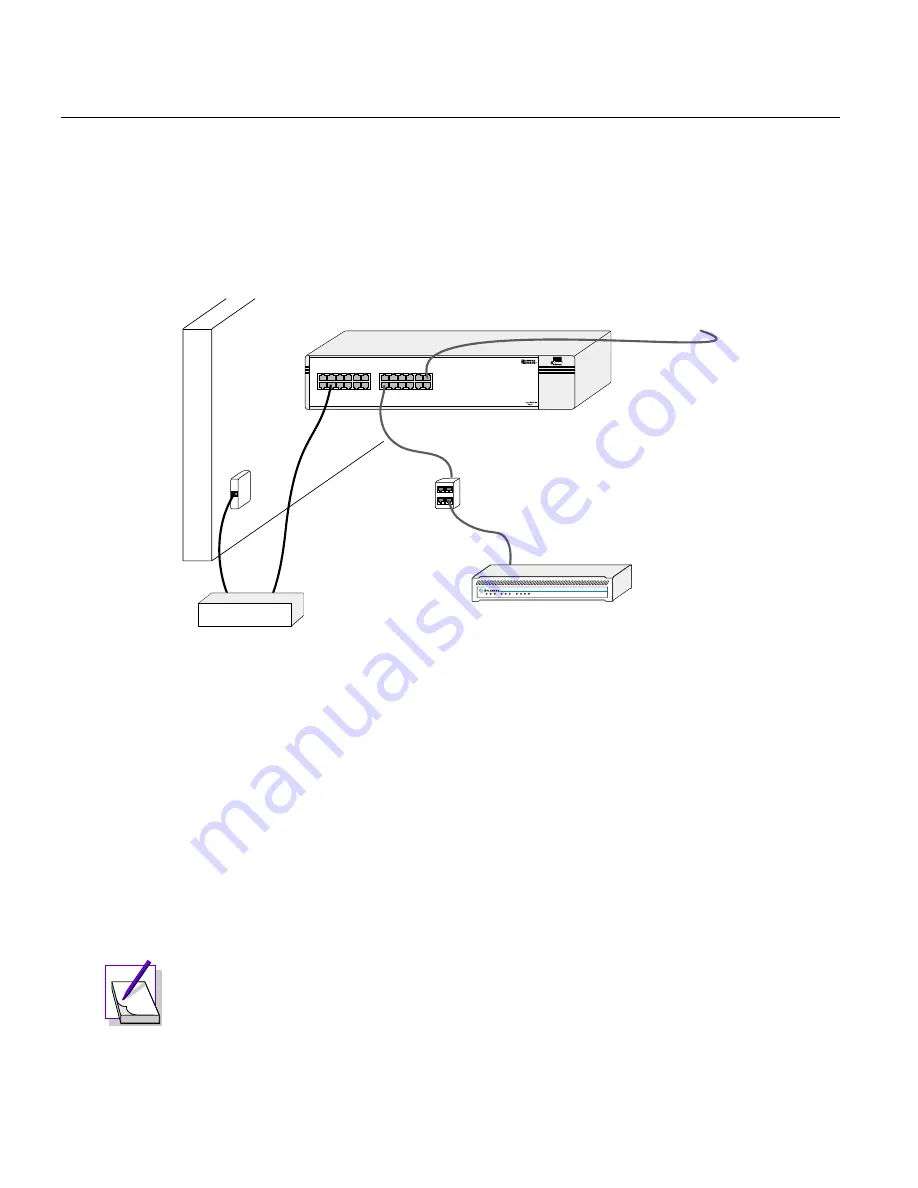
To connect the adapter to the customer’s LAN, connect one end of the network cable
to the Ethernet port on the back of the 4-port adapter and the other end to a nearby
LAN outlet or directly to the Ethernet switch as displayed in Figure 3-2.
Figure 3-2
Ethernet Switch Connections
The incoming broadband IP line that comes from the service provider needs to be
connected to a device that converts the incoming line to 10/100-BaseT Ethernet. The
10/100-BaseT line is then connected to an Ethernet switch. The network
connections are made using Category 5 Ethernet cables.
This configuration applies to any incoming broadband connection such as a DSL
line or T1/E1 line from the service provider. The network connection provided by
the service provider should have sufficient bandwidth to support the customer data
and voice requirements. For more information on bandwidth requirements, refer to
“Bandwidth Requirements” on page 2-4.
Note:
Make sure the service provider network connection is already
installed and verified before the adapter is installed.
Ethernet switch
Integrated
access device
Incoming
network
termination
Data network
LAN outlet (optional)
Adapter (front)
CA-204
STATUS
TX LNK RX
1
2
3
4
The adapter can also be connected
directly to the Ethernet switch.
4port_adapter_net_connect1


