1-26(E)
SX-M700
20
Telephone coupler
3
1
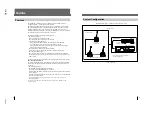
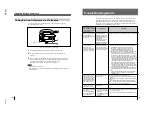
Taking Part in a Conference via a Telephone
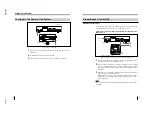
A person can take part in a conference from a remote location by using the
SX-T100 Telephone Coupler .
Taking part in a conference via the telephone
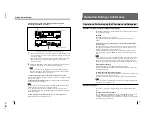
1
Set the POWER ON/OFF switch of the telephone coupler to ON.
2
Set up a telephone connection with the party who will take part in the
conference.
3
Place the handset on the telephone coupler after the other party answers the
phone. The handset catch part is movable. Adjust the coupler to the handset
size and secure the handset with the handset-securing tape.
The called person can now take part in the conference.
Notes
• Orient the handset correctly.
• If the handset is not adjusted to the coupler, the satisfactory communication may
not be possible.
Operation During a Conference
21
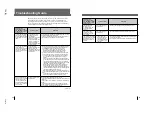
Troubleshooting Guide
Should a problem arise in your system, check the system while referring to the
instructions in the table below. If the system continues to malfunction after
applying the following checks and remedies, contact your nearest Sony dealer.
The system indicates the problem by lighting the microphone indicator and MIC
ON/OFF button of chairman’s/delegate’s units.
Lighting of the
microphone indicator
and MIC ON/OFF button
of the chairman’s unit/
delegate’s unit
Possible cause
Remedies
The indicator and button
blink for a few seconds
when the POWER
switch of the control unit
is set to ON.
The chairman’s unit/
delegate’s units for a
conference system, SX-
C100A/D100A/SX-C150/
D150, and those for a
simultaneous
interpretation conference
system, SX-C700A/
D700A/SX-C750/D750,
have been connected.
The SX-C700A/D700A/SX-C750/D750 can be used.
However, same sound is output from channel 1 to channel 6.
The indicator and button
of the chairman’s/
delegate’s units
continue to blink, after
the power switch of the
control unit is set to ON.
The units whose indicator
and button are blinking
cannot be controlled by
the control unit and cannot
be used in this system.
• When the indicator and button of units subsequent to the
16th unit of the units connected to one DELEGATE’S/
CHAIRMAN’S connector of the control unit blink:
– More than 16 units cannot be connected to one
DELEGATE’S/CHAIRMAN’S connector in series.
Disconnect the 16th unit and subsequent units.
• Even though the number of connected units is less than 16,
the indicators of some of the connected units blink:
– The first unit whose indicator and button are blinking may
be defective, or the connecting cable may be broken.
Disconnect the first unit of those whose indicator and
button are blinking. When the indicator and button of the
subsequent units stop blinking and go out, it indicates
that the disconnected unit was defective. Remove it from
the system or replace it with a functioning unit.
When the indicator and button continue to blink even
after removing the first unit, the connecting cable is
probably broken. Replace the connecting cable linking
the first unit whose indicator and button are blinking and
the unit immediately prior to that unit.
• Even though the number of connected units is less than 16,
the indicator and button of some of the connected units
blink:
– The unit whose indicator and button blink is defective.
Disconnect it from the system or replace it with a
functioning unit.
After the unit has been
operated for a while
after the power is turned
on, the unit’s indicator
and button start blinking
and do not go out, even
after a few seconds.
A communication error
has occurred.
Briefly turn the power off, then back on again.
If the unit subsequently operates normally, communication is
resumed.
If this problem occurs frequently, contact your nearest Sony
dealer.
If the indicator and button continue to blink just after the
power is turned on again, a problem described above may
have occurred. Proceed as described above.
The volume of the
earphone cannot be
adjusted by using the
VOL control.
The earphone may be
disconnected.
Insert the earphone plug into the earphone jack surely.
The indicator and button
blink and the
microphone is disabled
even if the MIC ON/OFF
button is pressed.
• The mode is that where
the number of speakers
is limited.
• The PRIORITY button is
held down by the
chairman.
• Wait until the speaker finishes speaking. Press the MIC
ON/OFF button again.
• Wait until the chairman releases the PRIORITY button.
Содержание SX-M100
Страница 75: ...SX M700 6 12 TMP68301AFR 16 TOSHIBA http getMANUAL com ...
Страница 110: ...8 1 8 1 SX M700 SX M700 M100 BLOCK SX M700 M100 BLOCK SX M700 M100 DIGITAL SECTION 8 BLOCK DIAGRAMS DIGITAL BLOCK ...
Страница 111: ...8 2 8 2 SX M700 SX M700 AUDIO SX M700 BLOCK SX M700 BLOCK AUDIO BLOCK ...
Страница 112: ...8 3 8 3 SX M700 SX M100 BLOCK SX M100 BLOCK SX M100 AUDIO AUDIO BLOCK ...
Страница 113: ...8 4 8 4 SX M700 SX E120 DIGITAL SX E120 BLOCK SX E120 BLOCK DIGITAL BLOCK ...
Страница 114: ...8 5 8 5 SX M700 SX E120 BLOCK SX E120 BLOCK SX E120 AUDIO AUDIO BLOCK ...
Страница 115: ...8 6 8 6 SX M700 SX T100 AU 202 SX T100 BLOCK SX T100 BLOCK AU 202 BLOCK http getMANUAL com ...
Страница 116: ...8 7 8 7 SX M700 SXA 120 BLOCK SXA 120 BLOCK SXA 120 AUDIO CPU 188 BLOCK ...
Страница 120: ......
Страница 126: ......
Страница 128: ......
Страница 130: ......
Страница 132: ......
Страница 136: ......


