


72
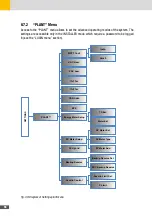
9�2�1 Connecting to a WiFi network
To connect the ES-T to the WiFi network, follow these steps:
1. Access, from the user panel, to the setup page through the following path:
MENU-->SETTINGS-->NETWORKING-->WLAN
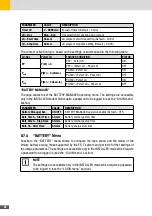
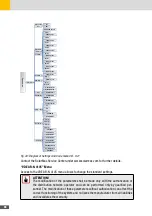
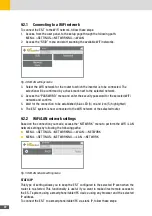
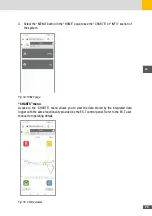
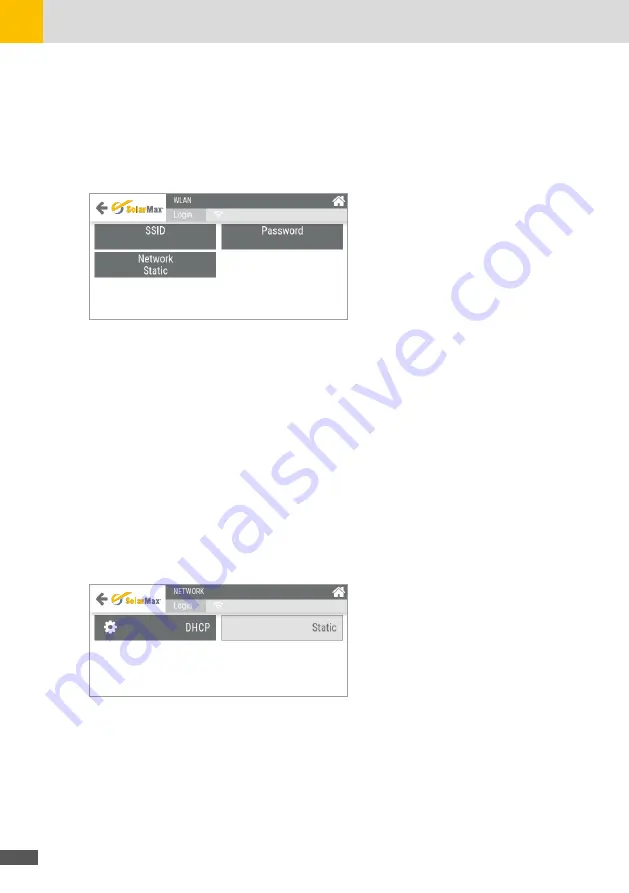
2. Access the “SSID” menu and start scanning the available WiFi networks.
Fig. 49: WLAN settings menu
3. Select the WiFi network for the router to which the inverter is to be connected. The
selection will be confirmed by a check mark next to the selected network.
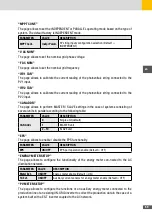
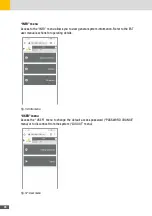
4. Access the “PASSWORD” menu and enter the security password for the selected WiFi
network and confirm.
5. Wait for the connection to be established (blue LED (3) on and icon (5) highlighted)
6. The ES-T system is now connected to the WiFi network of the selected router.
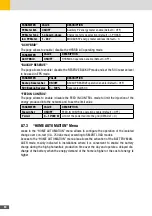
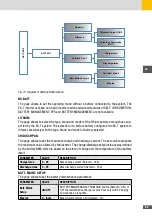
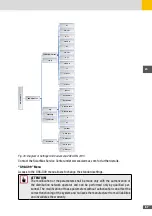
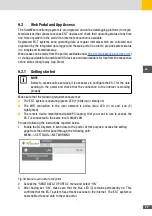
9�2�2 WiFi/LAN network settings
Based on the connection you made, access the “NETWORK” menu to perform the WiFi / LAN
network settings by following the following paths:
■
MENU-->SETTINGS-->NETWORKING-->WLAN-->NETWORK
■
MENU-->SETTINGS-->NETWORKING-->LAN-->NETWORK
Fig. 50: WLAN network setting menu
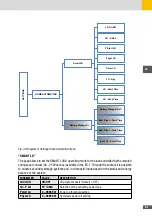
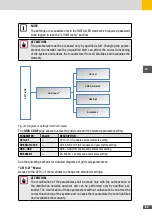
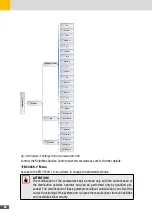
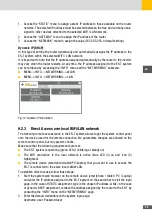
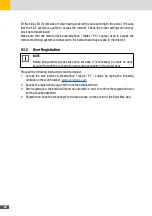
STATIC IP
This type of setting allows you to keep the ES-T configured to the selected IP even when the
router is re-started. This functionality is useful if you want to make direct remote access to
the ES-T system using a smartphone/tablet/PC device using any browser and the selected
IP address.
To connect the ES-T to a smartphone/tablet/PC via static IP, follow these steps:
Содержание 10ES-T
Страница 1: ...Instruction Manual SolarMax ES T series 5ES T 6ES T 8ES T 10ES T ...
Страница 10: ...10 3 2 Function Fig 2 Function of ES T ...
Страница 22: ...22 5 2 Electrical connection diagram ES T Fig 6 Electrical connection diagram ...
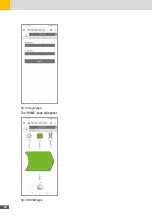
Страница 74: ...74 Fig 52 Login page The HOME page will appear Fig 53 HOME page ...


