


20
4�4
Mounting the ES-T
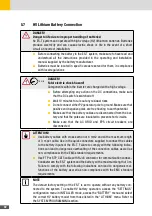
CAUTION!
Risk of electric shock or other injury by mounting the inverter!
■
To prevent the risk of electric shock or other injury, check that there are no
electrical or hydraulic lines in the walls before drilling the mounting holes of
the ES-T.
The ES-T is delivered with a wall mounting bracket suitable for use on most walls.
220
4 x Ø5,2
366
663
Fig. 4: Mounting bracket on the rear panel of the ES-T
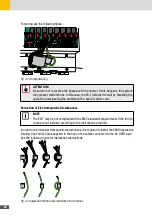
Do the following steps to mount the ES-T to the wall:
1
4 x
2
3
4
5
6
4 x
2 x
2 x
Fig. 5: Mounting Steps
1. Fix the top and bottom mounting brackets to the ES-T body.
2. Drill the holes to fix the ES-T mounting support on the wall.
3. Fix the mounting support to the wall
4. Install the ES-T.
5. Fix the ES-T to the wall using the bottom bracket fixing screw.
Содержание 10ES-T
Страница 1: ...Instruction Manual SolarMax ES T series 5ES T 6ES T 8ES T 10ES T ...
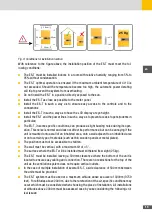
Страница 10: ...10 3 2 Function Fig 2 Function of ES T ...
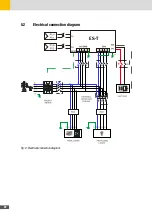
Страница 22: ...22 5 2 Electrical connection diagram ES T Fig 6 Electrical connection diagram ...
Страница 74: ...74 Fig 52 Login page The HOME page will appear Fig 53 HOME page ...


