16. INSTALLING THE GSM/GPRS REMOTE LINK
This module allows the remote connection of the DataHog or MiniMet logger via the GSM/GPRS digital
mobile telephone network. Whilst the two systems use different mobile phone technology and operate in
different ways, installation on the mast is the same.
Please refer to the separate GPRS manual for full details of how this system works.
The GSM/GPRS module housing itself is usually installed near the base of an outdoor mast, using the fitted
mounting bracket and supplied bolts, spacers, washers, nuts and end caps. In most cases the GSM/GPRS
housing will already be fitted to its mast bracket, but please see Appendix 7 if assembly is required.
16.1 GSM/GPRS Remote Link (excluding Solar Panel)
Appendix 8 shows the mounting of the GSM/GPRS housing and bracket onto the pole.
Locate the black cable with a round 8 pin plug coming from the base of the GSM/GPRS housing.
Connect and screw up (do not overtighten) this plug into the DataHog or MiniMet logger socket
marked RS232.
The antenna is already connected inside the GSM/GPRS housing. The antenna and bracket just
need fixing to the mast. The antenna needs to be mounted on the mast as high as possible, see
Appendix 15
To connect the 12V battery, first locate the white cable coming from the base of the GSM/GPRS
housing. Connect the red spade connector (brown wire) to the positive terminal of the battery.
Connect the black spade terminal (blue wire) to the negative terminal. A plastic sheet is provided
which can be bent over the battery and pegs to the ground, to give some protection from the
weather (see Appendix 15)
Use plastic cable ties to protect all cables from movement and damage from chafing.
16.2 GSM/GPRS Remote Links with a Solar Power Source
If this option has been purchased, the solar panel may be mounted back-to-back with the
GSM/GPRS module housing. In some cases, if the GSM/GPRS unit has been installed in a shaded
site, it may be necessary to install an additional mast nearby to mount the solar panel.
Appendix 9, 10 and 11 show the order in which to assemble the GSM/GPRS housing and solar panel
on one pole. The main brackets are mounted first, (Appendix 9), the solar panel hinged bracket
second (Appendix 10), and finally the solar panel itself is attached (Appendix 11)
31
MiniMet Installation
Содержание MiniMet
Страница 1: ...MiniMet Installation Manual Iss 2 0...
Страница 45: ...APPENDIX 2 CONCRETE BASE FOR A 2M MAST 44 MiniMet Installation...
Страница 46: ...APPENDIX 3 SITE LOCATION 45 MiniMet Installation...
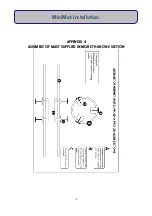
Страница 47: ...APPENDIX 4 ASSEMBLY OF MAST SUPPLIED IN MORE THAN ONE SECTION 46 MiniMet Installation...
Страница 49: ...APPENDIX 6 RAINGAUGE BASEPLATE 48 MiniMet Installation...
Страница 50: ...APPENDIX 7 MOUNTING OF GSM GPRS ENCLOSURE TO BRACKET 49 MiniMet Installation...
Страница 51: ...APPENDIX 8 MOUNTING THE GSM GPRS MODULE ON THE MAST NO SOLAR PANEL 50 MiniMet Installation...
Страница 52: ...APPENDIX 9 MOUNTING OF THE GSM GPRS UNIT ON THE MAST WITH A SOLAR PANEL STEP 1 51 MiniMet Installation...
Страница 53: ...APPENDIX 10 MOUNTING OF THE GSM GPRS UNIT ON THE MAST WITH A SOLAR PANEL STEP 2 52 MiniMet Installation...
Страница 54: ...APPENDIX 11 MOUNTING OF GSM GPRS UNIT ON THE MAST WITH A SOLAR PANEL STEP 3 53 MiniMet Installation...
Страница 55: ...APPENDIX 12 TYPICAL MINIMET INSTALLATION WITH GSM GPRS 54 MiniMet Installation...
Страница 56: ...APPENDIX 13 TYPICAL MINIMET INSTALLATION WITHOUT GSM GPRS 55 MiniMet Installation...
Страница 57: ...APPENDIX 14 56 MiniMet Installation...
Страница 58: ...APPENDIX 15 FITTING THE BATTERY COVER 57 MiniMet Installation...


