Commissioning and configuration
40
© SICK AG · Germany · All rights reserved · Subject to change without
notice
8016535/1D2F/2022-11-14
Operating instructions
NAV310 Laser positioning sensor
Chapter
6
Configuring with AutoIP
Important
Deactivate all programs on your PC/notebook that access Ethernet or TCP/IP.
1. In the NETWORK SCAN ASSISTANT dialog, under INTERNET PROTOCOL, IP COMMUNI-
CATION, select the ACTIVATE IP COMMUNICATION checkbox and the USE AUTOIP check-
box.
2. Click AUTO IP CONFIGURATION Button
3. Click SEARCHING FOR SENSORS Button to verify that the device is CONNECTABLE
4. If the status is NOT CONNECTABLE , highlight the device and follow instructions 5.-7. If
the status is CONNECTABLE, close the dialog box with OK and start the NETWORK SCAN
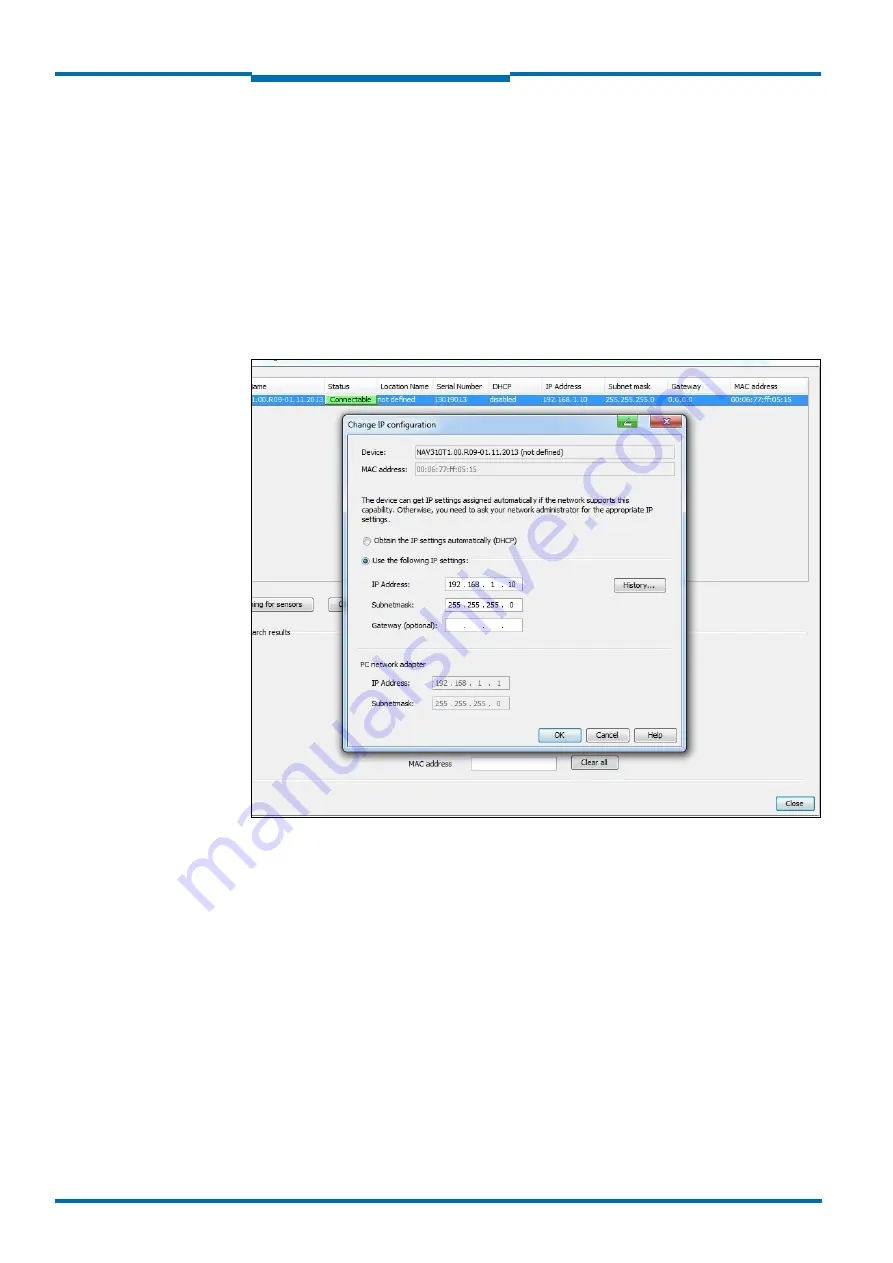
5. Click CHANGE IP CONFIGURATION
Fig. 20:
Configuring with AutoIP
6. Enter the IP ADRESS of your PC NETWORK ADAPTER incremented by one in IP ADDRESS
under USE THE FOLLOWING IP SETTINGS, e.g.:
IP address under PC Network adapter = 169.192.88.120
IP ADDRESS under USE THE FOLLOWING IP SETTINGS = 169.192.88.121
7. Confirm the settings in the NETWORK SCAN ASSISTANT dialog box with OK. The SCAN
ASSISTANT dialog box is closed.
6.3.5
Performing scan
1. In the NETWORK SCAN ASSISTANT dialog box, click on the NETWORK SCAN button.
2. Choose devices listed and accept using ADD.
A scan is performed for devices connected via the connection. SOPAS ET adds the de-
vices found to the project tree and uploads the actual parameter set from the device.


