


35
3.2.2
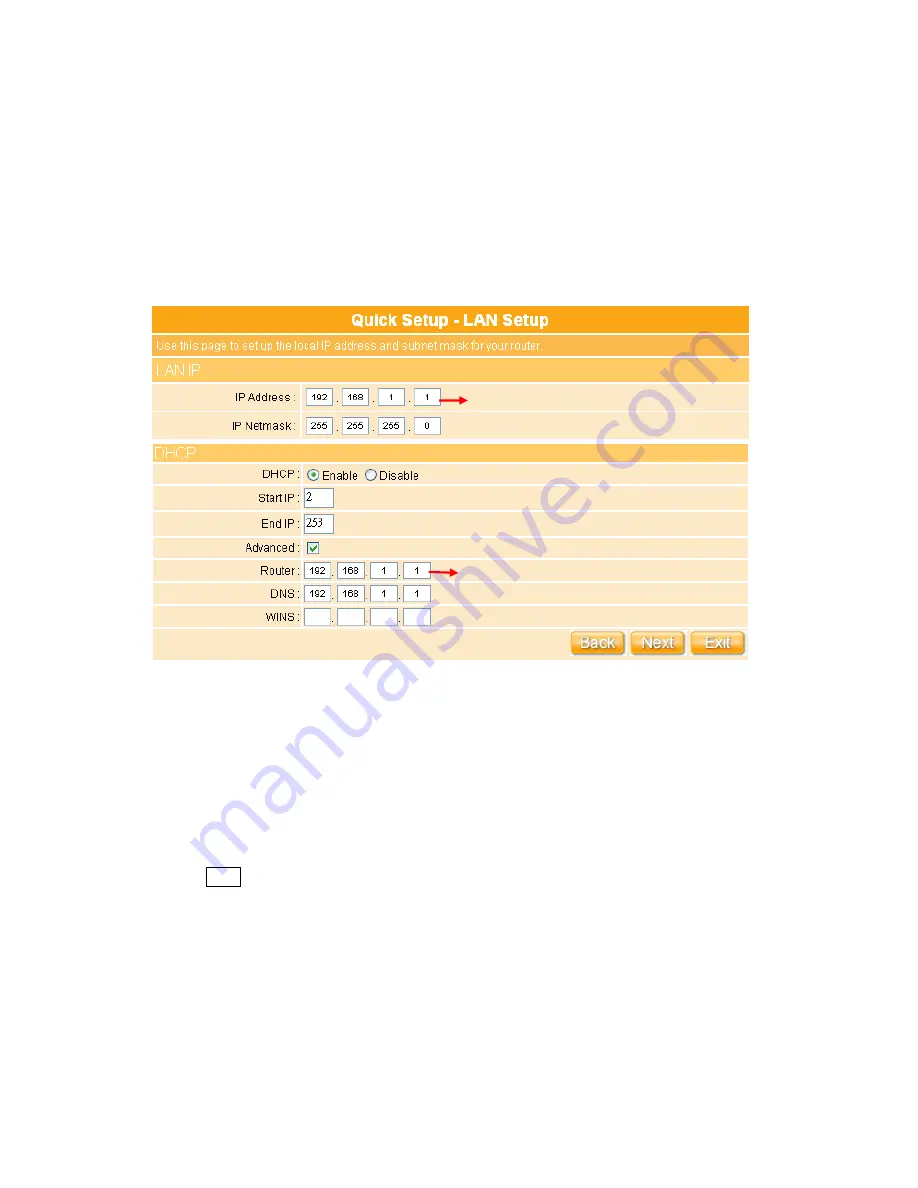
LAN Setup
If you are using the WE-1110 with multiple PCs on your LAN, you must connect the LAN via
the Ethernet ports on the built-in Ethernet switch. You must assign a unique IP address to
each device residing on your LAN. The LAN IP address identifies the router as a node on
your network; that is, its IP address must be in the same subnet as the PCs on your LAN.
The default LAN IP for the Internet Security Router is 192.168.1.1.
For Gateway IP Address, the IP address 192.168.1.xxx (xxx can be any number between 1
and 254 that is not used by another device.) Please don’t change the default LAN IP
settings at this section until you have completed the reset of the configurations and confirm
that your Internet connection is working. And the DHCP Server will automatically allocate
an unused IP address from the IP address pool to the requesting computer. You must
specify the starting and ending address of the IP address pool.
Click on “
Next
” button to proceed to the next setting.
The setup of pre-assigned Gateway
IP Address is
suggested for good to
use.
Requested to be as complied as LAN IP.
Содержание we 1110
Страница 1: ...1 ...
Страница 18: ...18 Step2 Click on Properties button Step3 Double click on Internet Protocol TCP IP ...
Страница 23: ...23 If it can t work it will show Request timed out ...
Страница 89: ...89 Step 2 Click Add a printer Step 3 Click Next ...
Страница 91: ...91 Step 6 Click Next Step 7 Input the IP address of WE 1110 192 168 1 1 Router Mode and then click Next ...
Страница 152: ...152 Step 6 Input Username and Password of your own You will see like as below monitor screen ...
Страница 158: ...158 Step 3 Click Next Step 4 Click the Local printer attached to this computer and then click Next ...
Страница 159: ...159 Step 5 Click the Create a new port and select the Standard TCP IP Port and then click Next Step 6 Click Next ...
Страница 224: ...224 Step 3 Click Next Step 4 Click the Local printer attached to this computer and then click Next ...
Страница 225: ...225 Step 5 Click the Create a new port and select the Standard TCP IP Port and then click Next Step 6 Click Next ...
Страница 258: ...258 Step3 Please finish these blank fields Then click on Create Account button ...
Страница 260: ...260 Step5 1 Click on the mail 2 Click on the address https www dyndns org account confirm xxx Step6 Click on login 2 ...
Страница 261: ...261 Step7 Click on the My Services under Account Step8 And then click on Add Host Services ...


