


111
1.
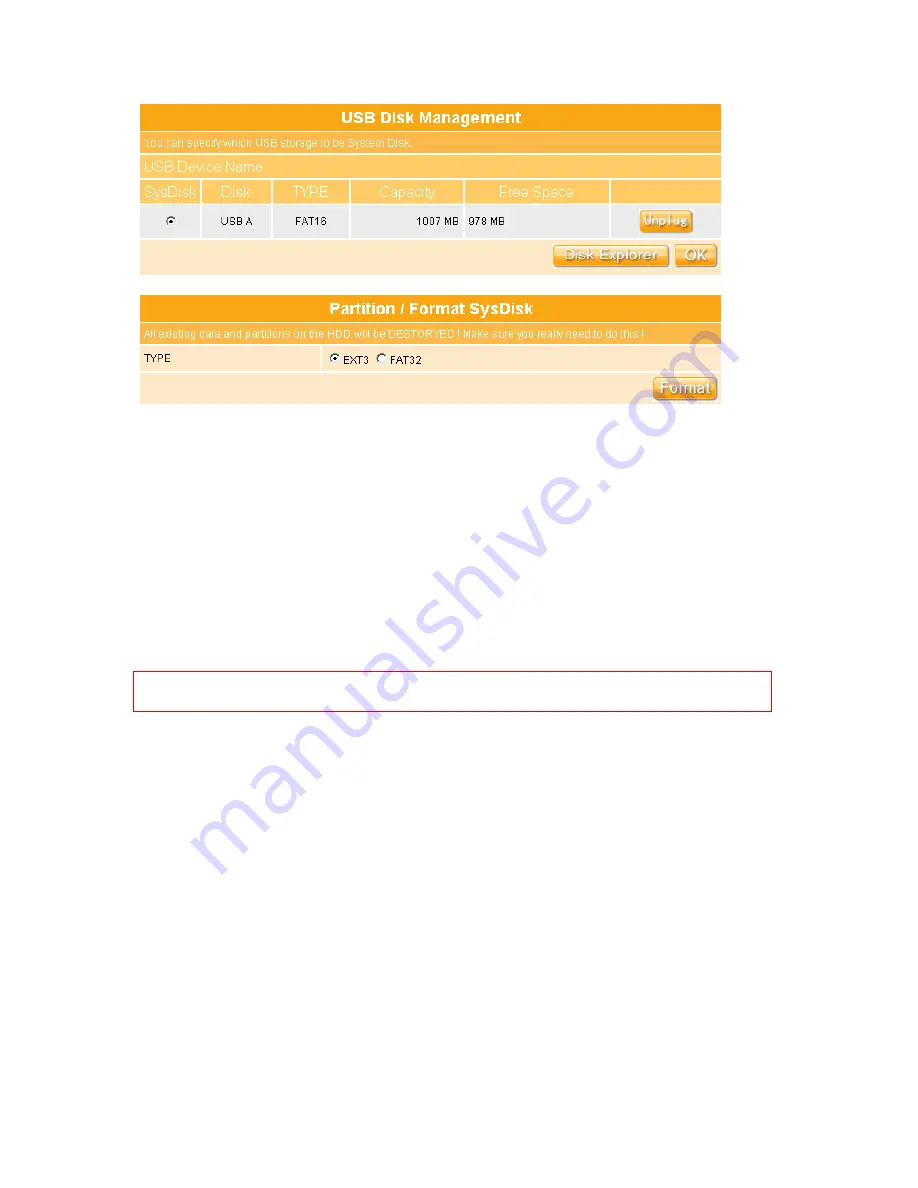
Select the USB Disk and click on
OK
button for refresh all disks before you do disk
partition, and the
Unplug
button will appear.
2.
To partition/format the disk, please select the disk and click on
Format
button.
3.
Moreover, if you want to view the data inside the disk, please go to “
3.5.1 FTP Sever
Setup
” to enable FTP server and then click on “
Disk Explorer
” to view all the disks
folders inside the device.
Notice: You have to click on “
Unplug
” button before remove the USB devices from
WE-1110.
3.6.11 Email Alert
To monitor router activity, you can run on a local PC or a remote one elsewhere on the
Internet. And the WE-1110 provides the email alert facility so that the Log messages can
packed as an e-mail for someone who wants to receive these messages. In the following,
here explain how to setup the email alert function.
Содержание we 1110
Страница 1: ...1 ...
Страница 18: ...18 Step2 Click on Properties button Step3 Double click on Internet Protocol TCP IP ...
Страница 23: ...23 If it can t work it will show Request timed out ...
Страница 89: ...89 Step 2 Click Add a printer Step 3 Click Next ...
Страница 91: ...91 Step 6 Click Next Step 7 Input the IP address of WE 1110 192 168 1 1 Router Mode and then click Next ...
Страница 152: ...152 Step 6 Input Username and Password of your own You will see like as below monitor screen ...
Страница 158: ...158 Step 3 Click Next Step 4 Click the Local printer attached to this computer and then click Next ...
Страница 159: ...159 Step 5 Click the Create a new port and select the Standard TCP IP Port and then click Next Step 6 Click Next ...
Страница 224: ...224 Step 3 Click Next Step 4 Click the Local printer attached to this computer and then click Next ...
Страница 225: ...225 Step 5 Click the Create a new port and select the Standard TCP IP Port and then click Next Step 6 Click Next ...
Страница 258: ...258 Step3 Please finish these blank fields Then click on Create Account button ...
Страница 260: ...260 Step5 1 Click on the mail 2 Click on the address https www dyndns org account confirm xxx Step6 Click on login 2 ...
Страница 261: ...261 Step7 Click on the My Services under Account Step8 And then click on Add Host Services ...


