6
Maintenance Procedures
To
p
joint
Pre
ss
Pre
ss
Pre
ss
Pre
ss
S
to
pp
er
S
to
pp
er
Left-
s
ide joint
Electroly
s
i
s
tank
in
s
tallation
b
racket
Electroly
s
i
s
tank
S
crew
s
S
crew
S
crew
S
crew
Electroly
s
i
s
tank
Electroly
s
i
s
tank
Bindin
g
b
and
Wirin
g
in
s
tallation
b
and
Water tem
p
erature
s
en
s
or
Water tem
p
erature
s
en
s
or
Electroly
s
i
s
tank
in
s
tallation
b
racket A
Electroly
s
i
s
tank
in
s
tallation
b
racket A
Electroly
s
i
s
tank
in
s
tallation
b
racket B
Electroly
s
i
s
tank
in
s
tallation
b
racket B
Electroly
s
i
s
tank
in
s
tallation
b
racket B
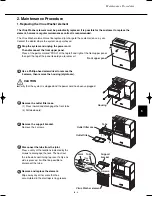
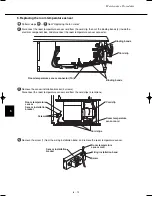
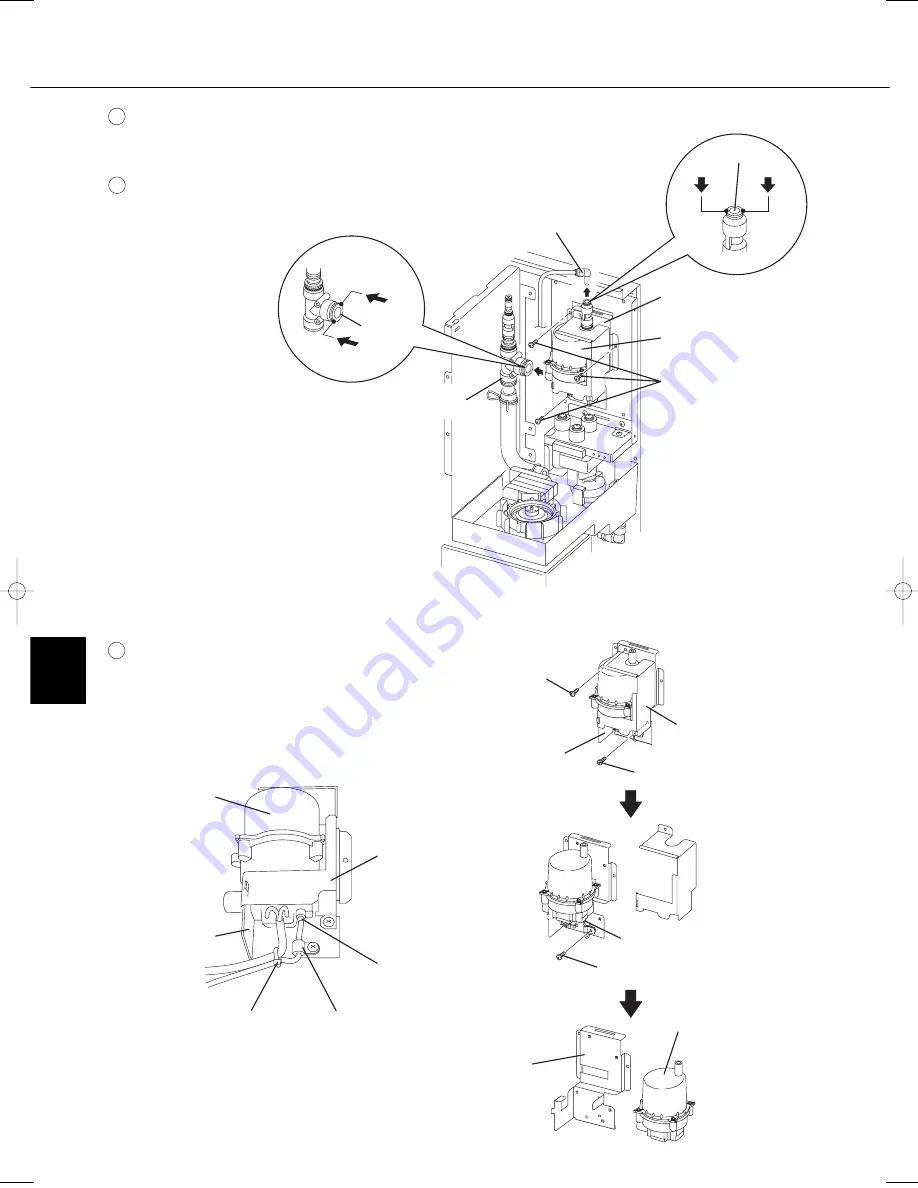
Remove the top joint and left-side joint from the electrolysis tank unit. To remove the joint, press the stopper at
the base of each joint while pulling on it.
7
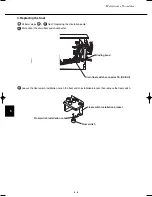
Remove the screws (2) from electrolysis tank installation
bracket A, then disconnect it from electrolysis tank
installation bracket B. Remove the screw (1) that fastens
the wiring installation band, then pull out the water
temperature sensor. Cut the wire binding band, and
remove the electrolysis unit from electrolysis tank
installation bracket B.
9
Remove the electrolysis tank unit together with the installation
bracket (3 screws).
8
* When replacing the electrolysis tank with a
new one, follow the removal procedure in the
reverse order.
6
- 6
07-032 VW-VF10BG_TD 2/15/07 11:25 AM Page 6


