1
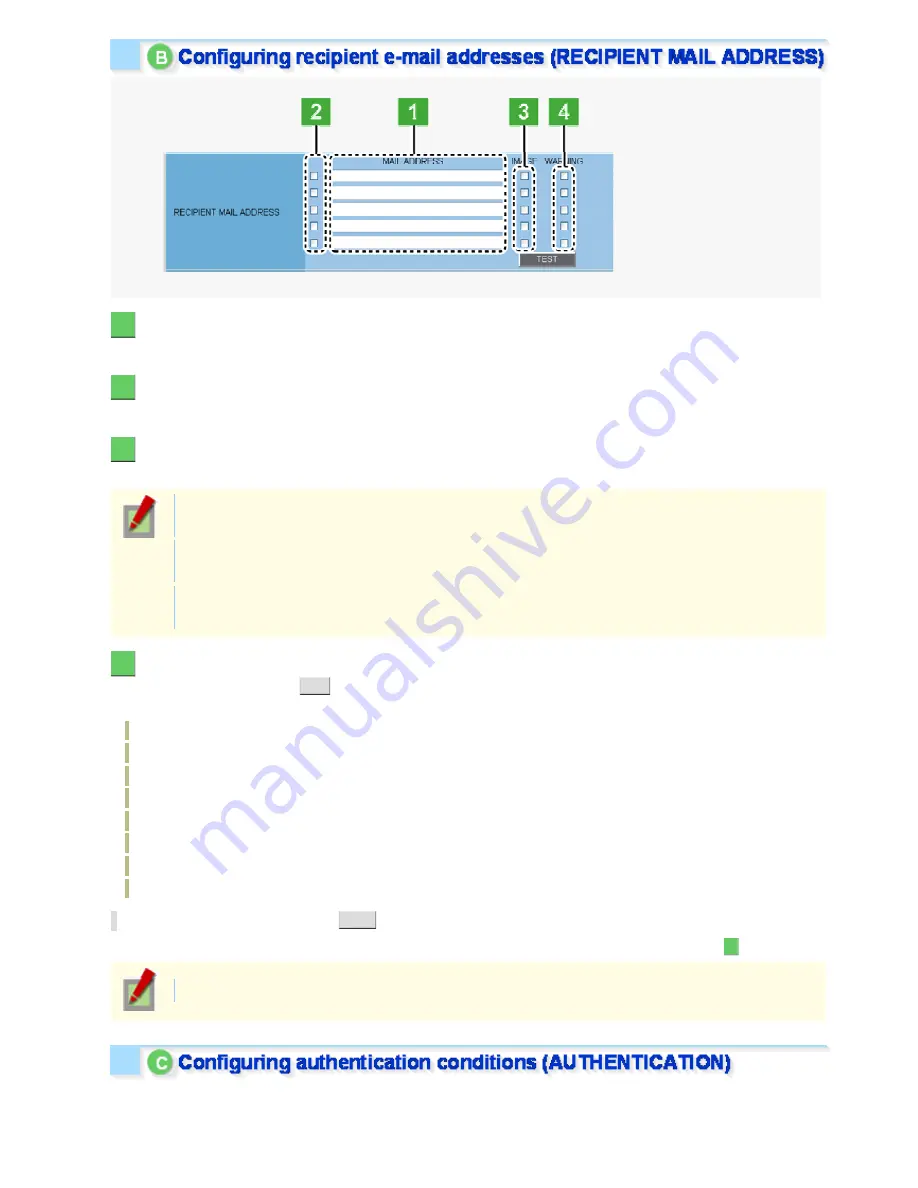
In [MAIL ADDRESS], type the recipient e-mail addresses.
Here, you can type up to five e-mail addresses (up to 64 alphanumeric characters for each).
2
Select the check box for each e-mail address to which you want to send e-mails.
You can send e-mails to the selected e-mail address(es).
3
Select the [IMAGE] check box for the recipient address if you want to attach an image file
to each e-mail.
The attached image file will have the following file name:
CAMERA ID +_yymmddhhmmss.jpg
CAMERA ID is the leading four characters of the camera title. However, any of the following symbols,
if included, will be replaced by a “-” (hyphen):
/ (slash), \ (backslash), ? (question mark), * (asterisk), : (colon), ; (semicolon), ' (single quote),
" (double quote), < (less-than sign), > (greater-than sign), ¦ (broken bar)
4
To send a warning e-mail automatically in the event of a failure, select the [WARNING]
check box and click
SET
.
A warning e-mail will be sent in any of the following cases:
When an SD card error occurrs,
Error occurred in the hard disk drive.
Abnormal camera temperature
Error occurred in the fan
When the remaining recording area is reduced to the warning level (20%/10%),
When recording was stopped because the remaining recording area had been used up, or
When a power failure occurs, or the system recovers from a power failure.
Abnormal USB current
* To send a test e-mail, click
TEST
.
A test e-mail is sent to each recipient e-mail address for which you selected the check box in Step
2
.
The subject (SUBJECT) of this test e-mail will be “TEST”.
To perform an authentication check, you need to configure the authentication conditions.
Working with Administrator Configuration Screens 66/79


