


N
A
V
I
130
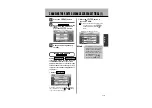
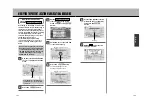
Select
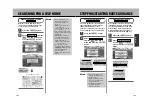
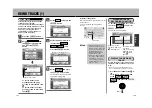
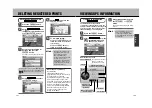
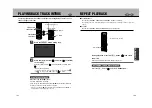
Example of selecting “memory 3”.
t
Select
and press the
Ä
button.
Recording
Clear
Select
Recording
Clear
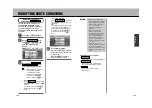
y
Select
and press the
Ä
button.
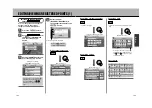
Yes
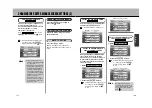
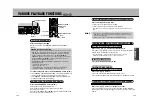
q
Press the
É
button.
w
Select from
the
drop-down menu and press
the
Ä
button.
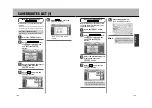
z
See step and . (p.127)
To delete the presently selected
group tracks, go to step
t
.
To delete the tracks of another
group, go to step
e
.
e
Select
and press the
Ä
button.
z
See step . (p.127)
r
Select the group to be deleted
(
/
/
)
and press the
Ä
button.
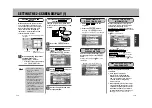
Track
Memory 3
Track
Memory 2
Track
Memory 1
Memory
Change
Save Route Track
DELETING TRACKS
1
2
3
129
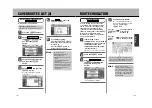
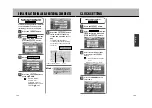
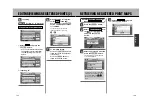
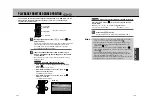
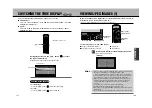
When the tracks in memory 3 are
displayed on the map, a
mark
appears here.
w
Select
and press the
Ä
button twice.
The present map is displayed.
Display
ON
Example of selecting “memory 3”.
Select Display
ON
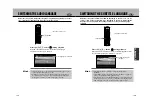
The tracks disappear from the map.
* Disabling the display doesn’t erase the tracks
from the memory.
q
Proceed as described in step
and (p.127), select
and
press the
Ä
button twice.
The present map is displayed.
Display
OFF
DISABLING TRACK
DISPLAY
1
2
This indicates that presently the
memory 3 tracks are being
displayed on the map.
Select Display
OFF
¡
Track display cannot be
disabled during track recording.
¡
Pressing to
retrieve
a group will automatically
disable track display.
Display
ON
Hint
USING TRACKS (2)
Содержание NV-E7000 - Portable GPS And Mobile DVD Entertainment System
Страница 10: ...17 ...
Страница 94: ...175 ...


