- 31 -
䣑 䣍
䣷 䣵
䣕 䣶 䣣 䣶
䣮 䣵
䣖 䣱 䣱
䣎 䣱 䣩
䣕 䣧 䣶
䢷 䢰 䢲
䢲
䢵 䢹 䢰
䣗
䣏 䣇 䣐
䣑 䢴
䢰 䢲 䢧
䢴
䢷
䣅 䣑
䢰 䢲 䤑䣅
䣲
䢵 䢹
䣖 䣧 䣯
䣅 䣣 䣰 䣥 䣧 䣮
䢴 䢶
䢳 䢴
䢲
䣅 䣮 䣧 䣣 䣴
䣒 䣅
䣃 䣮 䣮
䣒 䣅
䢳 䣆
䣏 䣇 䣐 䣗
䢹
䢱 䢷 䢱 䢳
䢴 䢲 䢳 䢲
䢷 䢲 䤑䣅
㻼 㻯 㻚
㼍
㼠 㼛
㼛 㼓
㼐
㻿
䣧
㼚 㼐
㼘
䢱 䢳 䢹
䢲 䢱 䢲 䢷
䢴 䢲 䢳
䣆 䣣 䣶 䣣
䣎 䣱 䣩
䣧 䣮
䣅 䣣 䣰 䣥
䣕 䣶 䣣 䣴 䣶
㼍 㼠
䣏 䣇 䣐 䣗
䣵 䣵
䣱 䣩 䣴 䣧
䣒 䣴
㻼 㻯 㻚
㼠 㼛
㼓
㼐
㼍
㻿
䣧
㼚 㼐
㼘 㼛
䢸
䢴 䢷
䢰 䢰 䢰
䣦 䣫 䣰 䣩
䣕 䣧 䣰
䢳 䢹
䢱 䢲 䢷 䢱
䢴 䢲 䢳 䢲
䣣 䣶 䣣
䣎 䣱 䣩
䣆
䣮
䣣 䣰 䣥 䣧
䣶 䣣 䣴 䣶
䣕
㼍 㼠
䣅
䣇 䣐 䣗
䣏
䣵 䣵
䣱 䣩 䣴 䣧
䣒 䣴
䢷 䢸
䢴
䣧 䣦 䢰 䢰
䣈 䣫 䣰 䣫 䣵 䣪
䢳 䢹
䢱 䢲 䢷 䢱
䢴 䢲 䢳 䢲
䣣 䣶 䣣
䣱 䣩
䣆
䣎
䣮
䣅 䣣 䣰 䣥 䣧
㻯 㻚
㼠 㼛
㻼
㼍 㼠 㼍
㼛 㼓
㼐
㼚 㼐
㼘
㻿
䣧
䣕 䣶 䣣 䣴 䣶
䣏 䣇 䣐 䣗
䣵 䣵
䣱 䣩 䣴 䣧
䣒 䣴
㻌
㻌
㻌
㻌
㻌
㻌 䠘
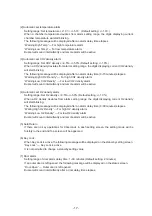
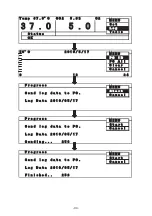
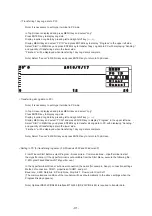
Transferring 1day Log data to PC>
Note) It is necessary to set Hyper terminal in PC side.
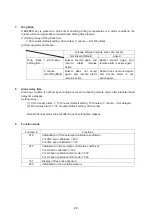
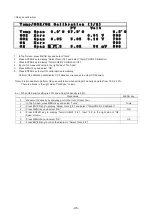
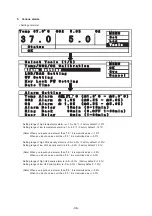
In Top Screen is displayed and press MENU key and select “Log”.
Press ENTER key to display Log data.
Display required Log data by pressing left and right shift key (
䊹㻌 䊻
).
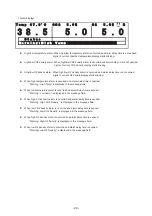
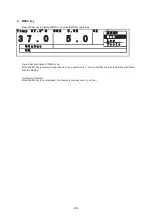
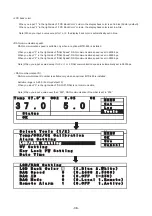
Display MENU key and select “PC 1D” and press ENTER key to display “Progress” in the upper left side.
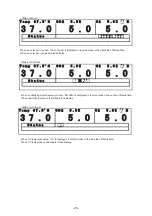
Select “Start” in MENU key and press ENTER key to transfer 1day Log data to PC with displaying “Sending..”
and quantity of transferring data in the lower side.
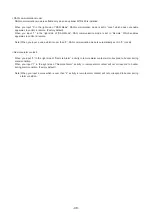
“Finished..” will be displayed when transferring 1day Log data is complete.
Note) Select “Cancel” in MENU key and press ENTER key to return to Top Screen.
㻌
䢴 䢶
䢴
䢳
䢲
䣥 䣧 䣮
䣅 䣣 䣰
䣅 䣮 䣧 䣣 䣴
䣃 䣮 䣮
䣒 䣅
䣒 䣅
䢳 䣆
䣗
䣏 䣇 䣐
䢳 䢹
䢲 䢱 䢷 䢱
䢴 䢲 䢳
䣅
䢷 䢲 䤑
㻌
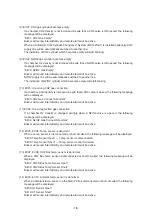
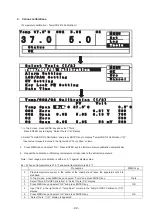
<Transferring all Log data to PC>
Note) It is necessary to set Hyper terminal in PC side.
In Top Screen is displayed and press MENU key and select “Log”.
Press ENTER key to display Log data.
Display required Log data by pressing left and right shift key (
䊹㻌 䊻
).
Display MENU key and select “PC All” and press ENTER key to display “Progress” in the upper left side.
Select “Start” in MENU key and press ENTER key to transfer all Log data to PC with displaying “Sending..”
and quantity of transferring data in the lower side.
“Finished..” will be displayed when transferring 1day Log data is complete.
Note) Select “Cancel” in MENU key and press ENTER key to return to Top Screen.
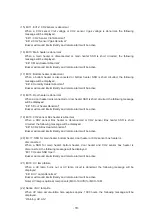
<Setting in PC for transferring log data> (For Windows 2000 and Windows XP)
From Window Start Button, select Program – Accessories – Communications – HiperTerminal to start
the HyperTerminal. (If the HyperTerminal is not available from the Start Menu, execute the following file:
C:¥Program Files¥Windows NT¥hypertrm.exe.)
In the HyperTerminal Window, set a new connection, the name (for example, Sanyo), connection settings,
Method of connection, COM1, properties of COM1, and port.
Baud rate: 9,600, Data bits: 8, Parity:None, Stop bits:1, Flow control: Xon/Xoff
(The communications condition of the Incubator will be set automatically to the above settings when the
Progress Display appears.)
Note) Optional RS232C/RS485 Interface MTR-480 (RS-232C/RS-485) is required to transfer data.
Содержание MCO-19M
Страница 7: ... 4 Dimensions Power cord ...
Страница 16: ...Wiring diagram 13 ...
Страница 17: ...Circuit diagram Main PCB 14 ...
Страница 18: ... LCD PCB 15 ...
Страница 110: ...MCO 19M UVH MCO 19M UV MCO 19M Multi Gas Incubator INSTRUCTION MANUAL 107 ...
Страница 112: ...CONTENTS SPECIFICATIONS P 74 PERFORMANCE P 75 SAFETY CHECK SHEET P 76 109 2 ...
Страница 183: ...Fig A Stacking plate B Stacking plate A Protective sticker Front panel Hook Front 180 73 ...
Страница 187: ...SANYO Electric Co Ltd Printed in Japan DC3186 150B ...

