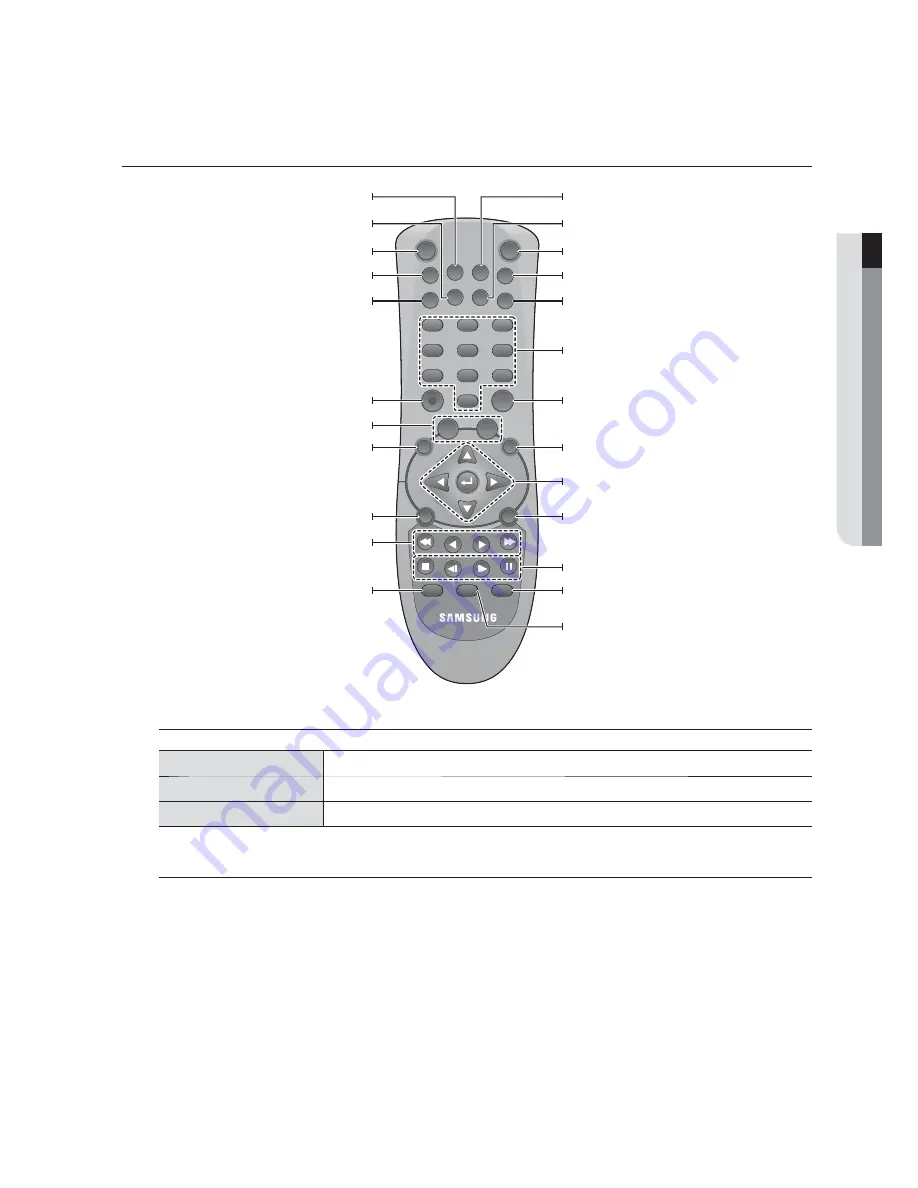
● OVER
VIEW
REMOTE CONTROL
Using the numeric buttons
CHANNEL 1–9
Press each button between 1 to 9.
CHANNEL 10
Press the [
+10
] button first, then press the [
0
] button again within 3 seconds.
CHANNEL 11–16
Press the [
+10
] button first, then press any number between [
1
] to [
6
] within 3 seconds.
Changing the Remote Control ID
1.
Check the remote control ID that is specified for the DVR.
The factory default ID of the remote control is 00.
2.
Press [
ID
] on the remote control, and enter the remote control ID number.
3.
If the remote control ID matches with the remote control ID, the DVR will sound the buzzer.
M
If changing the remote control ID to 08: Press and hold the system [
ID
] button and press the number [
8
].
If changing the remote control ID to 12: Press and hold the system [
ID
] button and press the numbers [
+10
] and [
2
] in
sequence.
The remote control will be active only if the remote control ID matches with that of the DVR remote device. For details, refer
to "
Communication > Remote
". (page 46)
STATUS
Show the system configuration information
MULTI
Change the split mode
ID
1
2
3
4
5
6
7
8
0
+10
FN1
FN2
9
MULTI
AUTO
MENU
ESC
P/T
LOAD PRESET
AUX ON
SEARCH
COPY
DISP
PTZ
STATUS
ZOOM
MON
PIP
FUNC
Channel Button
Select a channel
MON
Not used
ID
Select a remote control ID
Decrease the play speed, or play backward/
forward, increase the play speed
PIP
Not used
FUNC
Access the function menu
+10
Use if selecting a larger number than 10 (+10 + 1)
SEARCH
Display the search menu
Stop, move backward/forward slowly, pause
AUX ON
Not used
COPY
Display the copy menu, or save the recording video in USB
memory, CD/DVD media
Decrease the play speed, or stop/play/pause,
increase the play speed
ZOOM
Digital zooming
AUTO
Auto sequence
Record
Start or stop recording manually
FN1/FN2
Not used
MENU
Switch to menu screen
ESC
Cancel your work or exit the menu
P/T
PAN/TILT Operation
DISP
Access the selection screen of channel and split mode
PTZ
Switch to PTZ mode
LOAD PRESET
Read the preset
English
_13


