


78 Firmware Download
KP-3016/KP-3016A Series
Bosch Security Systems, Inc.
Technical Manual
F.01U.315.927
Rev. 02
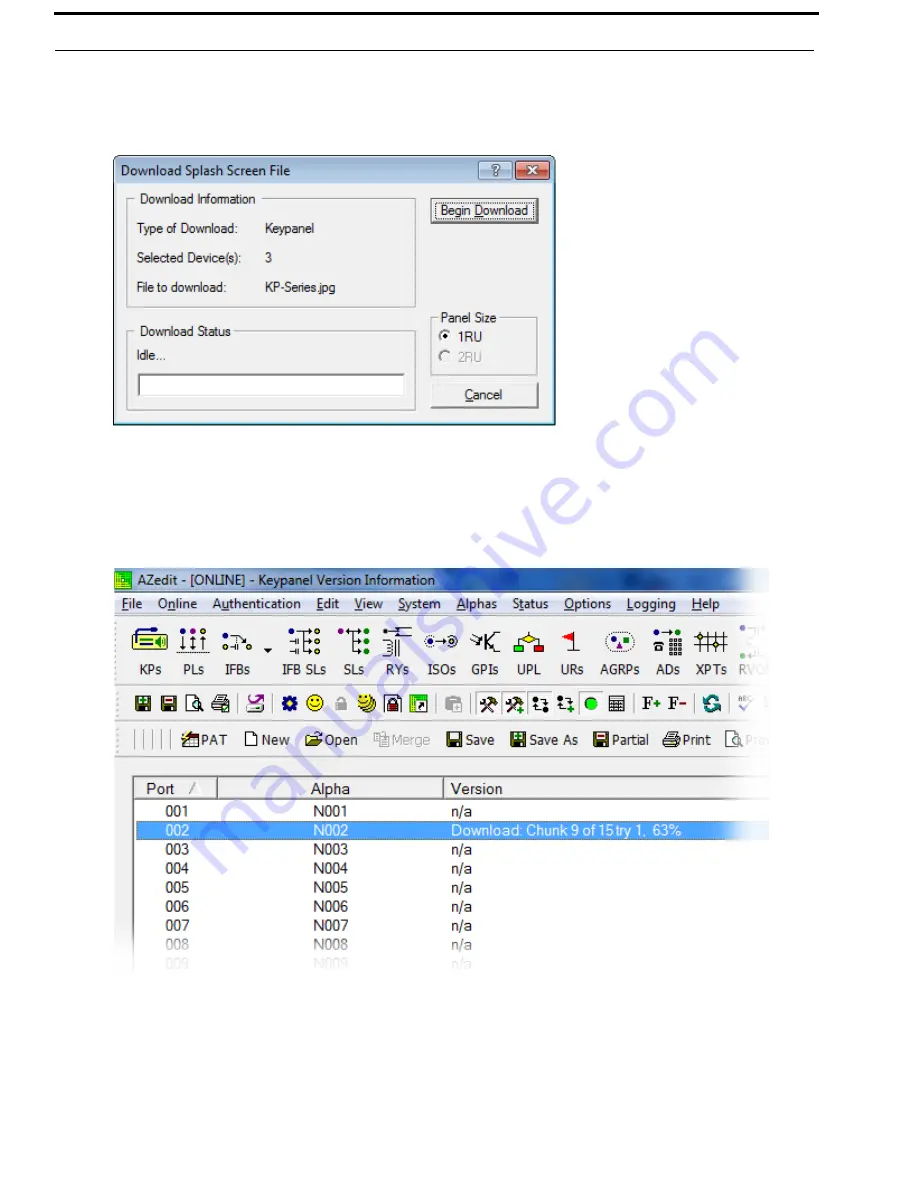
6.
Select
Download splash screen...
.
The Splash Screen Download window appears
.
7.
Click
Open
.
The Download Splash Screen File window appears
.
8.
In the Panel Size group box, select the 1RU radio button.
9.
Click
Begin Download
.
The download begins. A progress bar appears to show the progress of the download.
Once the download is complete the Download Splash Screen File window closes.
10.
Verify the Keypanel Version Information window is displaying the
numbers of chunks (of data) transferred to the
keypanel
.
Содержание EKP-3016
Страница 4: ...Bosch Security Systems Inc Technical Manual F 01U 315 927 Rev 02 4 KP 3016 3016A Series...
Страница 8: ...Bosch Security Systems Inc Technical Manual F 01U 315 927 Rev 02 10 KP 3016 KP 3016A Series...
Страница 64: ...66 Basic Operation KP 3016 KP 3016A Series Bosch Security Systems Inc Technical Manual F 01U 315 927 Rev 02...
Страница 82: ...84 Firmware Download KP 3016 KP 3016A Series Bosch Security Systems Inc Technical Manual F 01U 315 927 Rev 02...
Страница 134: ...136 KP 3016 3016A Menu System KP 3016 KP 3016A Series Bosch Security Systems Inc Technical Manual F 01U 315 927 Rev 02...
Страница 163: ...KP 3016 3016A Series 165 Bosch Security Systems Inc Technical Manual F 01U 315 927 Rev 02 Notes...
Страница 164: ...Bosch Security Systems Inc 12000 Portland Avenue South Burnsville MN 55337 U S A www boschcommunications com...