120
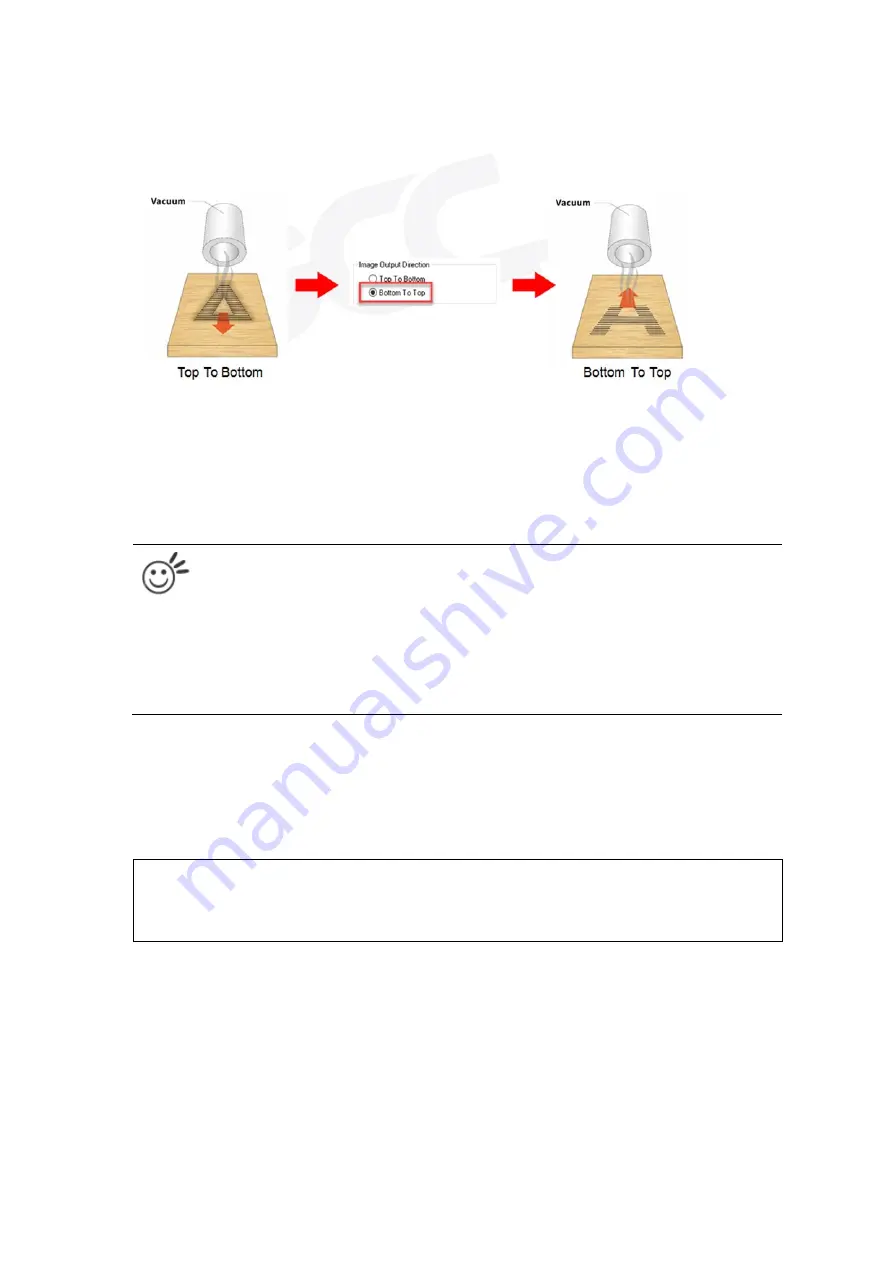
Image Output Direction (Advanced Page) [DEFAULT SETTING: Top to Bottom]
These selections allow you to control the direction in which the system processes an engraved image.
•
Top to Bottom
: Selecting this will force the system to process the current task by moving the lens carriage
from the top to the bottom of the image (rear end to front end of the work table).
•
Bottom to Top
: Selecting this will force the system to process the current task by moving the lens carriage
from the bottom to the top of the image (front end to rear end of the work table)
Normally, the LV-290 engraves from left to right, top to bottom. Selecting Bottom Up will alter the engraving
sequence and the engraving will start from the bottom and work its way to the rear of the working table.
Tip
In situations where the material you will be working with may produce a lot of dust byproducts and
you are utilizing the optional air extraction system, it is recommended that you select the Bottom To
Top image output direction option. This will minimize the amount of dust byproducts lodged in the
engraved sections as the air extraction system is vented from the rear of the machine, the same
direction as the image is processed.
Border (Advanced Page) [DEFAULT SETTING: Unselected]
In cases where you are working with a negative image (negative outline areas of your image are engraved,
rather than the positive areas), you may wish to include a border around your image.
To properly add a border, you will first need to Invert your design from the Options Page, then check Use
Border and specify a value for the thickness of the border you would like to add to your design. This mode is
useful for engraving rubber stamps, as it allows you to create the outline around your stamp image.
NOTE
If you wish to use the Border and Cluster function simultaneously, the Border Thickness value must
be less than the Distance value specified in the Cluster setting.
Содержание LV-290
Страница 1: ......
Страница 25: ...23 3 Chapter 3 Mechanical Overview Front View Top View Right View Left View Rear View...
Страница 28: ...26 3 5 Rear View SmartEXTTM Pass Through Door Rear SmartLIDTM Operation Handles Ventilation Openings...
Страница 34: ...32...
Страница 35: ...33...
Страница 36: ...34...
Страница 41: ...39...
Страница 42: ...40...
Страница 50: ...48 3 Click Next 4 The installation would be finished in few seconds...
Страница 74: ...72 5 1 4 Graphic Control Panel Navigation Chart...
Страница 160: ...158 12 Select the converted file and click Open to import the saved file to SmartCONTROLTM 13 File import is completed...
Страница 185: ...183...
Страница 187: ...185...
Страница 193: ...7 Chapter 7 Optional Items Fume Extraction Unit Option Air Compressor Option Items Focus Lens Option...
Страница 199: ...197 Cutting edges achieved with the different lenses...
Страница 211: ...209 9 Chapter 9 Basic Troubleshooting...
Страница 213: ...211 10 Chapter 10 Appendix Glossary Specification Sheet...
Страница 216: ...FA01785 R1 190805...


