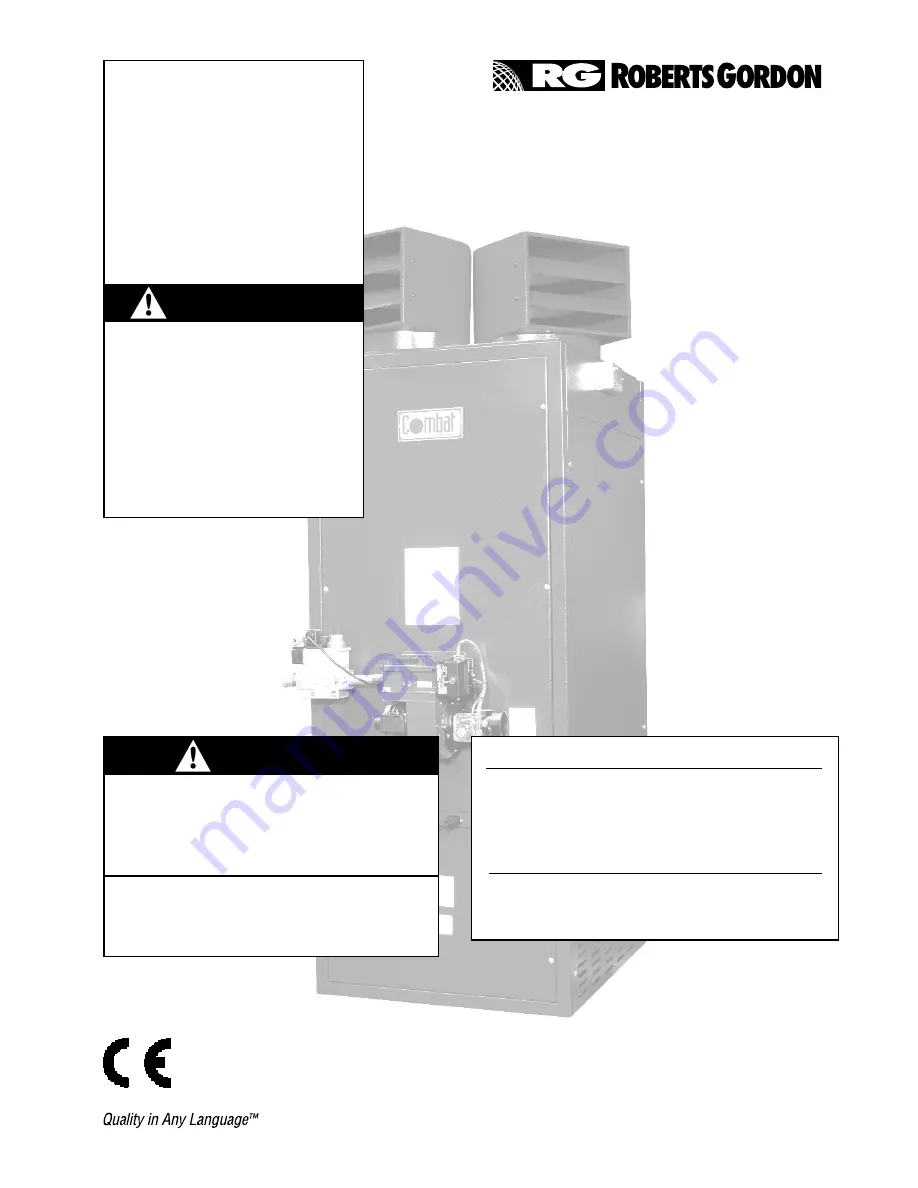
background image

FOR YOUR SAFETY

If you smell gas:

1. Open windows.

2. DO NOT try to light any appliance.

3. DO NOT use electrical switches.

4. DO NOT use any telephone in

your building.

5. Leave the building.

6. Immediately call your local gas

supplier after leaving the building.

Follow the gas supplier’s

instructions.

Do not store or use petrol or other

flammable vapours and liquids in the

vicinity of this or any other appli-

ance.

Failure to follow these instructions

can result in death, injury or property

damage.

WARNING

Improper  installation,  adjustment,  alteration,

service or maintenance can result in death, injury

or  property  damage.  Read  the  Installation,

operation and service manuals thoroughly before

installing or servicing this equipment

Installation must be done by a contractor qualified

in  the  installation  and  service  of  gas/oil  fired

heating equipment (whichever is applicable).

Installer

Please take time to read and understand these

instructions prior to any installation. Installer must

give a copyof this manual to the user/owner.

Owner/User

Keep this manual in a safe place close to the heater

to provide your serviceman with information should it

become necessary.

Roberts-Gordon Europe Ltd.

Oxford Street

Bilston, West Midlands WV14 7EG UK

Telephone: +44 (0)1902 494425

Fax: +44 (0)1902 403200

email: [email protected]

www.combat.co.uk

www.rg-inc.com

Combat

®

Warm Air Cabinet

& High-Flow Heaters


OIL FIRED: POP, POPH and

POP /H versions

Models 015 to 0100

GAS FIRED: PGP, PGPH and

PGP /H/M versions

Models 015 to PGP 0100


Installation, Commissioning,

Service & User Instructions

WARNING

Fire Hazard

X523F  02/03

© Copyright 2002 Roberts-Gordon

Содержание Combat HF 30 v4

Страница 1: ... this equipment Installation must be done by a contractor qualified in the installation and service of gas oil fired heating equipment whichever is applicable Installer Please take time to read and understand these instructions prior to any installation Installer must give a copyof this manual to the user owner Owner User Keep this manual in a safe place close to the heater to provide your service...

Страница 2: ......

Страница 3: ...ns The fuel specified for oil fired burners is Class D fuel oil to BS 2869 Which is similar to Gas oil with a maximum viscosity at 20 C of 1 5 E These appliances must be installed in accordance with the rules in force and used only in a sufficiently ventilated space as specified in these instructions and local regulations Before installation check that the local distribution conditions of the fuel...

Страница 4: ...n information 72 12 Parts List 73 13 Commissioning Data Sheet 74 THIS MANUAL RELATES TO THE AIR HEATERS WHICH ARE MANUFACTURED FOR USE WITH OIL FIRED HEATERS GAS FIRED HEATERS Class D fuel oil to BS 2869 Natural gas G20 Which is similar to L P G Propane G31 Gas oil with a maximum viscosity at 20 C of 1 5 E THESE INSTRUCTIONS ARE TO BE LEFT WITH THE USER OR NEAR THE HEATER Note Every effort is made...

Страница 5: ... oil fired or gas fired burners manufactured for Roberts Gordon UK Ltd The heater cabinets are manufactured in Zintec coated mild steel which is finished with a stove cured powder coat paint The combustion chambers are of high grade stainless steel construction The heat exchangers are mild steel tubular all welded construction Centrifugal fan s located in the base of the heater cabinet provide hea...

Страница 6: ...ads Fan Limit Thermostat Flue Flue Spigot female Heat Exchanger Rear Pressure Relief Stainless Steel Combustion Chamber Double Skin Panels Burner Tube for mounting the packaged burner Electrical Connections Lower Front Panel Main Fan Assembly Direct Drive on Models 15 50 Belt Dive on Models 60 100 ...

Страница 7: ...outputs 81kW 115kW and 145kW 1 2 2 Electrical Supply The HF range of heaters all require a 400v three phase and neutral 50Hz supply to the main terminals within the heater 1 2 3 Controls The HF range of heaters are designed to be operated with external controls and are provided with electrical terminals to accommodate these They may be controlled in the same manner as the PGP or POP models using R...

Страница 8: ...run until the fan thermostat detects a drop in leaving air temperature sufficient to turn it off The heater is then at rest until the beginning of the next cycle If for any reason the main fan should fail or the air flow through the heater is reduced then the built in limit thermostat will cause the burner to go to safety shut down lockout This condition will remain until the fault is corrected an...

Страница 9: ...1 30 457 18 648 25 361 14 200 441 2 x 229 178 7 Dir Drive 0 75 1 n a n a 24 5 3 2 1 3398 2000 230 50 1 030 724 28 857 33 1740 68 1220 48 1306 51 2058 81 781 30 457 18 648 25 361 14 200 441 2 x 356 178 7 Dir Drive 0 75 1 n a n a 28 6 3 2 1 5097 3000 230 50 1 040 857 33 857 33 1930 76 1254 49 1348 53 2235 88 781 30 559 22 781 30 446 17 245 540 2 x 356 178 7 Dir Drive 2 2 3 n a n a 21 6 2 5 4 6796 40...

Страница 10: ...eater dimensions are as vertical units but with heaters lain on their left hand side as standard 015 020 030 040 050 060 070 080 0100 MODEL K Spigot Width L Spigot Depth mm ins mm ins 015 648 25 476 18 020 648 25 476 18 030 648 25 476 18 040 781 30 476 18 050 781 30 610 24 060 070 080 940 37 1238 48 0100 940 37 1524 60 Air Outlet Spigot Dimensions Standard Cabinet Heaters ...

Страница 11: ...6 0 10 Amp 6 0 10 Amp 4 0 7 5 Amp 6 0 10 Amp Star Delta 7 5 A FLC 6 0 10 Amp Star Delta 7 5 A FLC Star Delta 10 A FLC Star Delta 10 A FLC Part Number D 020 D 024 D 024 D 020 D 024 D 020 A D 024 D 020 A D 024 D 024 Vee Belt Size A49 A49 A49 A49 A49 B54 A49 B50 B52 B52 Part No A 136 A 136 A 136 A 136 A 136 A 408 A 136 A 409 A 410 A 410 Wiring Diagram RDW 1556 D RDW 1556 D RDW 1556 D RDW 1556 D RDW 1...

Страница 12: ... 2 300 6 355 8 Btu hr 174012 251073 374277 498786 625000 754870 874060 1025647 1213874 Nom inal Heat output Kw 44 58 6 87 9 117 2 146 5 175 8 205 2 234 5 293 1 Btu hr 150000 200000 300000 400000 500000 600000 700000 800000 1000000 Ecoflam Burner type Minor 8 Minor 8 Minor 12 Minor 20 Minor 20 Minor 30 Minor 30 Minor 30 Major 30 Nozzle Size Us gall hr 1 00 1 50 2 25 3 00 3 00 4 00 5 00 5 50 7 00 An...

Страница 13: ...1 9 9 13 9 17 5 21 2 24 4 28 6 34 9 Main Burner Gas Pressure mbar 4 7 2 5 4 9 5 2 8 5 5 6 7 5 9 5 11 Start Gas Pressure mbar N A N A N A 1 8 2 8 0 9 1 1 1 7 3 4 BURNER TYPE AZUR BLU BLU BLU BLU BLU BLU BLU BLU 60 120 120 170 250R 250 250 250S 350 Burner Head s s s s s s s s s Burner Injector Head Setting mm 0 10 11 15 14 24 24 24 21 1st Flame Air Setting 3 5 3 9 8 2 8 5 1 3 3 5 3 2 2 2nd Flame Air...

Страница 14: ...hr 3 9 5 1 7 1 10 1 12 7 15 4 17 6 20 6 25 3 Lt hr 7 7 10 0 13 9 19 8 25 0 30 3 34 6 40 5 49 7 Main Burner Gas Pressure mbar 3 9 3 1 5 6 4 6 7 0 5 2 6 8 9 5 7 6 Start Gas Pressure mbar 1 6 2 5 0 8 1 0 1 5 3 1 BURNER TYPE AZUR BLU BLU BLU BLU BLU BLU BLU BLU 60 AH 120 AH 120 AH 170 AH 250R AH 250 AH 250 AH 250S AH 350 AH Burner Head s s s s s s s s s Burner Injector LPG Head Setting mm 10 0 13 0 15...

Страница 15: ...mum net heat Input kW 30 50 40 00 57 50 78 50 99 00 120 00 138 00 162 00 198 00 Approx heat output Net kW 43 5 58 5 82 2 115 3 144 6 174 6 202 0 237 0 289 9 Start Gas Orifice mm dia 7 0 7 0 7 0 7 0 7 0 7 0 Max Gas Rate Sm3 hr 5 2 7 1 9 9 13 9 17 4 21 1 24 4 28 6 35 0 Min Gas Rate Sm3 hr 3 1 4 2 6 0 8 5 10 6 13 0 15 0 17 5 21 6 Main Burner Gas Pressure mbar 4 7 2 5 4 1 5 2 8 5 5 9 7 5 9 5 9 6 Min B...

Страница 16: ... Head s s s s s s s s s Burner Injector LPG Head Setting mm 0 0 8 0 10 0 15 0 14 T O T O T O T O Low Flame Air Orange Cam 20 13 22 18 18 18 22 25 25 High Flame Air Red Cam 33 40 80 30 32 30 35 55 60 Gas Valve Setting 0 1 4 0 3 0 9 0 1 1 0 1 1 0 1 1 0 1 4 0 1 4 0 1 5 0 0 85 Valve Type MBVEF MBVEF MBVEF MBVEF MBVEF MBVEF MBVEF MBVEF MBVEF Main Gas 407 407 407 407 412 412 412 412 412 Valve Type S I T...

Страница 17: ...e safe presence of a flame If the flame should fail or fail to be monitored then the control will go to the safety shut down lockout condition The button on the front of the control box will light to indicate this This button will then need to be pressed in manually to reset the control box to recommence the burner firing cycle This is a thermal control which following a lockout condition cannot b...

Страница 18: ...not open and the control will lockout For control sequence see Fig 2 1 2 3 Control Box Gas Fired Heaters See also the Burner Manufacturer s Instructions High Low and Modulating burners although following the general sequence as described below also have extra functional stages related to air damper positions Refer to burner manufacturers instructions for further detail Ecoflam gas burner have only...

Страница 19: ...sequence continues with a purge time with the burner fan only running 2 3 5 Electric Ignition ON The electric ignition switches ON at the end of this purge time 2 3 6 Start Gas Valve Main gas for models 015 to 030 The start gas valve opens and once a flame has been established this remains on until close down The flame probe is now continuously monitoring for the safe presence of flame 2 3 7 Elect...

Страница 20: ...NTIAL THAT THE LINK SHOWN IN FIG 2 3 IS REMOVED IN THE EVENT OF A REPLACEMENT COMBINATION FAN LIMIT THERMOSTAT BEING FITTED Following replacement or adjustment the limit thermostat setting must be re sealed using a suitable paint spot seal For settings see Commissioning Section 5 1 2 1 Fig 2 3 Combination Fan Limit Thermostat 2 3 8 Main Gas Valve For models above 030 Ten seconds from when the star...

Страница 21: ...o operate the contactor coil On direct drive fan models the thermal overload is built into the motor and is an automatic reset device connected as shown in the Wiring Diagrams Section 6 2 6 Burners For details of the Packaged Burners see the Manufacturer s Instructions and the Data Tables in Section 2 1 When reading the Data Tables ensure that the correct table for the burner and gas valve install...

Страница 22: ...sition of the burner pressure regulation adjustment This must be used to set the burner pressure as in the Data Tables as described in Section 5 Note For Ecoflam High Low or Modulating burners then the Dungs gas valve has extra features as it is an air gas ratio control valve Please refer to the manufacturers instructions regarding the setting of these controls 2 7 1 3 Throughput Adjuster Fig 2 6 ...

Страница 23: ...ure TP on burner Automatic gas valve regulator Automatic gas valve Note orifice fitted into union between valve and burner for models 40 50 and burner flange for models 60 and over Automatic gas valves Regulator Union Burner flange TP1 TP2 TP3 1 1 2 TP1 TP2 TP3 1 1 2 2 1 Pressure regulator under swivel cover 2 Slow opening adjustment 3 Throughput adjuster always fully open 4 Inlet flange with inle...

Страница 24: ...ow is high enough to cause a motor current significantly above the full load current recommended by the motor manufacturer Operation of the heater in this section of the curve is not recommended however a 5 overload of the motor is normally acceptable due to the high air flow over the motor keeping it cool It is advised that heaters are selected so that the resultant air flow does not fall below t...

Страница 25: ...tic Pressure Pa 5 5 5 6 6 5 7 7 5 8 8 5 9 Motor Current Amps Full load current 8 7 Amps Air flow v static pressure Air flow v Motor current Graph HF12 Air Flow v Static Pressure Motor Current for HF 30 V6 with 4 kW motor and 112mm pulley fan pulley 180 mm Fan 457 486 Based on Model 30 in 50 cabinet 0 50 100 150 200 250 300 350 400 2 4 2 5 2 6 2 7 2 8 2 9 3 3 1 3 2 3 3 3 4 3 5 3 6 3 7 3 8 Air Flow ...

Страница 26: ... 5 Current Amps F L C 5 0 A Air flow v Static Pressure Air Flow v Motor Current Graph HF4 Fig 2 11 Air Flow v Static Pressure Motor Current HF40 v2 Graph of air flow v staic pressure and current for model HF40 v2 with 4 0kW motor with 118mm pulley Fan pulley 180mm 0 50 100 150 200 250 300 350 400 2 2 2 4 2 6 2 8 3 0 3 2 3 4 3 6 3 8 4 0 4 2 4 4 4 6 4 8 5 0 Air Flow m3 sec Static Pressure Pa 6 6 5 7...

Страница 27: ...Pa 8 5 9 9 5 10 10 5 11 11 5 12 12 5 13 Current Amps F L C 11A Air Flow v Static Pressure Air Flow v Motor Current Graph HF6 Fig 2 13 Air Flow v Static Pressure Motor Current HF50 v1 Graph of Air Flow v Static Pressure and Current Model HF50 v1with 4 0kW motor and 95mm pulley Fan pulley 180mm 0 50 100 150 200 250 300 2 4 2 6 2 8 3 0 3 2 3 4 3 6 3 8 4 0 4 2 4 4 4 6 4 8 5 0 5 2 Air Flow m3 sec Stati...

Страница 28: ...5 8 5 9 5 10 5 11 5 Current Amps F L C 11A Air Flow v Static pressure Air Flow v Motor Current Graph HF8 Fig 2 15 Air Flow v Static Pressure Motor Current HF50 v3 Graph of Air Flow v Static Pressure and Current Model HF50 v3 with 7 5kW motor and 132mm pulley Fan pulley 200mm 0 50 100 150 200 250 300 350 400 450 500 2 6 3 0 3 4 3 8 4 2 4 6 5 0 5 4 5 8 6 2 6 6 7 0 7 4 Air Flow m3 sec Static Pressure...

Страница 29: ...el HF50 v4with 7 5kW motor with 140mm pulley Fan pulley 200mm 0 50 100 150 200 250 300 350 400 450 500 3 4 3 6 3 8 4 0 4 2 4 4 4 6 4 8 5 0 5 2 5 4 5 6 5 8 6 0 6 2 6 4 6 6 Air Flow m3 sec Static Pressure Pa 11 5 12 12 5 13 13 5 14 14 5 15 15 5 16 16 5 Current Amps F L C 15A Air Flow v Static Pressure Air Flow v Motor Current Graph HF10 ...

Страница 30: ...Kw Note Although written for gas fired heaters the requirements of this standard should be observed for oil fired heaters except for the fuel supply BS5588 PARTS 2 3 FIRE PRECAUTIONS IN THE DESIGN CONSTRUCTION OF BUILDINGS BS6891 LOW PRESSURE INSTALLATION PIPES BS5410 CODES OF PRACTICE FOR OIL FIRING PART 2 INSTALLATIONS OF 44Kw AND ABOVE OUTPUT CAPACITY FOR SPACE HEATERS HOT WATER AND STEAM SUPPL...

Страница 31: ...imum Typical installation of a Gas fired heater Lead Roof Plate Cravat Guy wires where flue extends more than 2m above roof Flue Air distribution heads Building ventilation See text for spacing from walls Electrical supply via isolator 1000mm minimum Vent Gauge Filler Plugged drain valve Gate valve Fire valve Manual isolating valve Fusible link Terminal Typical installation of an Oil fired heater ...

Страница 32: ...ear area of at least 0 6 m from each side and to the rear of the heater and not less than 2 m at the front For all models except High Flow heaters the pressure relief door is at the rear of the heater it is important that the minimum clearance at the rear of the heater is not less than 0 3 m to ensure safe operation IMPORTANT For maintenance of the heater all of the upper panels need to be removed...

Страница 33: ...ils 3 4 Building Ventilation In buildings having a design air change rate of less than 0 5 h and where heaters are to be installed in heated spaces having a volume less than 2 2 m per kilowatt of total rated heat input for heaters fitted with forced or induced draught burners grilles shall be provided at low level i e below the level of the appliance flue connection except that Most traditional bu...

Страница 34: ...a vertical flue must be within as short a distance from the heater as is possible Normally the transition to vertical will be no more than one metre from the flue spigot As a guide where it is necessary to use 135 bends to offset a flue at least 1 m of vertical flue must be added to the minimum requirement for every 2 x 135 bends or 0 3 m of non vertical flue No draught diverters or stabilisers sh...

Страница 35: ...e cable or flexible conduit to the main terminal block under the front lower panel of the heater using 1 sq mm cable on all models except Model 0100 and High Flow models with 5 5kW or 7 5kW motors when 1 5 sq mm cable should be used Cable entry is provided into the rear horizontal frame of the cabinet 4 3 Remote Controls 4 3 1 Individual Controls All the heater controls for the COMBAT range are to...

Страница 36: ...lled by the temperature of the air in the outlet duct but it is possible to control on room temperature The position of the sensor in the outlet duct is to be determined on site as all installations differ By using a suitable thermometer select a position in the outlet duct approximately 1 meter from the heater and look for a position across the cross section of the duct that provides a reasonable...

Страница 37: ... gravity feed system as in Fig 3 1 This system relies on the head of the fuel in the tank to push the fuel through the system 4 4 4 B M Oil Lifter Where a gravity feed system cannot be used a B M Oil Lifter may be used for small installations up to the equivalent to a single model 050 on minimum lift or a single model 020 on maximum lift see Fig 4 1 The fuel output from the oil lifter is gravity f...

Страница 38: ...132ft 165ft Lift in Feet Lift in Metres Total Suction Length in Feet 8mm 5 16 O D Copper Tube Fig 4 2 Pressurised System Installation Duplex System The system shown has one pump for run and the other for stand by The valves allow the stand by pump to be removed for maintenance whilst the system is still running Check Valve Check Valve Stop Valve Stop Valve Stop Valve Stop Valve Check Valve Storage...

Страница 39: ...will generally be required to use installation pipes of a larger diameter than the heater inlet connection The supply should terminate at each heater with a service cock and a union so as to facilitate the removal of the gas train for servicing see Fig 3 1 Natural Gas The gas meter and service must be checked by the local gas supply undertaking to ensure that it is adequate to deal with the total ...

Страница 40: ... any product Where specific detailed settings are referred to in this instructions book they should be followed as they represent the agreed settings when used on COMBAT Cabinet Heaters Note During the commissioning instructions reference is made to the information in the Data Tables in Section 2 It is important that reference is made only to the Data Table which relates to the burner option fitte...

Страница 41: ...y at the isolator and the manual switch to fan on if there is no remote fan switch installed then press in the white button of the combination fan limit thermostat On three phase heaters check the rotation of the main air moving fan This should be clockwise looking at the drive end If rotation is not correct turn off the isolator and change over any two of the incoming supply phases and recheck It...

Страница 42: ... the burner pump pressure test port See Manufacturers Information A test manifold gives the facility for the connection of the pressure gauge and venting of the pump 5 2 3 Switching On i Operate the external controls to turn the heater on Heat ON position Note The burner plug and socket may be used to turn off the burner during commissioning ii If the lockout reset button is illuminated press in t...

Страница 43: ...will raise both CO2 and smoke number Conversely opening the air damper rising number will reduce these levels 5 2 6 Completion Recheck and note all results and settings on the commissioning data sheet at the rear of this these instructions Test burner for correct start and stop operation several times Check that all safety devices operate correctly Inspect the heater and pipework for any oil leaks...

Страница 44: ...er to cycle without gas turned on With the gas service cock still in the off position turn on the electric supply to the heater and observe the burner operation as it goes through the cycle of events 5 3 3 Switching On Operate the external controls to turn on the heater Heat ON position If the lockout reset button on the burner control box is illuminated press in to reset Note The burner plug and ...

Страница 45: ...cerned using the Main Gas Regulator accessed under the swivel cover see Figs 2 6 2 7 The results of setting the gas flow rate by using burner pressure only can lead to quite wide variations in heat input due to the nature of the burners used It is important to check that the gas rate set during the commissioning is within 5 of the required flow rate This may be achieved by wherever possible checki...

Страница 46: ... covers caps and panels removed during commissioning are securely replaced High Low or Modulating Burners Following setting the minimum firing rate a check must be made following the setting of the burner combustion The check is made by running the heater on low fire for a minimum of 15 minutes at the full transport air rate and at typical ambient conditions During the test check that the flue gas...

Страница 47: ...Page 45 CABINET HEATER Section 6 Wiring Diagrams Fig 6 1 As Wired Diagram for Models 015 to 030 Floor Standing ...

Страница 48: ...Page 46 CABINET HEATER Fig 6 2 As Wired Diagram for Models 015 to 030 Horizontal Mounting ...

Страница 49: ...Page 47 CABINET HEATER Fig 6 3 As Wired Diagram for Models 040 and 050 Floor Standing ...

Страница 50: ...Page 48 CABINET HEATER Fig 6 4 As Wired Diagram for Models 040 050 Horizontal Mounting ...

Страница 51: ...Page 49 CABINET HEATER Fig 6 5 As Wired Diagram for Models 060 to 0100 Floor Standing ...

Страница 52: ...Page 50 CABINET HEATER Fig 6 6 As Wired Diagram for Models 060 to 0100 Horizontal Mounting ...

Страница 53: ... 6 9 Final Connections to Ecoflam On Off Burners All Models Fig 6 10 Final Connection to Ecoflam High Low or Modulating Burners All Models See Manufacturers detail for Connecting these three cables for fully modulating controls ...

Страница 54: ...Page 52 CABINET HEATER Fig 6 11 Wiring Diagram for all High Flow Models except HF 40 v3 HF 50 v2 HF50 v3 and HF50 v4 ...

Страница 55: ...Page 55 CABINET HEATER Fig 6 12 Wiring Diagram for High Flow Models HF40 v3 HF50 v2 HF50 v3 and HF50 v4 ...

Страница 56: ...pplied ready for installation and no alteration of the internal wiring is required The 230v coil circuit is connected to the two terminals 1 2 as shown on the diagram RDW1713 Figure 4 4 The two links between terminals 3 4 and 4 5 also need to be added The START timer needs to be set to 3 and 5 seconds The relay adjustment on the timer may be ignored ...

Страница 57: ...rty or dusty environments where servicing may be required more frequently Minor faults may be traced by use of the Fault Finding charts in Section 9 A list of parts that may be needed during maintenance is given in Section 11 7 1 Burner Maintenance See the Manufacturers Information for specific instructions The maintenance of the burner should include cleaning of the fan and fuel filters when fitt...

Страница 58: ...rred to Roberts Gordon UK Ltd for advice 4 Replace components in reverse order to above replacing gasket material and any damaged turbulators bolts and nuts if necessary 5 Inspect and repair any damage to the seal between the flue and the heater flue spigot 7 4 Thermal Insulation Whilst the upper panels are removed for heat exchanger servicing the thermal insulation fitted to all the upper panels ...

Страница 59: ...ine connections to the top of the contactor noting the colour code and the two coil connections at the top rear of the contactor Unscrew the fixing screws to remove the contactor from the panel To refit reverse the above operations Check rotation of fan following work on the contactor B The Overloads these are fixed only by the 3 load connections at the lower end of the contactor and are fitted to...

Страница 60: ...ts should be exactly parallel to the fan case For Star Delta starters play specific attention to the 6 motor connections They must be as shown in Fig 6 14 otherwise motor damage may occur 8 6 Main Fan Units Dependent on the model of the heater the main fan unit will be direct drive with integral motor or belt drive The belt drive units are normally the double fan units i e two fan on a single shaf...

Страница 61: ... ON Does the burner fire Is the lockout button on the burner alight Check control fuse in heater has not blown Repair as necessary Test burner as in 9 1 oil fired 9 2 gas fired Check external controls are ON and the fuse in the burner is sound Press in white button on fan limit thermostat Does the main fan run Use 9 5 or 9 6 to test fan See Section 5 1 2 to check thermostat settings Replace fan li...

Страница 62: ...O YES Does the burner control box lockout before 15 seconds Disconnect photo cell and try again Control Box faulty Replace Use 9 3 to trace fault NO Does the burner control box lockout after 15 seconds Did the burner fire Check ignition electrodes are set as in the manufacturer s instructions the fuel supply and nozzle Use 9 3 to trace fault Check oil solenoid valve BURNER OPERATING NO NO Check co...

Страница 63: ...kout occur before the burner has run for 10 secs Use 9 3 to check the flame monitoring system Does lockout occur after the burner has run for 10 secs Check settings air pressure switches Check combustion air fan is clean Check combustion chamber is clean and sound Check flue is clean and sound Check joint between flue spigot and flue is sound NO NO NO NO NO YES YES YES Does the burner fire Check i...

Страница 64: ...ufacturer s instructions Oil Fired Gas Fired Maximum flame current with no flame Minimum flame current with flame Maximum flame current with no flame Minimum flame current with flame 12µ Amp 25µ Amp 0 5µ Amp 1 0µ Amp Connect a DC ammeter in series with the flame monitor Turn on all controls and ensure supply to burner OIL FIRED Is there a stray light entering the burner or is there a flame GAS FIR...

Страница 65: ... and the rise in pressure observed at the appropriate time YES Is there pressure on the outlet of the valve when the valve should be closed Is there an electrical supply to the valve terminals YES Fault lies elsewhere Investigate and correct Valve faulty Replace with correct type Does valve open at the correct time Is there an electrical supply to the valve terminals Fault lies elsewhere Investiga...

Страница 66: ...and retest Re check supply to terminals L1 to N Fault lies elsewhere Check the setting of the fan thermostat as in Section 5 1 Check calibration of the fan thermostat The dial should indicate the approximate temperature of the sampled air Fan thermostat faulty Replace and reset Check and test wiring to motor Does the motor run now Motor faulty Replace complete fan unit Thermal overload in motor is...

Страница 67: ...hermal overload and check setting See Note 1 Check for 230v at coil terminals of fan contactor Does fan run now Check for 400v three phase at input and output of contactor Contactor or overload faulty Replace as necessary Check and test wiring to motor Motor faulty Replace complete fan unit Motor stops after running some time Thermal overload in motor faulty Replace complete fan unit direct drive ...

Страница 68: ...temperature sufficient to turn it off The heater then is at rest until the beginning of the next cycle 10 1 1 Heater operation for High Low or Modulating The heater will operate as described above but with the added features as below High Low operation A second thermostat or two stage thermostat will be installed on site so that as the temperature reaches the first set point the firing rate will r...

Страница 69: ...anger against overheating Although it should not be necessary for the user to touch this control it is worth noting that Pressing in the white button on the combination fan limit thermostat causes the main fan s to run continuously For normal operation this button should be pulled to the out position If for any reason the main fan should fail or the air flow is reduced the built in limit thermosta...

Страница 70: ...ER DOES NOT OPERATE AFTER THE THIRD DEPRESSION OF THE LOCKOUT RESET DO NOT MAKE ANY FURTHER START ATTEMPTS UNTIL THE FAULT HAS BEEN TRACED AND CORRECTED BY A COMPETENT ENGINEER FOR OIL FIRED HEATERS UNBURNED RESIDUAL OIL IN THE COMBUSTION CHAMBER IS AN EXPLOSION RISK 10 3 2 To Turn the Heater Off 10 3 2 1 Short Periods a Turn Off the remote controls fitted on site or turn down the setting of the r...

Страница 71: ... This may take some time as often pockets of air can follow oil until all of the air is removed The air will also need to be vented from the burner pump To carry out pump venting the pump must be running see burner manufacturer s instructions Slacken the pump vent port and turn on the burner If the burner goes to lockout before the pump has vented reset the control box and repeat until all the air...

Страница 72: ... the front of the heater should be maintained at all times and the air intake grilles must not be covered or blocked by debris IMPORTANT For maintenance of the heater all of the upper panels need to be removed for the checking and replacement of insulation Also the lower side panels are the only access for removal of the main fan it is therefore necessary to have a minimum clear area of at least 1...

Страница 73: ... this may shorten the life expectancy of the fuel pump and some other fuel carrying components For details of the changes necessary please contact Roberts Gordon UK Ltd quoting the heater serial number and burner type fitted Burners designed to burn natural gas may be converted to burn L P G Propane gas For details of the changes necessary please contact Roberts Gordon UK Ltd quoting the heater se...

Страница 74: ...tion Heater Model No Fitted A 025 DDC 1220 direct drive fan 015 to 030 1 A 029 DDC 1500 direct drive fan 040 to 050 1 A 038 BDC 1500 belt drive fan 060 to 0100 1 A 136 A49 vee belt 060 to 0100 2 K 017 Combination fan limit stat All Models 1 D 004A Motor Contactor 040 to 0100 1 D 020A Motor overload 4 5 7 5 amp 060 to 070 1 D 024A Motor overload 6 10 amp 0100 1 Roberts Gordon Contact Numbers Spares...

Страница 75: ...MP C BURNER TYPE BURNER HEAD SETTING NOZZLE SIZE AND BURNER PRESSURE COMMENTS GAS HEATER COMMISSIONING DATA SHEET DATE MODEL NUMBER SERIAL No T No C02 CO PPM FLUE DRAUGHT GROSS STACK TEMP C BURNER TYPE BURNER HEAD SETTING PRESSURE LOSS ACROSS SECOND MAIN VALVE START GAS PRESSURE MAIN GAS PRESSURE INLET PRESSURE MEASURE GAS FLOW COMMENTS ...

Страница 76: ...el 01902 499051 Fax 01902 499042 MAIN SWITCHBOARD Tel 01902 494425 Fax 01902 403200 Roberts Gordon Europe Ltd Oxford Street Bilston West Midlands WV14 7EG Tel 01902 494425 Fax 01902 403200 e m a i l u k s a l e s r g i n c c o m www combat co uk w w w r g i n c c o m ...

Отзывы: