background image

Getting Acquainted

Display

24

Display

The Screens and their Various Stages

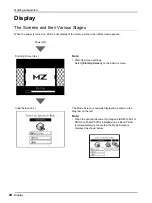
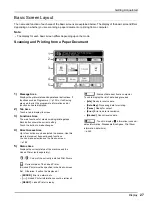
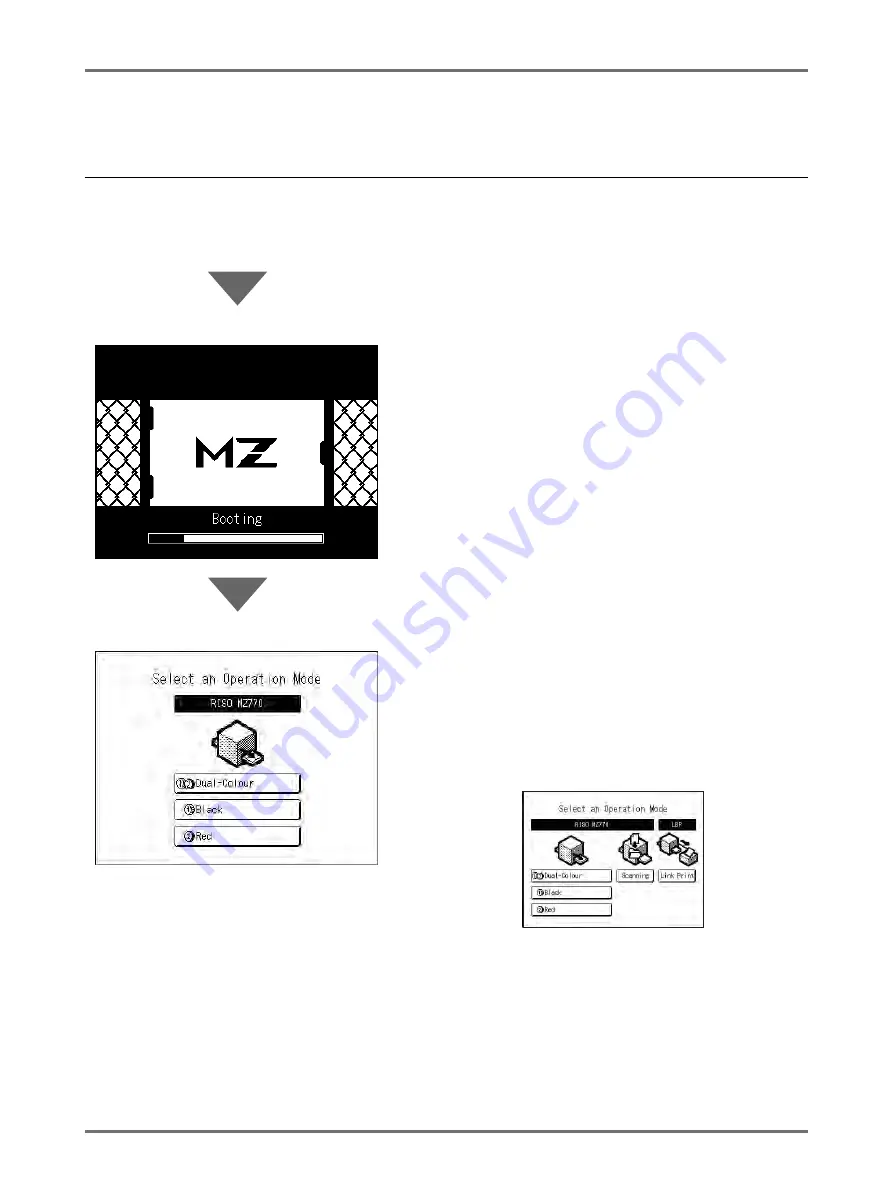
When the power is turned on, after a brief display of the start-up screen, the initial screen appears.

Power ON

Start-Up Screen (Ex.)

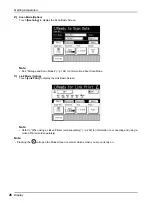
Note:

• Start-Up Screen settings

Select 

[Start-Up Screen]

 on the Admin. screen.

Initial Screen (Ex.)

The Mode Screen is normally displayed as shown in the 
diagram on the left.

Note:

• When the optional Document Storage Card DM-128CF or 

RISO Controller PS7R is installed and a Linked Printer 
(sold separately) is connected, the Mode Screen is 
displayed as shown below.

Содержание MZ770

Страница 1: ......

Страница 2: ......

Страница 3: ......

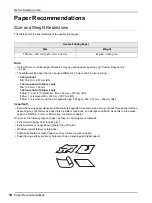
Страница 4: ...e or losses or expenses resulting from the use of this product or included manuals BCaution Make sure to read the important operational safety information Store this manual close by and fully acquaint...

Страница 5: ...ment 15 Originals 16 Size and Weight Restrictions 16 Maximum Printing Areas and Margins 17 Materials Not to Be Printed 17 Getting Acquainted 18 Function and Name of Each Part 18 Optional Devices 20 Co...

Страница 6: ...d Paper Paper 82 Automatic Printing Auto Process 83 Printing from Bound Documents Book Shadow 84 Saving Ink Ink Saving 86 Printing Side by Side on One Sheet 2 Up Multi Up Print 87 Original Orientation...

Страница 7: ...Sorting Into Groups Programme 132 How to Programme Print 135 Setting Up for Programmed Printing 136 Saving Programmes 139 Renaming a Programme 141 Clearing Programmes 143 Retrieving a Programme 144 M...

Страница 8: ...rage Data 204 Using the Storage Retrieve Screen 206 Changing the Data Order 207 Overlaying Storage Data onto a 1 Colour Print Job Overlay 208 2 Colour Printing with the Original and Storage Data Stamp...

Страница 9: ...Print Drum 252 Disposal of Depleted Consumables 253 Maintenance 256 Cleaning 256 Thermal Print Head 257 Platen Glass and Platen Cover Pad 257 Scanner Glass and White Sheet of ADF unit Option 258 Pres...

Страница 10: ...contains user cautions information on storing and changing consumables and troubleshooting procedures It also contains an explanation for using Link Mode when an optional linked printer is attached R...

Страница 11: ...ution could cause injury or damage to property Important Indicates items that require special attention or that are prohibited actions Read carefully and follow the directions as instructed Note Gives...

Страница 12: ...e content of this manual and the illustrations Displays are illustrated as if currently activated Some buttons presented in this manual may not be available by default setting or when the optional dev...

Страница 13: ...the locations listed below Failure to observe this precaution may lead to machine failure Locations with exposure to direct sunlight such as locations close to windows Curtain all windows that might e...

Страница 14: ...its excessive heat smoke or foul odor immediately turn off the POWER unplug the power cord and contact your service representative Failure to do so can result in fire or electric shock If something dr...

Страница 15: ...here is no other choice curtain the window Locations that are subject to rapid changes in temperature Extremely hot and humid locations or extremely cold and dry locations Ink Handling BCaution If ink...

Страница 16: ...turn off both the machine and computer The maximum allowable voltage for USB connector input and output is 5 V 1 For installation procedure via USB cable refer to Installation Guide in the CD ROM Con...

Страница 17: ...oved and the print speed is high 150 ppm Min 257 mm 364 mm B4 Important Even when using paper whose specifications are supported size and weight it may not pass through the machine depending on such f...

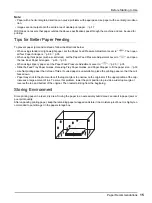
Страница 18: ...ry paper set the Paper Feed Pressure Adjustment Lever to p 33 p 35 Slide the Feed Tray Paper Guides Receiving Tray Paper Guides and Paper Stopper to fit the paper size p 33 Use flat printing paper tha...

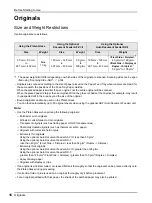
Страница 19: ...ted originals such as thermal or carbon paper Originals with correction fluid or glue Extremely thin originals Using the optional Auto Document Feeder AF VI II less than 50 g m2 Using the optional Aut...

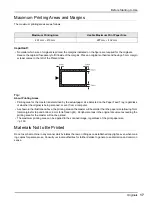
Страница 20: ...being scanned or sent from a computer As shown in the illustration above the printing area on the master will be smaller than the paper size allowing 7mm total margins for top and bottom 6 mm for lef...

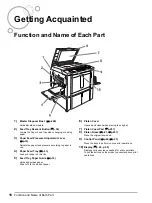
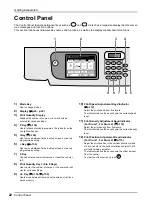
Страница 21: ...to paper in use 4 Paper Feed Tray p 33 Load print paper on this tray 5 Feed Tray Paper Guide p 33 Holds and guides paper Slide to fit to the sides of paper 6 Platen Cover Opened and closed when placin...

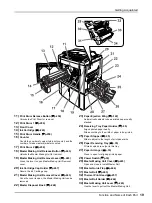
Страница 22: ...nit Removal Cover p 243 Once the cover is open the Master Making Unit can be removed 22 Master Disposal Box 2 p 248 23 Paper Ejection Wing p 122 Automatically adjusts to keep printed paper neatly stac...

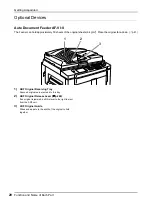
Страница 23: ...the original sheets 64 g m2 Place the original face down p 41 1 ADF Original Receiving Tray Scanned originals are ejected into this tray 2 ADF Original Release Lever p 269 If an original is jammed pu...

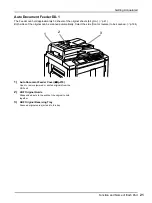
Страница 24: ...ides of the original can be scanned automatically Select the side front or reverse to be scanned p 164 1 Auto Document Feeder Cover p 270 Open to remove jammed or misfed originals from the ADF unit 2...

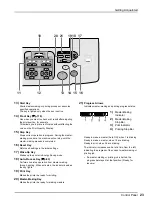
Страница 25: ...ey Cancels entered numerical values or reset the counter to 0 8 Print Quantity Keys 0 to 9 Keys Use to enter the number of copies or the numerical val ues for various settings 9 Key p 136 p 150 Use to...

Страница 26: ...aving mode 18 Auto Process Key p 83 Performs non stop operation from master making through printing When activated the indicator besides the key lights 19 Print Key Makes the printer be ready for prin...

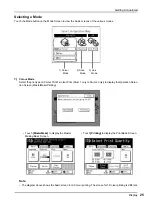
Страница 27: ...ower ON Start Up Screen Ex Note Start Up Screen settings Select Start Up Screen on the Admin screen Initial Screen Ex The Mode Screen is normally displayed as shown in the diagram on the left Note Whe...

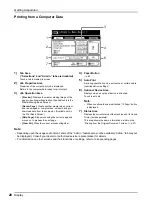
Страница 28: ...lour Print 1 Colour Print Drum 1 only or Drum 2 only to display the Operation Selec tion Screen MasterMake Printing Note The diagram above shows the basic screen for 2 Colour printing The screen for 1...

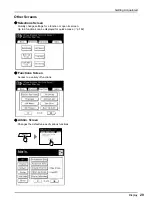
Страница 29: ...194 for information about Scan Mode 3 Link Mode Option Touch Link Print to display the Link Basic Screen Note Refer to When using a Linked Printer sold separately p 222 for information on connecting...

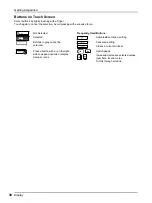
Страница 30: ...utton to make changes 4 Direct Access Area Up to four buttons can be selected in advance Use this area to store most frequently used functions You can make selections on the Admin screen p 182 5 Statu...

Страница 31: ...n to process the next page Clear All Stops the current process altogether 4 Paper Button p 82 5 Auto Print A printing operation can be set to stop at certain points overrides driver settings 6 Optiona...

Страница 32: ...Selections Screen Quickly change settings for a function or open its screen Up to 9 functions can be displayed for quick access p 182 Functions Screen Access to a variety of functions Admin Screen Cha...

Страница 33: ...g with excessive force Not Selected Frequently Used Buttons Selected Activates Executes a setting Buttons in grey cannot be selected Cancels a setting Closes a current window Press a button with a on...

Страница 34: ...Getting Acquainted Display 31...

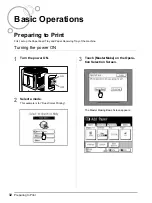
Страница 35: ...set up the Paper Feed Tray and Paper Receiving Tray of the machine Turning the power ON 1 Turn the power ON 2 Select a mode This example is for Dual Colour Printing 3 Touch MasterMake on the Opera tio...

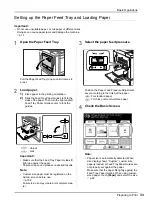
Страница 36: ...the Feed Tray Paper Guides fit tight up against the paper Failure to do so can produce undesired results Note Custom size paper must be registered on the Admin screen before use p 186 Failure to do so...

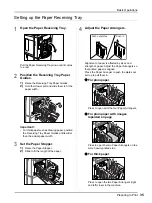
Страница 37: ...Tray will be lowered until you depress the button Important When changing to a different paper size remember to readjust the Receiving Tray Paper Guides and Paper Stopper When changing to a different...

Страница 38: ...actual paper width 3 Set the Paper Stopper 1 Raise the Paper Stopper 2 Slide to fit the length of the paper 4 Adjust the Paper Arrangers Alignment of paper is affected by sizes and strength of paper...

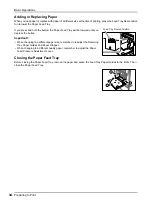
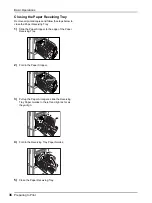
Страница 39: ...elow to close the Paper Receiving Tray 1 Slide the Paper Stopper to the edge of the Paper Receiving Tray 2 Fold in the Paper Stopper 3 Pull up the Paper Arrangers slide the Receiving Tray Paper Guides...

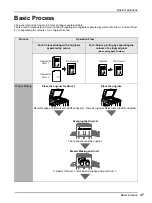
Страница 40: ...printing with 2 originals separated by colour For 2 Colour printing by separating the colours of a single original when using Easy 2Colour Master Making Place the original for Drum 1 Place the origina...

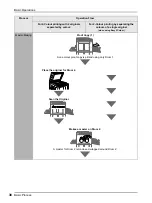
Страница 41: ...rum 1 Place the original for Drum 2 Scan the Original Makes a master on Drum 2 A master for Drum 2 is made and wrapped around Drum 2 Process Operation Flow For 2 Colour printing with 2 originals separ...

Страница 42: ...2 colour proof copy is printed Printing Print The specified number of copies are printed Process Operation Flow For 2 Colour printing with 2 originals separated by colour For 2 Colour printing by sepa...

Страница 43: ...isplay and the key are off Turn the power ON If the key is lit the machine is in Energy Saving mode Press the key to cancel Energy Saving mode 2 Selecting Dual Colour Printing 1 Touch Dual Colour Note...

Страница 44: ...y are not squared on the sheet Shift the original sheet along the grid lines printed on the cover touching it through the openings on the cover Setting the Auto Document Feeder Option Match the origin...

Страница 45: ...formation about print func tions If it is not displayed press to display the Master Making Basic Screen 7 Press the key The scan of the original for Drum 1 begins Once the scan has completed the maste...

Страница 46: ...nal are as shown below Auto Process p 83 Making a master and printing in one pass Image Processing mode p 70 Selecting Image Processing mode for the document Scanning Contrast p 77 Selecting Scanning...

Страница 47: ...antity Display Note To change the number press the key then re enter the correct number 13Press the key The specified number of copies will be printed Note Press the key to interrupt printing opera ti...

Страница 48: ...g is completed the master remains on the Print Drum To protect confidential docu ments from unauthorised duplication use the Confidential feature to discard the master after printing p 162 15Remove th...

Страница 49: ...method Red Colour Hand Writing 1 and Hand Writing 2 Separating by specified area Draw around the part of the original that you want to separate by using a recommended pen You can use 2 functions with...

Страница 50: ...images written with the recommended pen pencil or mechanical pencil from black printed images by copier or a laser printer The master of the prior original is created on Drum 1 the handwritten portion...

Страница 51: ...remely light neither a red nor black master will be made We recommend a Sans Serif fonts of 8 point or larger for the original For Serif fonts please use 18 point or larger font In case of Hand Writin...

Страница 52: ...lected Note About the Area Specification Sheet Use the area specification sheet if you are using an original that cannot be written on Also use the area specifica tion sheet for separating originals w...

Страница 53: ...not be recognized as a specified area If the area specified by the pen exceeds A3 size it will not be recognized Do not create dark points on the pen line Up to 20 pen areas can be created on one orig...

Страница 54: ...on the Operation Selection Screen The Master Making Basic Screen appears 3 Load paper See p 33 for details on how to load the paper 4 Set up the Paper Receiving Tray See p 35 for details on how to set...

Страница 55: ...l the way to the back How to Set the Original p 41 Important When using Specified Area set the original on the platen glass 6 Select Easy 2Colour 1 Touch Functions The Functions screen appears 2 Touch...

Страница 56: ...o display the Master Making Basic Screen Note Set Preview to confirm the colour separation p 108 8 Press the key The machine scans the original separates col ours then creates masters in a sequence No...

Страница 57: ...int Basic Screen will be displayed automatically Check the proof copy e g print position and den sity If necessary change print position and density Print Position p 115 Print Density p 114 After adju...

Страница 58: ...urrent one To prevent this from occurring you may set a Reserve Period We recommend that you activate the Reservation setting when printing leaflets etc to prevent interruption p 159 Easily restore cu...

Страница 59: ...sheet Shift the original sheet along the grid lines printed on the cover touching it through the openings on the cover When placing in the ADF unit Option Place originals and then adjust the ADF Origi...

Страница 60: ...ht sec tion of the screen at Drum 1 and Drum 2 Touch Sw Colour to switch the colour separations 4 Touch OK The Functions screen appears 3 Configure print functions Make various settings as needed For...

Страница 61: ...place the original as described in step 1 Note Scrap books etc should be placed on Platen Glass When placing one sheet at a time into the ADF unit Place the original as described in step 1 When placi...

Страница 62: ...rinting 1 Touch the button of the drum to use Note The button uses Drum 1 for 1 Colour printing the button uses Drum 2 for 1 Colour printing Printing with Drum 1 is explained here To use Drum 2 see 1...

Страница 63: ...g the grid lines printed on the cover touching it through the openings on the cover When placing in the ADF unit Option Place originals and then adjust the ADF Origi nal Guides to the width of the ori...

Страница 64: ...y result Check the proof copy e g print position and den sity If necessary change print position and density Print Position p 115 Print Density p 114 After adjustment press the key to print a proof co...

Страница 65: ...revent this from occurring you may set a Reserve Period We recommend that you activate the Reservation setting when printing leaflets etc to prevent interruption p 159 11Press the key when print job i...

Страница 66: ...sizes cannot be used Standard sizes A4 landscape card Custom sizes Paper smaller than 182 mm 257 mm B5 Do not use paper smaller than 257 mm 364 mm B4 when using the high speed function 150ppm When le...

Страница 67: ...Auto When Full Auto is activated however proof copy printing and subsequent adjustment steps will be disabled To temporarily halt an operation during the creation of a master or during print process s...

Страница 68: ...Stopper p 35 3 Set printing options from your com puter screen Important Make sure to uncheck the Collate option in the Print dialog box Before printing either perform an Idling Action p 160 especiall...

Страница 69: ...reen for deleting the developed job Tip Job List Screen Once the data is received touch on the Basic Screen to review current Job List From the Job List screen you can initiate output for jobs pausing...

Страница 70: ...2nd page prints Data from the 2nd page on prints in accordance with Auto Print settings Subsequent steps are the same as printing from the 1st page Use the Received Data screen to change settings fro...

Страница 71: ...d without having to receive original data from the computer Note When 2 Colour printing you can select the drum on which to recreate the master When 1 Colour printing the current drum is used to recre...

Страница 72: ...h the Auto Print function but ton The Auto Print screen appears 2 Select the desired function ON Makes a master then automatically prints Semi Auto Print After the data is received the operation stops...

Страница 73: ...text docu ment newspaper Photo Only photos contained Duo Both text and photos contained Pencil pencil drawings or lightly printed doc uments Touch Photo to select the type of photo Standard Select fo...

Страница 74: ...llowing screen appears Returns to the Master Making Basic Screen Image Processing mode is updated Note Some functions are not available in certain Image Processing mode settings available not availabl...

Страница 75: ...with dot screening in order to print more clearly Select from four types of dot patterns Note Dot Process is not available when Image Processing mode has been set to Line or Pencil 1 Touch Functions o...

Страница 76: ...Functions for Master Making Processing Photos with Dot Screen Dot Process 73 The following screen appears Returns to the Functions screen Dot Process set ting is updated...

Страница 77: ...ast Adj cannot be used 1 Touch Functions on the Master Making Basic Screen 2 Touch Contrast Adj 3 Touch the button of the contrast to use Lighter Lightens dark sections Use this setting if the entire...

Страница 78: ...ly Important If the Image is set to Line Tone Curve cannot be used 1 Touch Functions on the Master Making Basic Screen 2 Touch Tone Curve 3 Touch the Lights and Shadows adjustment buttons Use 1 or 1 t...

Страница 79: ...Functions for Master Making Adjusting Photo Gradation Tone Curve 76 Returns to the Functions screen Tone Curve set ting is updated...

Страница 80: ...st is automatically adjusted to the background colour of the original for printing Important Auto is available only when Image Processing mode has been set to Line p 70 Note Default Scanning Contrast...

Страница 81: ...or reduced and printed as desired Specify the zoom ratio between 50 and 200 in increments of 1 Zoom Allows you to specify numerical resize ratio Specify the zoom ratio between 50 and 200 in increments...

Страница 82: ...orresponding to the desired size Touch 100 to restore the original size Important The Margin setting is not available when Auto Zoom or Free is selected Note Standard Ratio and Margin can be selected...

Страница 83: ...on the Master Making Basic Screen 2 Touch Free 3 Touch or to adjust zoom ratio in horizontal or vertical directions The reproduction size can be increased decreased in increments of 1 Note Print Quan...

Страница 84: ...Size on the Master Making Basic Screen 2 Touch Zoom 3 Touch or to change ratio The reproduction size can be increased decreased in increments of 1 Note Print Quantity Keys can also be used to enter nu...

Страница 85: ...aster can be made Important Custom paper size must be registered on the Admin screen Failure to do so may make an incomplete master p 186 1 Touch Paper on the Master Making Basic Screen 2 Touch the de...

Страница 86: ...y is displayed on the Master Making Basic Screen Input the number of copies prior to creating the master because when Auto Process is set the job will be printed as soon as the master is created on Dr...

Страница 87: ...setting cannot be applied to just Drum 1 or just Drum 2 The original must be placed as shown below Align centre on the top edge The shadows will be erased Book Shadow is not available for bound books...

Страница 88: ...dows near the centre and around the original Halftone Photo processes the centre shadow for a natural feel and deletes shadows that it can around the original 4 Touch OK The following screen appears R...

Страница 89: ...ink conservation process may result in lighter prints than usual Contrast and Print Density Adjustment functions are not available when Ink Saving is selected This function is not available when prin...

Страница 90: ...times Multiple Original Multiple originals are printed multiple times Multi Up Tickets You can print multiple long thin custom originals such as tickets Single Original and Multiple Original can prin...

Страница 91: ...wn below Important Leave a margin of at least 5mm on the top edge of the Platen Glass Allowing a proper margin is critical in well bal anced Multi Up positioning p 14 2 Up Prints two copies of the sam...

Страница 92: ...the original on one sheet of paper 16 Up 16 on 1 Prints 16 images of the original on one sheet of paper Platen Glass 1st original 2nd original Single original For multiple originals Platen Glass 1st o...

Страница 93: ...Print 90 For Multi Up Tickets Multi Up Tickets cannot be used with multiple originals The number of images printed is determined by the width of the ticket Orientation of Print Paper Always place pape...

Страница 94: ...kets Original A4 B5 A5 B6 A6 B7 A7 B8 Printing Paper A3 100 116 141 163 200 B4 87 100 123 142 173 200 A4 71 82 100 116 138 163 200 B5 61 71 87 100 122 141 173 200 Original A3 B4 A4 B5 A5 B6 A6 B7 A7 B...

Страница 95: ...When printing with 1 colour p 59 Important Pay attention to the orientation of the original For 2 Up make sure to place the original as the diagram demonstrates The same is true when using the ADF un...

Страница 96: ...59 Note Pay attention to the orientation of the original p 88 3 Touch Functions on the Master Making Basic Screen 4 Touch Multi Up Print 5 Select the Page Size to use Touch the Page Size same as the...

Страница 97: ...Make various settings as needed 10Press the key Starts scanning of the original After this please follow the same operations for normally making a master for 1 Colour and 2 Col our mode Important Aft...

Страница 98: ...size 297 50 5 with a remainder of 47 In this example 5 images print on one sheet of paper 1 Select a colour mode Select 1 Colour or 2 Colour print Note See p 25 for how to select a colour mode 2 Plac...

Страница 99: ...he short edges of the print paper When magnifying make sure to prepare paper that fits the enlarged size 8 Touch OK The following screen appears Returns to the Functions screen Multi Up Tickets settin...

Страница 100: ...ginal master for the letterhead 1 The first of the 2 Colour print is exe cuted 2 Colour Printing with 2 Originals p 40 Note If you are connecting the printer with a compu ter we recommend that you set...

Страница 101: ...he master is made a proof copy using only Drum 2 is printed and then a 2 Colour proof copy is printed When a proof copy is printed the Print Basic Screen appears 8 Check the proof copy result Check th...

Страница 102: ...for Master Making Switching Masters of Just One Drum OneSide MasterMake 99 10Press the key The specified number of copies will be printed Note Press the key to interrupt printing opera tion currently...

Страница 103: ...s of the print paper size or original document size Maximum Printing Area 291 mm 413 mm Important Be sure to check the sizes of the original document and the printing paper first p 14 The 5mm margin o...

Страница 104: ...e the master When 1 Colour printing the cur rent drum is used to recreate the master When 2 Colour printing you can change Drum 1 and the master on Drum 2 and recreate the master change print colour R...

Страница 105: ...te the master Note If you touch and select Sw Colour you can change the masters on Drum 1 and Drum 2 a handy function if you ve inadvert ently misplaced the original order If you touch and select Rota...

Страница 106: ...ON p 177 The Auto Page Renewal is set to OFF in the following instances When printing with Programme When the is pressed When attempting to process the next job with direct print Note The factory sett...

Страница 107: ...mbol that indicates the position to cut in this event is known as the registration mark Important When you are setting the Size magnify reduce using the area that skips the set value Do not use Auto N...

Страница 108: ...of the Original and Printing Top Margin 105 4 Touch ON 5 Touch or to specify the cut width You can set from 0 to 99 mm Note Print Quantity Keys can also be used to enter a value 6 Touch OK Returns to...

Страница 109: ...ten glass Important Side Margin is a function intended to adjust the location of the master If there are no white margins on the left or right of the original a margin will not be created the function...

Страница 110: ...t Quantity Keys can also be used to enter a value 5 Touch OK Returns to the Functions screen Side Margin set ting is updated Important By using Side Margin the opposite side of the side margin may be...

Страница 111: ...nk mode when a linked printer sold separately is connected the original image after scanning and prior to output from the linked printer is previewed Mode name original type When set When to display I...

Страница 112: ...displayed arrow 5 Show All Button Shows the entire image 6 Reduce Button Shrinks the preview display each time it is touched 7 Magnify Button Magnifies the preview display each time it is touched 8 Di...

Страница 113: ...of the original begins and can be pre viewed on the Preview screen 6 Check the preview image 7 Touch Continue A master is created using the settings configured in step 4 After this please follow the s...

Страница 114: ...Functions for Master Making Checking the Print Image Prior to Making Master Preview 111...

Страница 115: ...on the Admin screen The factory default is level 3 approximately 100 copies minute p 174 Press the or key to adjust the print speed 1 Print Speed Indicator Shows the current print speed 2 Key Increase...

Страница 116: ...A4 B5 Letter sizes using only Drum 2 for 1 Colour printing When used in an environment in which the temperature is less than 15 C Important Use the normal print speed adjustment 1 to 5 until the inte...

Страница 117: ...Density is not available when Ink Saving is selected p 86 Note The default print density can be set on the Admin screen The factory default is set at level 3 Standard p 174 Press the or key to adjust...

Страница 118: ...ng the print position of both drums to the same location you can do so by simply adjusting one drum The other will be adjusted to the same print position p 116 Print position adjustment values for eac...

Страница 119: ...al adjustment Adjusting the Print Position of Both Drums Together 1 Adjust the print position of one of the drums The adjustments display on the Print Basic Screen 2 Touch Functions on the Print Basic...

Страница 120: ...Mode can be set the print position can be finely adjusted in 0 1 mm increments the normal incre ment is 0 5 mm Note If you want to use Fine Adjust Mode please con tact your dealer or service maintena...

Страница 121: ...nsity check the print quality in a proof copy Proof copies are not counted towards the number of copies displayed on the Print Quantity Display Note The machine will continue to print proof copies if...

Страница 122: ...paper Paper jams or errors may be displayed depend ing upon the type of paper used In the following instances please set D Feed Check to OFF When a multi feed detection message is occasionally displa...

Страница 123: ...nting it from leaving marks on the back of the next sheet Skip Rotation can be set from 1 10 1 Touch Functions on the Print Basic Screen 2 Touch Interval 3 Touch ON 4 Touch or to set the number of Ski...

Страница 124: ...Functions for Printing Keeping Printed Copies Dry Interval 121 The following screen appears Returns to the Functions screen Interval setting is updated...

Страница 125: ...your dealer or authorised service representative Note The Paper Ejection Wing is a device which helps eject printed paper onto the Auto control Stacking Tray or the Paper Receiving Tray It automatical...

Страница 126: ...Settings for Special Paper and Printing Types Eject Wing Control Special Paper Ctrl 123 Setting the Eject Wing Control Eject Wing Control 1 Touch Functions on the Print Basic Screen 2 Touch Eject Win...

Страница 127: ...ngs Close Special Paper Ctrl S Tray Upper Limit Paper Feed Amount Auto Auto Revise Entry Call Paper Feed Adj Air Blow Separation F OFF 4 Paper Eject Adj OFF 4 OFF 4 OFF 4 Close Special Paper Ctrl S Tr...

Страница 128: ...er Ctrl 125 6 Touch Close Returns to the Functions screen and the settings are updated Retrieve the settings to confirm and follow the steps beginning with step 2 Close Special Paper Ctrl S Tray Upper...

Страница 129: ...re displayed with a solid line Greyed out buttons are not available associated with another setting Close Special Paper Ctrl S Tray Upper Limit Paper Feed Amount Auto Auto Revise Entry Call Paper Feed...

Страница 130: ...ist A 1 A 4 A 2 A 5 A 3 A 6 Register Retrieve Rename Clear Cancel OK This Setting will be Registered OK A 2 OFF 4 OFF 4 Close Special Paper Ctrl S Tray Upper Limit Paper Feed Amount Auto Auto Revise E...

Страница 131: ...he Parameter List screen and the name is updated 12Touch Close Returns to the Special Paper Ctrl screen Poster Capital Small Rename Cancel OK Poster Capital Small Rename Cancel OK OFF 4 OFF 4 Close Sp...

Страница 132: ...Adj Air Blow Separation Fan Paper Eject Adj Side Pre suction Fan Suction Fan Reseive Tray Close Parameter List A 1 A 4 Poster A 5 A 3 A 6 Register Retrieve Rename Clear Select a Button to be Retrieve...

Страница 133: ...Select a Button to be Cleared OFF 4 OFF 4 Close Special Paper Ctrl S Tray Upper Limit Paper Feed Amount 1 2 Revise Entry Call Paper Feed Adj Air Blow Separation Fan Paper Eject Adj Side Pre suction Fa...

Страница 134: ...Functions for Printing Paper Feed Output Settings for Special Paper and Printing Types Eject Wing Control Special Paper Ctrl 131...

Страница 135: ...amme Single Page Mode From a single original document print into multiple groups of sets A maximum of 50 groups can be created each having up to 99 sets Each set can be up to 9999 copies The machine c...

Страница 136: ...s up to 20 originals 1 Colour Printing 2 Colour Printing with 2 Originals Note This function cannot be used for printing from a computer data direct print Programme may be used in conjunction with the...

Страница 137: ...d Answers For example it can be used to print multiple test questions for students in one colour and then print one copy of the teacher s answer key in red Up to 50 groups can be set and each group ca...

Страница 138: ...e or Go to Next Stops current print job skips to the next original set or group Cancel Job Cancels execution of the Programme Note The Job Separator option is useful for Programmed Printing The Job Se...

Страница 139: ...the programme to set The input screen for that programme displays 3 Enter the numbers using the Print Quantity Keys For Single Page Mode 1 Enter the number of copies using the Print Quantity Keys 2 P...

Страница 140: ...ogrammed Printing setting touch Entry Call Once OK is touched the setting cannot be saved See Saving Programmes p 139 for fur ther information For Combination Print 1 Enter the number of copies using...

Страница 141: ...same number of 2 Colour copies as 1 Colour copies touch Same Number as 4 Touch OK and the Print screen closes Important To save the current Programmed Printing setting touch Entry Call Once OK is tou...

Страница 142: ...g Up for Programmed Printing p 136 2 Touch Entry Call on the Pro gramme screen 3 Touch an unused button Touch a button displayed with solid lines Greyed out buttons are not available already associate...

Страница 143: ...Advanced Features Automatic Sorting Into Groups Programme 140 Touch OK on the Programme screen to print from a saved Programme...

Страница 144: ...is already highlighted touching it will again display the Programme screen and not the Rename a Programme screen Touch Cancel Job then OK to return to Functions screen Touch Programme again 2 Touch P...

Страница 145: ...capitalization be selecting Small or Capital button p 142 7 When entered touch OK The following screen appears Returns to the Programme List screen The pro gramme is renamed Tip Rename Screen Small C...

Страница 146: ...y Note Alternatively from the Master Making Basic Screen touch Functions then Programme to display the Programme Type screen 2 Touch Programme List 3 Touch Clear 4 Select a programme to delete 5 Touch...

Страница 147: ...rom the Master Making Basic Screen touch Functions then Programme to display the Programme Type screen 2 Touch Programme List 3 Touch a button to select a Pro gramme to retrieve Note When printing wit...

Страница 148: ...and 3 in Retrieving a Programme p 144 2 Make changes to the Programme Modify number of copies or sets in the current screen Note See Setting Up for Programmed Printing p 136 for details on how to set...

Страница 149: ...each group class Group 1 50 copies Group 2 45 copies Group 3 55 copies Group 4 52 copies Group 5 48 copies The printed document consists of the one colour problem sheet 2 copies of the answers writte...

Страница 150: ...n Programme to display the Programme Type screen 2 Touch Combination 3 Input the number of test copies for each 5 groups into the 5 input boxes 1G to 5G Touch the input box and use the Print Quan tity...

Страница 151: ...o the Combination Print screen Note The settings made here are cleared if Programme is used If you plan on using the same settings on a regular basis touch Entry Call to save the settings for later us...

Страница 152: ...um 2 a single 2 colour proof copy will be printed After a proof copy has been printed the Print Basic Screen appears 2 Check the proof copy result Check the proof copy e g print position and density I...

Страница 153: ...th Linked Printer Available with optional device Image Multi Up Print Paper Feed Adj Auto Page Renewal Dot Process Top Margin D Feed Check Air Blow Contrast Contrast Adj Eject Wing Control Separation...

Страница 154: ...ey on the Print Quantity Keys Skip to step 4 3 Touch Job Memory 4 Touch an unused button A button in solid lines is available Buttons already associated with another job set ting are greyed out Note I...

Страница 155: ...Job Memory Functions Job Memory 152 6 Touch OK The following screen appears Returns to the Job Memory screen Settings are updated Each job memory can be named for your con venience See step 3 in Renam...

Страница 156: ...Screen Note Job Memory screen can also be invoked by pressing the key on the Print Quantity Keys Skip to step 4 2 Touch Job Memory 3 Touch Rename 4 Select a Job Memory to rename Greyed out buttons ar...

Страница 157: ...Touch character buttons to enter a new name Change capitalization by selecting Small or Capital button p 142 7 When entered touch OK Returns to the Job Memory screen The name is updated 8 Touch Close...

Страница 158: ...inal p 46 When printing with 1 colour p 59 2 Touch Functions on the Master Making Basic Screen Note Job Memory screen can also be invoked by pressing the key on the Print Quantity Keys Skip to step 4...

Страница 159: ...sing the retrieved job settings 7 Press the key The master is made and copies printed in accord ance with the Job Memory setting Tip Quick Retrieval A job setting can be retrieved via hardware keys wi...

Страница 160: ...ing Basic Screen Note Job Memory screen can also be invoked by pressing the key on the Print Quantity Keys Skip to step 3 2 Touch Job Memory 3 Touch Clear 4 Select a Job Memory to delete Important Mak...

Страница 161: ...Advanced Features Using Job Memory Functions Job Memory 158 5 Touch OK 6 Touch Close The following screen appears Returns to the Functions screen...

Страница 162: ...te the Reserva tion setting when temporarily pausing a job to prevent interruption Note Select from 5 10 or 30 minutes as the Reservation period on the Admin screen The factory default is 5 minutes p...

Страница 163: ...l have no effect Note If both Drum 1 and Drum 2 are set you can select Idling Action for either If you are only using Drum 1 or Drum 2 the Idling Action is only applied to the drum that is set To perf...

Страница 164: ...nced Features Idling Action Idling Action 161 Note If displays in the screen message area this indicates that the Auto Idling time has elapsed If you make a master in this status Idling Action is exec...

Страница 165: ...performed the discarded master may no longer be reproduced and Renew Page feature is disabled If Idling Action is set to ON Idling Action is executed using a confidential master use this function when...

Страница 166: ...Advanced Features Protecting Confidential Documents Confidential 163 4 Touch OK The following screen appears The current master is discarded and a new mas ter is set on the Print Drum...

Страница 167: ...gin function is used the setting Front Side Simplex must be used Back Side Simplex Scans the back side of the original and prints on one side Duplex Simplex Scans both sides of the original and prints...

Страница 168: ...ted from the top Front Side Simplex For 1 Colour Printing For 2 Colour Printing Back Side Simplex For 1 Colour Printing For 2 Colour Printing Original 1 2 3 Printed Copies 1 2 3 Printed Copies Origina...

Страница 169: ...ge Mode the first page of the original scanned is displayed as Page01 on the Setup screen e g With the Back Side Simplex option the last page of the original is displayed as Page01 on the Setup screen...

Страница 170: ...DF settings open the Scanning Side ADF screen once more The selected settings buttons are highlighted Duplex Front Side Simplex Simplex Simplex Simplex Back Side Scanning Side ADF Cancel OK Front Side...

Страница 171: ...ex print ing 1 Set the original for duplex printing For 1 Colour Printing For 2 Colour Printing 2 Select Front Side Simplex for printing 3 Place the printing paper face down in the Standard Feed Tray...

Страница 172: ...stop as needed For example to keep track of the number of prints made in a day set Job Count to 0 in the morning and check the counter at the end of the work day to get the count Note When using more...

Страница 173: ...are direct printing you can rotate the original data received from a computer 180 degrees to make a mas ter Important Rotate can also be set from the printer driver but if it is set on both the machin...

Страница 174: ...ne the machine continues to scan and cre ate the next master then print a proof copy before coming to a stop Important Turn Auto Process OFF when using ADF Semi Auto p 83 Note The default ADF Semi Aut...

Страница 175: ...the key After a master is made a proof copy is printed and the job stops 6 Check the proof copy Make adjustments if needed 7 Press the key The machine prints specified number of copies Master for the...

Страница 176: ...ns Entry Store frequently used functions on the Selections screen for each mode p 182 Display Priority Select first screen to display following the Startup Mode Screen Dual Colour 1 Colour 2 Colour Sc...

Страница 177: ...F Auto Process Mode Change the default setting for the Auto Process ON OFF Double Feed Check Change the default setting for the Double Feed Check ON OFF Job Separation Change the default setting for t...

Страница 178: ...rmation touch Cancel and wait for the PS7R to finish starting up then try again When using a DHCP server Use DHCP When entering IP address manually Manual Input or the Print Quantity Keys Base IP Addr...

Страница 179: ...od minutes After executing Auto Clear the Renew Page function cannot be used If you use Renew Page frequently we recommend setting this to OFF Auto Clear OFF ON Waiting Time 1 60 mn factory default is...

Страница 180: ...pies to print This prevents master from being made when a smaller quantity is entered for printing Important This setting can be locked to prevent alteration Consult your dealer or authorised service...

Страница 181: ...e Volume 2 99 copies OFF Factory default is 20 copies Duplex Interval Select the interval time seconds between first and second scans when using Double sided Printing 15 seconds 30 seconds Online Auto...

Страница 182: ...y relevant groups of function buttons All All Functions Display Functions related to Screen Display Default Basic Operational Functions System Functions affecting the entire System Link Mode Functions...

Страница 183: ...Keys Additional Setup Screen Available Multi Level Entry Style Select a button then set its values either by touching more buttons or entering a value numerically Touch ON to display more options on t...

Страница 184: ...y the stored data displays See p 204 for details on specifying the data 5 Touch OK Skip to step 6 if there is no additional setup screen Note Touch Cancel to cancel the changes and return to the Admin...

Страница 185: ...ct Access area can store up to 4 items Selections screen can store up to 9 items 6 in the Link Mode no item in the Scan Mode Note Choose functions that are relevant to each mode The machine comes with...

Страница 186: ...rea configuration screen is shown in the upper left and the Selections configuration screen is shown in the bottom right When both screens are the same only one image will be shown 1 Touch Admin on th...

Страница 187: ...more func tions if necessary To remove a function accidentally assigned touch No Entry Functions already assigned are greyed out and not available for selection Some functions display only when optio...

Страница 188: ...Advanced Features Setting Up Direct Access Area and Selections Tab DirectAccess Entry Selections Entry 185 9 Touch Returns to the Original Basic Screen...

Страница 189: ...Previously stored sizes can be modified or deleted You can register paper sizes between 100 mm 148 mm to 340 mm 555 mm However any paper longer than 436 mm prints in extended paper mode p 188 Importan...

Страница 190: ...ng towards the paper feeding direction into Paper Feed Tray enter W width and H height Touch either or use Print Quantity Keys 7 Touch OK Rename as necessary Touch Close to skip renaming the size 8 To...

Страница 191: ...me Extended Paper may fail to pass through the machine due to its paper characteristics or may get smudged with ink due to its image posi tioning Consult your dealer or authorised serv ice representat...

Страница 192: ...om Paper Size 1 Touch Custom Paper Entry on the Admin screen 2 Touch Clear 3 Select the paper size to delete 4 Touch OK Returns to the Custom Paper Entry screen The selected paper size is deleted 5 To...

Страница 193: ...r the Master Disposal Box can be unlocked and removed if the master is jammed in the Disposal Unit or the Master Disposal Box is full Locking the Master Disposal Box To prevent any leak of master docu...

Страница 194: ...p is activated automatically If Protect is ON Renew Page is greyed out with no access allowed If Protect is ON The following screen is displayed after printing Touch OK or Cancel OK Discards the maste...

Страница 195: ...essage is on appears each time you press key or key The screen shows the message below when setting the Print Drum that has been removed without the Confidential operation or the machine goes into the...

Страница 196: ...Advanced Features Keeping Masters Secure After Printing 193...

Страница 197: ...de Stored data is managed as Storage Data and unless expressly deleted will not be cleared if you press the key or turn the machine off Important We can not guarantee stored data against loss caused b...

Страница 198: ...d data This saves you the trouble of rescanning documents when printing the same materials p 195 If the stored data contains multiple pages you can choose to output all pages only odd or even pages or...

Страница 199: ...documents when repeatedly printing the same materials p 195 This function also prevents documents from getting lost or damaged over time Note You can easily delete unnecessary storage data when remai...

Страница 200: ...location and owner name p 201 4 Setting required functions Set the required functions for scanning the origi nal Note See the previous section for the functions that can be set You can instantly chec...

Страница 201: ...w shows on the display if Preview is set 6 Repeat steps 2 4 and 5 if the original has multiple pages Note If multiple originals are combined on the ADF unit option and Auto Process is set to ON all or...

Страница 202: ...or using the ADF unit option Go to step 4 if you are not specifying folder data or owner name If no settings are configured data is stored by default Data Name scan_001 Save Location 1_folder Owner Ow...

Страница 203: ...original for Drum 1 starts Note After scanning the original a preview appears on the display if Preview is set 11Place the original for Drum 2 Step 8 of 2 Colour Printing with 2 Originals p 43 This st...

Страница 204: ...e Directory folder can be changed in Admin p 174 2 Enter a data name 1 Touch the data name input box The Rename screen appears 2 Touch the button to delete the current name Note You can also press the...

Страница 205: ...turns to the Scan Basic Screen 4 Specifying an Owner 1 Touch the owner input box The Owner screen appears 2 Touch the button of the owner to set The owner name is confirmed and the screen returns to t...

Страница 206: ...saved as is with Auto If the original is custom sized use the Format screen to save at size that differs from the size of the original 1 Touch Format on the Scan Basic Screen The Format screen appears...

Страница 207: ...stored data to print If you are selecting data stored in a different folder touch that folder s tab Note is displayed at the beginning of the data name for 2 Colour originals If the stored data is not...

Страница 208: ...m retrieved data and specify output settings See p 206 for operational details 5 Touch Retrieve The storage data is retrieved and Storage Mode Basic Screen appears 6 Press the key A master is made fro...

Страница 209: ...nals select the tab for each colour to display its thumbnails 5 Output Range If the storage data consists of multiple pages you can specify which pages to print Touch Output and the Output screen appe...

Страница 210: ...the order of the storage data displayed on the storage data selection screen Note The factory setting is Date Ascend 1 Touch Sorting Note Sorting is inactive if there is no storage data or only one st...

Страница 211: ...n Side Margin Storage Memory Overlay images cannot be stored When sending original data from the computer 1 Place an original and load paper Place the original on Platen Glass or in ADF unit option Se...

Страница 212: ...bsequent operations see step 6 of 1 Col our Printing p 60 Tip Overlaying Storage Data The stored data overlays at the size it was saved You cannot magnify decrease the size to match the original or pa...

Страница 213: ...our insignia can be printed on consecutive pages Important When Stamp is used the printer automatically scans the hard copy original and creates a master on Drum 1 the black drum and creates a master...

Страница 214: ...Data on the Admin screen See p 173 for operational details of the Admin screen The Stamp Data screen appears 2 Touch an unused button Unused buttons are displayed with a solid line Greyed out buttons...

Страница 215: ...2 Colour Printing with the Original and Storage Data Stamp 212 5 Touch Close Note To change the Stamp Data touch Change Data The Stamp Data screen appears Proceed to the step 2 p 213 of Renaming the S...

Страница 216: ...of the Admin screen The Stamp Data screen appears 2 Touch Rename 3 Touch the buttun to rename Greyed out buttons are not available no Stamp Data has been registered yet 4 Touch to delete the existing...

Страница 217: ...ion 2 Colour Printing with the Original and Storage Data Stamp 214 6 Touch OK after entering all the characters The entered name is registered and returns to the Stamp Data screen 7 Touch Close Return...

Страница 218: ...Operations chapter for informa tion on placing the original 2 Touch Functions on the Master Making Basic Screen 3 Touch Stamp Important If data for the Stamp is not registered the Stamp button does no...

Страница 219: ...the Original and Storage Data Stamp 216 7 Press the key A master is made from the hard copy original and the stamp data and a proof printed For subsequent operations follow the same pro cedures from...

Страница 220: ...Data 1 Touch Stamp Data on the Admin screen See p 173 for operational details of the Admin screen The Stamp Data screen appears 2 Touch Change 3 Touch the buttun to change 4 Touch Change Data 5 Select...

Страница 221: ...age Data Stamp 218 6 Confirm the storage data and touch OK Note See p 206 for information about the Storage Retrieve screen Returns to the Stamp Data screen 7 Touch Close The data is changed and retur...

Страница 222: ...Storage Data Stamp 219 Deleting a Stamp Data 1 Touch Stamp Data on the Admin screen See p 173 for operational details of the Admin screen The Stamp Data screen appears 2 Touch Clear 3 Touch the butto...

Страница 223: ...Storage and Scan Modes Option 2 Colour Printing with the Original and Storage Data Stamp 220 6 Touch Close 7 Touch...

Страница 224: ...Storage and Scan Modes Option 2 Colour Printing with the Original and Storage Data Stamp 221...

Страница 225: ...Automatically select an output device the machine or a Linked Printer based on a pre determined number of cop ies Link Free Volume p 178 Auto Link can only be used for 1 Colour printing It cannot be u...

Страница 226: ...ne and printed from the Linked Printer p 228 Special Linked Printer functions such as double sided printing can be achieved When printing a high volume of copies of the scanned original it is more eco...

Страница 227: ...more information about Link Mode and other Admin settings Linked Printer Setup List Initial setting factory default Functions Description How to Enter Printer Name Enter a name for the Linked Printer...

Страница 228: ...nter 0 Use or enter using the Print Quantity Keys Staple Set Staple ON if the device has the capability Also set the tray number 1 used by the Staple function and whether it is fixed variable OFF No S...

Страница 229: ...ntity Keys for Tray No Offset Pages and Punch may be configured using similar steps Duplex Set Duplex ON if the device has the capability ON OFF Duplex Printer Collate Output Reversal ADF Auto Reversa...

Страница 230: ...the button to enter informa tion Note To display other functions that are not visible on the screen touch or 5 Change settings See Linked Printer Setup List p 224 to change settings Note If the functi...

Страница 231: ...creen touch Link Print to switch to the Link Basic Screen p 24 Note While the message Starting Up RISORINC NET Acquiring Linked Printer Configuration Data Please Wait a Moment is displayed on the mach...

Страница 232: ...ed 4 Select the print functions as needed The following functions are available Image Processing mode p 70 Scanning Contrast p 77 Size p 78 Dot Process p 72 Memory p 150 Contrast Adj p 74 Tone Curve p...

Страница 233: ...50 7 Press the key when the print job is complete The setting returns to its default value Tip When multiple Linked Printers are connected to the network When multiple Linked Printers are connected to...

Страница 234: ...functions are shown below These are available when the Linked Printer has an optional device such as a sorter or a duplex unit installed Note See Linked Printer User s Guide for further details on eac...

Страница 235: ...f trays Set at 1 or more Offset Pages Enable a feature to alternately eject multiple page print copies ON OFF Offset Pages Available only when Offset Pages option is ON Staple Specify the positioning...

Страница 236: ...ow to print double sided See Duplex Printing p 235 When the Auto Document Feeder AF VI II is installed OFF LongEdge Short Edge Page Total Odd Even When the Auto Document Feeder AF VI II is not install...

Страница 237: ...ocument Feeder DX 1 unit is installed Touch to select a button Functions Description Screens and Steps Related Admin Settings Cancel OK Duplex Align Side Align Top Setting Direction Duplex Simplex OFF...

Страница 238: ...reens Using the Platen Glass or Auto Document Feeder AF VI II This setting is available when a connected Linked Printer is equipped with the optional duplex printing unit 1 Touch Duplex on the Functio...

Страница 239: ...p 72 Memory p 150 Contrast Adj p 74 Tone Curve p 75 Book Shadow p 84 Top Margin p 104 Preview p 108 Overlay p 208 Storage Memory p 204 7 Enter the number of copies using the Print Quantity Keys The nu...

Страница 240: ...on the Admin screen p 173 Failure to do so will result in the Linked Printer printing one side only Note Pressing the key without placing the sec ond original will also result in the Linked Printer p...

Страница 241: ...put paper Place the original face up in the Auto Document Feeder DX 1 Duplex Duplex when a connected Linked Printer is equipped with the optional duplex printing unit Select this setting to print dupl...

Страница 242: ...p 70 Scanning Contrast p 77 Size p 78 Dot Process p 72 Memory p 150 Contrast Adj p 74 Tone Curve p 75 Book Shadow p 84 Preview p 108 Overlay p 208 Ready for Link Print Selections Basic Functions Admin...

Страница 243: ...the Linked Printer will print the specified number of copies To print multiple Duplex Print copies repeat steps 5 8 of Duplex Printing Important Once the first original is scanned the next orig inal m...

Страница 244: ...of the output paper Set Duplex Simplex on the Duplex screen for printing Cancel OK Duplex Align Side Align Top Setting Direction Duplex Simplex OFF A A A A A Duplex Duplex Simplex Duplex Top Bottom L...

Страница 245: ...ent status of the consumables as detected by the machine The icon will change depending on the match ing information detected from the consumable When matching information was correctly retrieved from...

Страница 246: ...Important While the Print Drum is pulled out Master Mak ing Unit cannot be pulled out Return the Print Drum into position and press the Master Making Unit Release Button p 250 2 Open the Master Makin...

Страница 247: ...e section when removing the shrink wrap If the section is bent or the perforation cut the master will become unusable Do not remove the tape yet 8 Close the Master Roll Holder Remove the tape once the...

Страница 248: ...urn the dial on the edge of the Master Guide Flap towards the rear and raise the Master Guide Flap 2 Pull out the master to the line indicated by the arrow 3 Lower the Master Guide Flap 10Return each...

Страница 249: ...SO Keep the power ON while replacing the Ink Cartridge Replace with an Ink Cartridge of the same ink colour If you want to change the ink colour replace the Print Drum itself p 250 1 Open the Front Co...

Страница 250: ...on the right side of the platen glass 4 Insert the new Ink Cartridge Align the arrow on the Ink Cartridge to the mark on the drum unit and insert until it stops 5 Lock the Ink Cartridge Turn the Ink...

Страница 251: ...strator before discarding the master When Protect is ON you can remove the Master Disposal Box only when the messages such as Master Dis posal Box is Full or Master Jammed in Disposal Unit are display...

Страница 252: ...al rule of your local community p 253 If used masters get stuck hold the Master Dis posal Box tilted downward and squeeze the push out lever to release any remaining mas ters 3 Place the Master Dispos...

Страница 253: ...izontally Removing the Print Drum Note The drum is removed from the printer to be changed and to remove paper jams The procedure for changing Drum 1 and Drum 2 is the same The procedure for changing D...

Страница 254: ...he Print Drum straight up to remove from the rail Proceed with replacing the drum removing the paper jam etc BCaution Do not touch the connector on the Print Drum Neglecting this may result in malfunc...

Страница 255: ...place the Print Drum hori zontally onto the guide Note If the Print Drum was manually rotated be sure to turn it back so that and marks align after it is placed on the guide 2 Return the Print Drum t...

Страница 256: ...ely Because ink may have adhered to the outlet surface of the Ink Cartridge be careful not to smudge your clothes Master core A metallic component has been attached to the bottom of the end section ha...

Страница 257: ...ables 254 Ejected Master Note It is made of carbon and hydrogen compounds If fully combusted it will turn into water and carbon dioxide Parts Materials Master material plastic Japanese paper Ink mater...

Страница 258: ...Replacing Consumables Disposal of Depleted Consumables 255...

Страница 259: ...tive immediately if you suspect any dangerous situations or have questions or problems with the machine Contact your service representative before moving the machine Do not allow unauthorised persons...

Страница 260: ...e Thermal Print Head is very delicate avoid shocks or scratches with a hard object Since Thermal Print Head is susceptible to damage by static electricity please be sure to remove the static elec tric...

Страница 261: ...lass and the White Sheet several times with a soft cloth or tissue For the Auto Document Feeder AF VI Clean while rotating the white roller For the Auto Document Feeder DX 1 The white Sheet does not r...

Страница 262: ...h a soft cloth dampened with alcohol BCaution Be sure to turn OFF power to the machine when cleaning the Pressure Roller When putting your hand into the unit do not touch the paper separation hook The...

Страница 263: ...nt use one recommended by your authorised service representative BCaution Because the machine exterior is plastic never use alcohol or solvent when cleaning The Display may be cleaned by gently wiping...

Страница 264: ...Maintenance Cleaning 261...

Страница 265: ...unt Touch to display the Digital Copy Count window Error Number Error Types Description Reference page T00 000 Service Call Error Errors that require repair or inspection by a authorised service repre...

Страница 266: ...iscarded 1 Pull out the Print Drum and remove the master from the drum If a master is not wrapped around the drum check the disposal unit and remove the master p 250 2 Return the Print Drum in place 3...

Страница 267: ...on Standard Feed Tray is Activated Reset paper on Standard Feed Tray The safety switch for the Paper Feed Tray has been activated Check underneath the Paper Feed Tray and on top of the printing paper...

Страница 268: ...Printer Linked Printer may not be turned ON cable may not be properly connected connection may be interrupted Check that the Linked Printer has been switched on Check to make sure all cables are prop...

Страница 269: ...artridge No Master Replace Master Roll The Master Roll is depleted Install a new Master Roll Use Master Roll specifically designed and approved for use with this machine p 243 Message Possible Cause A...

Страница 270: ...ng Unit in Place The Master Making Unit is missing or is improperly installed Properly install the Master Making Unit p 243 Set Print Drum 1 in Place The Print Drum is improperly set or is missing Pro...

Страница 271: ...not Read Master Info Replace Master Roll or Contact dealer Riso office Incorrect master is installed Set a correct Master Roll p 243 Important Use a Master Roll specifically designed and approved for...

Страница 272: ...ossible Cause Action Paper is jammed in the Paper Feed area 1 Check the paper feed side and remove the jammed paper 2 Touch OK Note When using special paper adjust the Paper Feed Pressure Adjustment L...

Страница 273: ...r inside the unit It may cause smudges on the original or a paper jam Removing originals jammed in the document feeder Open the ADF Cover and pull out the original Removing originals jammed in the doc...

Страница 274: ...the original receiving unit Lift the Platen Cover Pad up pull the release lever toward you and pull out the original Paper is jammed in the Print Drum area 1 Pull out the Print Drum p 250 2 Remove th...

Страница 275: ...ject correctly 1 Check for any jammed paper on the paper exit area 2 Touch OK Note When using special paper adjust the Paper Arranger on the Receiving Tray Paper Guides according to the paper characte...

Страница 276: ...routine inspection by a service personnel is required p 273 F00 000 Warning Messages Pops up when printing job cannot proceed due to a conflict between a Control Panel setting and the status of the ma...

Страница 277: ...en Link Switch will not display if no other Linked Printer is available p 230 Book Shadow Editor is Not Available with ADF Place Original on Platen Glass ADF unit is disabled while Book Shadow functio...

Страница 278: ...s may be selected Reduce number of selected areas Multi Up is Not Available with This Paper Size Replace with Proper Paper of Standard Size Multi up functions cannot be used when custom sized paper is...

Страница 279: ...key Load the correct size printer paper Page Format is Larger than Paper Size Possible Ink Smudges on Prints Continue PROOF Key The printing paper is smaller than the Master To override the message a...

Страница 280: ...he machine Processing Print Data from PC This Function is Not Available while Process ing Current Data Scanning is Not Possible External CI is not Connected or Processing Connection Check Cable Connec...

Страница 281: ...l data sent from the computer does not match the print paper size When resuming the print job Touch Continue Alternatively press the key to print When stopping the print job Touch Cancel Alternatively...

Страница 282: ...is placed into the Sleep status the key is pressed If you are not sure the best setting for the consumables used in the machine we may suggest that you use 1 default setting except for H1 setting and...

Страница 283: ...rk H3 First Print Density Adjustment for Print Drum 1 H9 First Print Density Adjustment for Print Drum 2 Select a Print Density level of the first print to match the ink 1 Light 5 Dark Screen Display...

Страница 284: ...t Density level of the first print to match the master 1 Light 5 Dark 2 3 4 5 1 7 8 9 10 6 Consumables Information Input Wizard Master Information Input Next H4 Master Density 2 3 4 5 1 Consumables In...

Страница 285: ...he machine and the power outlet Check the power breaker The front cover is closed but the error message still does not clear The Front Cover has not been firmly closed Completely close the Front Cover...

Страница 286: ...to undo the padlock p 248 There is no image on copies The original is placed face up Place the original face down This is also true for the ADF unit Some areas are missing in the printed copy The Plat...

Страница 287: ...es of printed copies are smudged with ink Larger size of paper than the original was placed on the Paper Feed Tray at the time of the master making process Because a master was made according to a lar...

Страница 288: ...rval features p 86 p 120 Printed images are faint Printed texts are blurred If the machine is not used for an extended period of time ink on the surface of the Print Drum may dry This results in faint...

Страница 289: ...l has a solid black portion at its top If an original has a solid black portion at the top printed copies may not properly output Replace the original in the reverse direction and restart the master m...

Страница 290: ...t to touch the roller inside the unit It may cause smudges on the original or a paper jam Removing originals jammed in the document carrier Open the auto document feeder cover and raise the feed rolle...

Страница 291: ...and pull the release lever toward you and pull out the original Printed copies are not neatly aligned in the Paper Receiving Tray The positions of the Receiving Tray Paper Guides and the Paper Stoppe...

Страница 292: ...tray as follows 1 Fold the Receiving Tray Paper Guides Stopper 2 Lift up the sides of the receiving tray with both hands and move the receiving tray shaft to position B Position A is recommended in m...

Страница 293: ...14 The position of the Paper Feed Pressure Adjustment Lever was inappropriate When using thick or slippery paper set the Paper Feed Pressure Adjustment Lever to Thick Paper p 33 The angle of the Strip...

Страница 294: ...r or authorised service representative for details on making the adjustment An error message displays even though there is no paper jam Is the lifted paper getting ejected at the second rotation of th...

Страница 295: ...sts Job Separator With the Programmed Printing function allows the machine to print and sort into groups separated by tape Stand RISO PRINTER Network Interface Card RISORINC NET D G GII Use to directl...

Страница 296: ...m2 Image Processing mode Line Photo Standard Portrait Group Duo Pencil Master making Time for A4 portrait 100 reproduction ratio Approx 57 seconds for dual colour print Approx 24 seconds for single c...

Страница 297: ...nges to the machine some images and explanations in this manual may not correspond to your machine The specifications are subject to change without prior notice Dimensions When in use 1605 mm W 725 mm...

Страница 298: ...encil Master making Time for A4 portrait 100 reproduction ratio Approx 57 seconds for dual colour print Approx 24 seconds for single colour print Drum 1 Approx 34 seconds for single colour print Drum...

Страница 299: ...ions 296 Note Please note that due to improvements and changes to the machine some images and explanations in this manual may not correspond to your machine The specifications are subject to change wi...

Страница 300: ...Appendix Specifications 297...

Страница 301: ...able Amount 242 CI Select 175 Cleaning 256 Clear All 68 Clock Calendar 176 Closing the Paper Feed Tray 34 Closing the Paper Receiving Tray 36 Colour Auto Link 178 Colour Drum 250 292 Colour Mode 25 Co...

Страница 302: ...ance Call 273 Malfunctions 282 Margin 78 79 Margin Plus Rate 176 Margins 17 Master 254 Master core 244 253 Master Disposal Box 248 Master Disposal Box 1 18 Master Disposal Box 2 19 Master Disposal Box...

Страница 303: ...22 Print Quantity Display 22 Print Quantity Keys 0 to 9 Keys 22 44 54 61 83 98 Print Speed 22 112 174 Print Speed Adjustment Keys 22 112 Print Speed Indicator 22 112 Printer Exterior 260 Printing Cau...

Страница 304: ...ent 15 Sub Tool Bar 178 T Tab Area 27 28 Temperature Range 11 Text and Photo Image Processing mode 70 Text Image Processing mode 70 The Screens and their Various Stages 24 Thermal Print Head 19 257 Ti...

Страница 305: ...Index 302 024 36004 802...

Страница 306: ...the Master Disposal Box Remove either one of two Master Disposal Boxes p 248 5 Touch Protect again after removing the Master Disposal Box The Protect setting is cancelled After confirming that the dis...

Страница 307: ...304 024 36004 802...

Отзывы: