


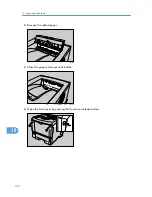


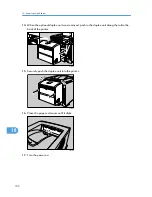
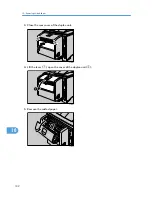
10. Removing Misfed Paper
Removing Misfed Paper
An error message appears if a paper misfeed occurs. The error message gives the location of the misfeed.
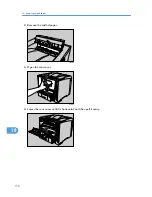
• The inside of the machine becomes very hot. Do not touch the parts with a " " label (means hot
surface). Touching a part with a " " label (means hot surface) could result in a burn.
• When pulling the paper tray out, be careful not to pull it strongly. If you do, the tray might fall and
cause an injury.
• When removing misfed paper, do not touch the fusing section because it becomes very hot.
• The fusing unit becomes very hot. When installing the new fusing unit, turn off the printer and wait
about an hour. After that, install the new fusing unit. Not waiting for the unit to cool down can result
in a burn.
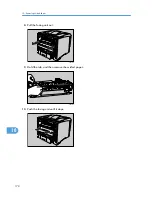
• Misfed paper may be covered in toner. Be careful not to get toner on your hands or clothes.
• Toner on prints made after removing misfed paper may be loose (inadequately fused). Make a few
test prints until smudges no longer appear.
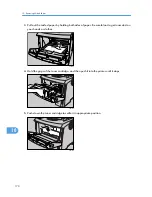
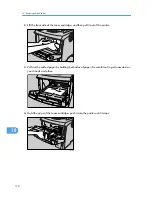
• Do not forcefully remove misfed paper, it will tear. Torn pieces remaining inside the printer will cause
further misfeeds and possibly damage the printer.
• More than one misfed area might be indicated. In this case, check every applicable area.
• If paper continues to misfeed, check the following points.
• Confirm that the setting of the paper size dial matches the size and feed direction of the paper
loaded in the paper tray.
• Confirm that the toner cartridge is set correctly.
• If paper misfeeds still occur, contact your sales or service representative.
• Do not leave any torn paper scraps within the printer.
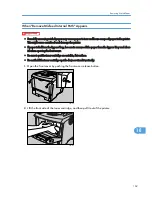
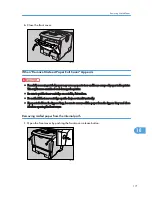
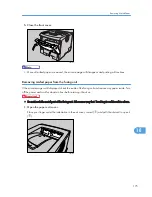
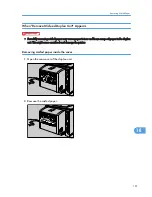
When "Remove Misfeed Paper Tray" Appears
• Forcefully removing misfed paper may cause paper to tear and leave scraps of paper in the printer.
This might cause a misfeed and damage the printer.
167
10
Содержание LP131n
Страница 6: ...Options 192 INDEX 197 4 ...
Страница 18: ...1 Guide to the Printer 16 1 ...
Страница 48: ...2 Installing Options 46 2 ...
Страница 53: ... p 37 Attaching Gigabit Ethernet Board Type A USB Connection 51 3 ...
Страница 76: ...4 Configuration 74 4 ...
Страница 130: ...6 Replacing Consumables and Maintenance Kit 128 6 ...
Страница 140: ...7 Cleaning the Printer 138 7 ...
Страница 198: ...11 Appendix 196 11 ...
Страница 201: ...MEMO 199 ...
Страница 202: ...MEMO 200 GB GB EN USA G176 ...
Страница 203: ...Copyright 2006 ...
Страница 204: ...Hardware Guide Model No MLP31n MLP36n P7031n P7035n LP131n LP136n Aficio SP 4100N Aficio SP 4110N G176 8602 EN USA ...


