


PC Configuration
29
4.0
PC Configuration
When used with the
920i
indicator, the
iQUBE
can be configured using a PC running either the
iRev
or the
Revolution III
program.
iRev
allows complete configuration of the
920i
, with the capability to download the
iQUBE
configuration from the indicator to the junction box.
Revolution III
can be used to configure the
iQUBE
directly, for use with any indicator.
iQUBE
configurations created using
Revolution III
can be uploaded to the
920i
.
4.1
Using Revolution III
The
Revolution III
configuration utility can be used to
set
iQUBE
configuration parameters for use with any
indicator. When
Revolution III
configuration is
complete, configuration data is downloaded to the
iQUBE
.
R e v o l u t i o n I I I
s u p p o r t s b o t h u p l o a d i n g a n d
downloading of
iQUBE
configuration data. This
capability allows configuration data to be retrieved
from one
iQUBE
, edited, then downloaded to another.
Revolution provides online help for each of its
configuration displays.
To use
Revolution III
, do the following:
1. Install
Revolution III
on an IBM-compatible
personal computer running Windows
®
98 or
later. Minimum system requirements include a
processor speed of at least 166MHz, 32MB of
memory (64MB recommended, required for
NT4, 2000, XP), and at least 40MB of available
hard disk space for installation.
2. With both the
iQUBE
and the PC powered off,
connect the PC serial port to pins 2, 3, and 6 of
connector J7 on the
iQUBE
connector board.
(See Figure 2-2 on page 4 and Figure 2-4 on
page 7).
3. Power up the PC and the
iQUBE
. Use the setup
switch to place the
iQUBE
in setup mode.
4. Start the
Revolution III
program.
4.1.1
Revolution III Configuration
To configure the
iQUBE
using Revolution, do the
following:
1. With the PC and
iQUBE
connected and the
Revolution III program running, select
New
from the File menu.
2. On the Select Indicator display, highlight the
iQUBE
icon, for the correct core version, see
Figure 2-2 on page 4, click the radio button
for
New Configuration File
, then click
OK
. The
iQUBE
Information Display is shown.
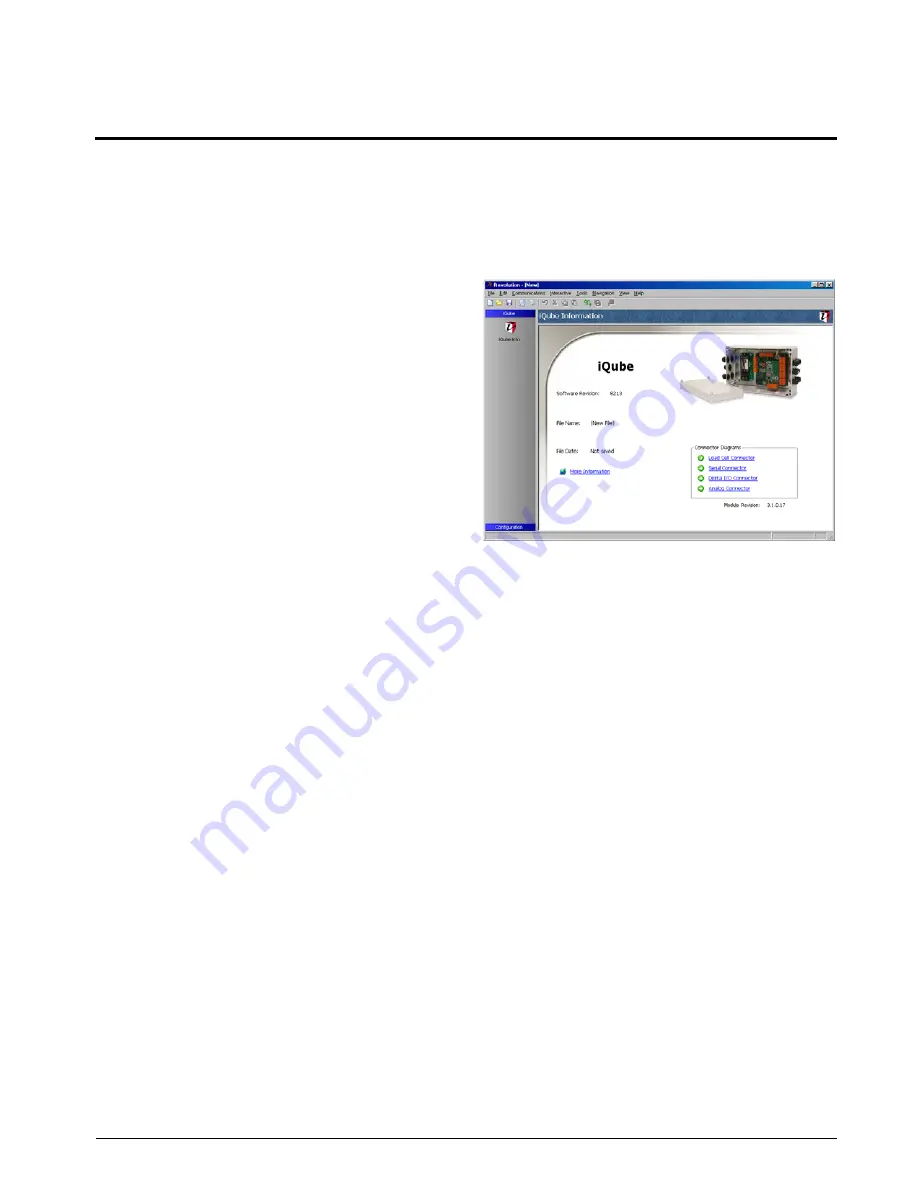
3. Select
Configuration
from the left-hand tool
bar on the
iQUBE
Information Display (see
Figure 4-1). The Configuration submenu is
shown.
Figure 4-1. Revolution
iQUBE
Display
4. Select
Core
. Use this screen to set the Auto
Transmit Port and section type. Note: As you
set up
iQUBE
you will be moving down
through the configuration menu pages.
5. Select the
Cells Configuration
display. Use this
display to select the load cells used in the
iQUBE
system by checking the box to the left
of each cell. Enter load cell data such as
factory sensitivity, serial numbers, and
capacity on the General Information sheet for
each cell.
6. Select the
Platforms Configuration
display.
Cells that were checked on the Cells screen
are now listed as Available Load Cells for the
iQUBE
.
7. Click on
Platform 1
.
8. Double-click on each available load cell to
move the cell into the Assigned Load Cell
column for Platform 1.
NOTE:
You can rearrange the Assigned Cells by
clicking on individual cells and then using the up or
down arrows to change the position of the cell.
As cells are added to the Assigned Cell
column, a Section Format Diagram is
displayed at the bottom of the screen.
9. Select the
S
ystems
display.
10. Click on
S
ystem 1
.
11. Platform 1 is now shown in the Assigned


