DR4300 Owners Manual
Front panel features and indicators
8
DR4300e system overview
Your DR4300e system is 2U rack server that supports up to two Intel Xeon E5-2620 v3 processors, up to 24
DIMMs, and twelve 3.5-inch hard drives and 2 optional 2.5-inch back-accessible hard drives for the operating
system.
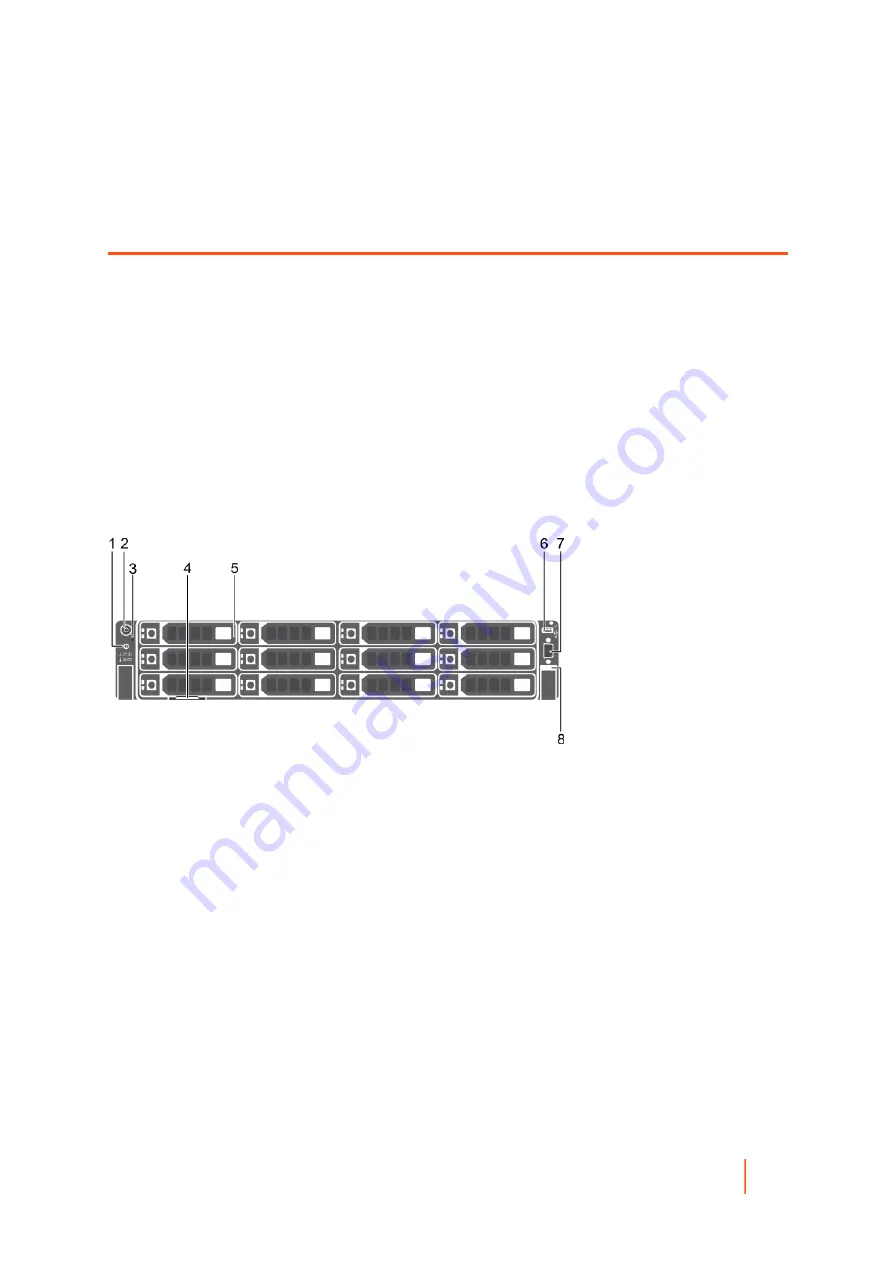
Front panel features and indicators
The front panel provides access to the features available on the front of the server, such as the power button,
NMI button, system identification tag, system identification button, and USB and VGA ports. The diagnostic LEDs
or the LCD panel is prominently on the front panel. The hot swappable hard drives are accessible from the front
panel.
Figure 1. Dell
DR4300e
system front panel features and indicators
1. System identification button
2. Power button
3. NMI button
4. Information tag
5. Hard drives
6. USB management port/iDRAC Direct
7. Video connector
8. Quick Sync
Table 1. Front panel features and indicators
Item 1 is the system identification button on the front and back panels, that can be used to locate a particular system within a
rack. When one of these buttons is pressed, the LCD panel on the front and the system status indicator on the back flashes until
one of the buttons is pressed again. Press to toggle the system ID on or off. If the system stops responding during POST, press
and hold the system ID button for more than five seconds to enter BIOS progress mode. To reset iDRAC (if not disabled in F2
iDRAC set up) press and hold the button for more than 15 seconds. Item 2 is the power button. Enables you to know the power
status of the system. The power indicator turns on when the system power is on. The power button controls the power supply
output to the system. Item 3 is the NMI button, that is used to troubleshoot software and device driver errors when running
certain operating systems. This button can be pressed using the end of a paper clip. Use this button only if directed to do so
by qualified support personnel or by the operating system documentation. Item 4 is the information tag, a slide-out label panel
that allows you to record system information such as Service Tag, NIC, and MAC address, as per your need. Item 5 indicates
the hard drives, you can have up to twelve 3.5-inch hot-swappable hard drives. Item 6 is the USB management port/iDRAC
Direct port. The USB management port can function as a regular USB port or provide access to the iDRAC Direct features.
For more information, see the Integrated Dell Remote Access Controller User’s Guide at
Dell.com/idracmanuals
. The USB
Содержание DR4300e
Страница 1: ...DR4300e System Owner s Manual ...
Страница 181: ...DR4300 Owners Manual 181 Index ...


