background image

Chapter 4: Configuration Wizards

Support Wizard

Quantum DXi4700 User’s Guide

108

 4.  Click 

Save

 or 

OK

 to download the file.

 5.  Click 

Next

 to continue.

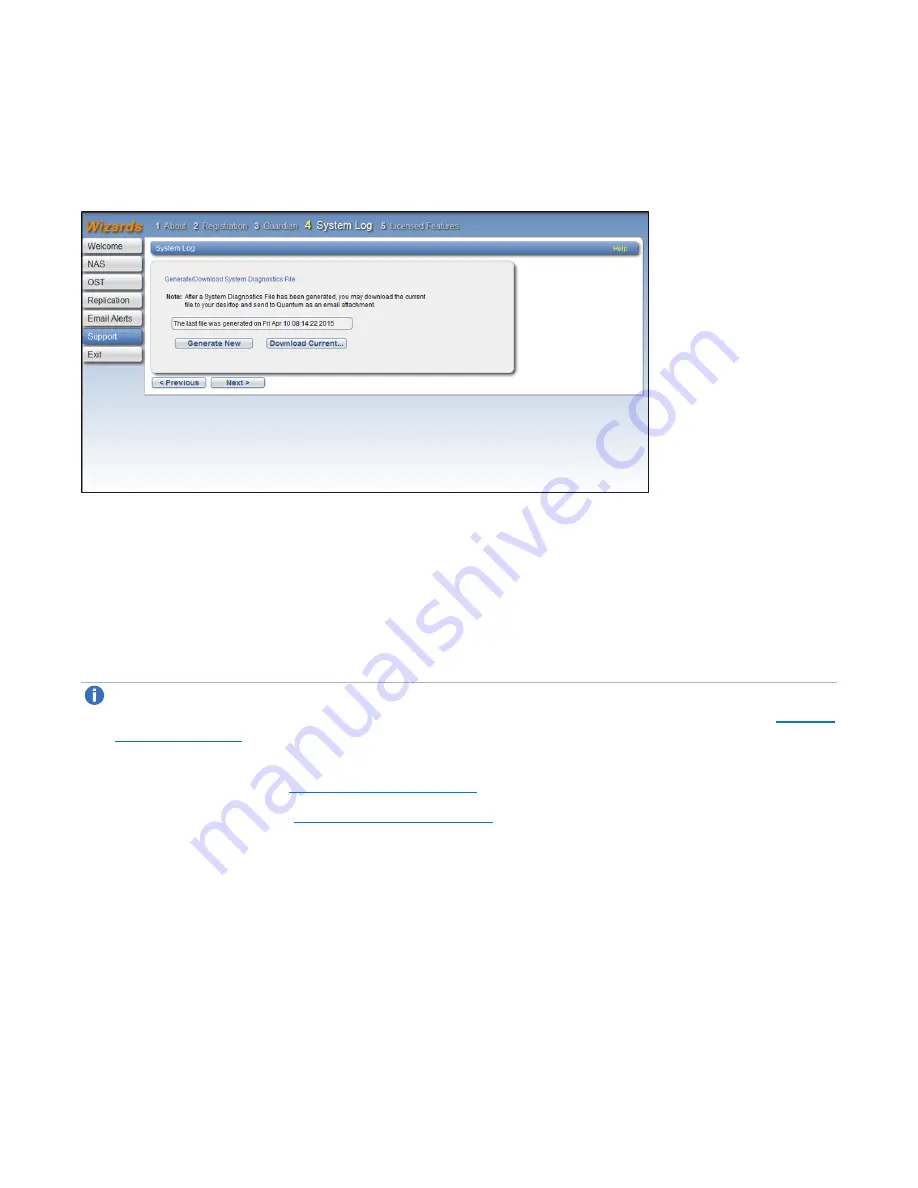
Figure 75: 

Support Wizard: System Log

Step 5: Licensed Features

Add a license key to enable new functionality on the DXi4700. To install a license key, you must first obtain a 
License Certificate containing an authorization code.

Contact your Quantum sales representative to purchase a license. After you purchase the license, you will 
receive a License Certificate containing an authorization code.

Note: 

Some licenses are pre-installed on the DXi4700. In addition, License Certificates for some 

licenses may be included with the DXi4700. For more information about licensed features, see 

License 

Keys on page 349

.

 1.  Select the DXi system serial number (displayed under 

Enable Licensed Features

) and press 

<Ctrl+C>

 to copy it (see 

Figure 76 on the next page

).

 2.  Click the link for Quantum

’s License Key Management

 site.

The 

License Key Management

 page displays.

 3.  Click to place the cursor in the 

Serial Number

 box and press 

<Ctrl+V>

 to paste the DXi system serial 

number.

 4.  Click 

Submit

.

The 

Licensed Feature

 page displays.

 5.  Enter the authorization code (printed on the License Certificate) and click 

Get License Key

.

The 

Licensed Feature

 page returns a license key. Select the license key and press 

<Ctrl+C>

 to copy 

it. You should also print out or write down the license key, or save it to a text file, for future use.

Содержание DXi4700

Страница 1: ...6 68551 02 Quantum DXi4700 with DXi 3 4 0 Software User s Guide...

Страница 2: ...ion of the law TRADEMARK STATEMENT Artico Be Certain and the Q brackets design DLT DXi DXi Accent DXi V1000 DXi V2000 DXi V4000 FlexTier GoVault Lattus NDX the Q logo the Q Quantum logo Q Cloud Quantu...

Страница 3: ...ckup Data Providing Automated Disaster Recovery Protection 16 Enterprise Features Provide Secure Repository 16 Features and Benefits 17 Determining the DXi4700 Model 18 Data Reduction 19 Data Deduplic...

Страница 4: ...36 DXi4700 Node Rear Panel Features 39 DXi4700 Node 1 GbE Ethernet 42 DXi4700 Node 10 GbE Ethernet Port Indicators 43 DXi4700 Node 10 GBase T Ethernet Port Indicators 44 DXi4700 Node Power Supply Ind...

Страница 5: ...er 4 Configuration Wizards 67 Configuration Wizards 67 NAS Wizard 69 VTL Wizard 75 OST Wizard 83 Replication Wizard 88 Users Wizard 95 Email Alerts Wizard 101 Support Wizard 105 Chapter 5 Home Page 11...

Страница 6: ...s 177 Activity Log 178 Chapter 8 Alerts 181 Alerts 181 Admin Alerts 182 Service Tickets 183 Chapter 9 Configuration 190 DXi4700 Configuration Overview 190 NAS Configuration 191 NAS Summary 192 Windows...

Страница 7: ...62 Physical Device Discovery 263 Scheduler 265 Notifications 272 Email 273 SNMP 280 System 290 Network 290 Date Time 302 Security 304 Manage Users 319 Client Plug Ins 322 App Environment 323 Redirect...

Страница 8: ...s 367 DXi4700 Interfaces 369 DXi4700 G1 Power Requirements 370 DXi4700 G2 Power Requirements 372 DXi4700 Environmental Specifications 373 DXi4700 G1 Environmental Specifications 373 DXi4700 G2 Environ...

Страница 9: ...Contents Quantum DXi4700 User s Guide 9 Replication Problems 383 Temperature Problems 383...

Страница 10: ...l Web interface l Basic troubleshooting l Service menus and FRU replacement Audience This manual is written for Quantum DXi4700 operators system administrators and field service engineers Note It is...

Страница 11: ...es important information related to the main topic Caution Caution indicates potential hazards to equipment or data WARNING Warning indicates potential hazards to personal safety l Right side of the s...

Страница 12: ...Preface Quantum DXi4700 User s Guide 12 Contacts For information about contacting Quantum including Quantum office locations go to http www quantum com aboutus contactus index aspx...

Страница 13: ...date contact information add attachments and receive status updates via email Online Service accounts are free from Quantum That account can also be used to access Quantum s Knowledge Base a comprehen...

Страница 14: ...Xi4700 User s Guide 14 Worldwide End User Product Warranty For more information on the Quantum Worldwide End User Standard Limited Product Warranty http www quantum com serviceandsupport warrantyinfor...

Страница 15: ...g sections Overview 16 Features and Benefits 17 Determining the DXi4700 Model 18 Data Reduction 19 Space Reclamation 20 Remote Replication 20 DXi4700 System 21 Hard Drive Storage 22 Supported RAID Con...

Страница 16: ...Protection With the DXi4700 users can transmit backup data from a remote site to a central secure location to reduce or eliminate media handling DXi Series replication is asynchronous automated and o...

Страница 17: ...PTT capability that writes data from virtual cartridges directly to a tape library to create removable media for long term retention It is supported by o Veritas NetBackup under VTL and OST implement...

Страница 18: ...four post EIA 19 server rack Note Quantum recommends installing the DXi4700 system in a controlled or restricted area and using strong private passwords to prevent access by untrained personnel In ad...

Страница 19: ...uantum s patented data deduplication technology to dramatically increase the role that disk can play in data protection With DXi Series solutions users can retain 10 to 50 times more backup data on fa...

Страница 20: ...backup jobs occur the data deduplication engine searches for new data entering the DXi and uses a variable length compression algorithm to compare new data to existing data in the block pool Unique bl...

Страница 21: ...hat supports the same protocol as the DXi4700 NAS or VTL That is a DXi4700 NAS system can only replicate data to a DXi that supports NAS Similarly a DXi4700 VTL system can only replicate data to a DXi...

Страница 22: ...00 Multi Protocol configurations present the drive storage area as VTL partitions see Virtual Tape Storage on page 24 NAS shares or OST LSUs Logical Storage Units see Network Attached Storage NAS on p...

Страница 23: ...h support 12 high capacity 4 TB hard disk drives see Figure 6 below The Expansion module hard drives are used for data storage All hard disk drives are mounted and pre assembled in drive carriers see...

Страница 24: ...on allows the storage space on these hard drives to appear to the backup application as tape cartridges DLT or LTO Data is stored on the hard drives through an interface that appears as a tape library...

Страница 25: ...are supported l CIFS SMB Protocol below l NFS Protocol on the next page l Application Specific Protocol on the next page CIFS SMB Protocol The CIFS Common Internet File System SMB Server Message Bloc...

Страница 26: ...ons or leave the ACL Access Control List as is if the server is set up in a fully trusted environment NFS Protocol The NFS Network File System protocol allows network users to access shared files stor...

Страница 27: ...d are supplied by Quantum To use the DXi in OST mode you must configure an OST storage server and LSUs on the DXi You must also map the LSUs on the NetBackup server so that NetBackup can perform backu...

Страница 28: ...nger the rebuild will take and the longer the system is vulnerable to possible data loss The DXi4700 Node and Expansion modules JBODs use RAID 6 volumes for data storage see Figure 12 below Figure 13...

Страница 29: ...help you identify potential problems and optimize system operation For more information refer to the DXi Advanced Reporting User s Guide 6 67353 Network Configuration During network configuration eac...

Страница 30: ...re enabled through licensing options which are available through the remote management console see License Keys on page 349 Licenses are either factory installed on the DXi4700 or they are available t...

Страница 31: ...a maximum of 3 concurrent path to tape physical tape drives using Backup Application Specific NDMP or OST Direct to Tape License key is pre installed on all DXi4700 Multi Protocol systems The Backup...

Страница 32: ...Supported Tape Libraries in Backup Application Specific Vendor Tape Library Quantum Scalar i40 and i80 Scalar i500 Scalar i2000 and i6000 Scalar 24 Scalar 50 PX502 PX500 PX720 Dell PV132T PVT136T ML60...

Страница 33: ...ual Media How Many and What Size There is no correct answer to this question as it really depends on your backup regime and the backup application in use A DXi system does not preallocate disk space w...

Страница 34: ...amount of free space available on the DXi For example if you have a virtual tape cartridge size of 400 GB but only 300 GB of free space is available on the DXi the backup will fail when attempting to...

Страница 35: ...t data for the DXi4700 system such as metadata and indexes and provides data storage Depending on the configuration the Node contains 6 or 12 hard drive carriers In addition all network connections ar...

Страница 36: ...ode Front Panel Features and Indicators Figure 15 below shows the controls indicators and connectors located behind the optional rack bezel on the front panel of the DXi4700 G1 Node Figure 16 on the n...

Страница 37: ...lights when the system power is on The power button controls the power supply output to the system WARNING Turning off the power removes the main power but keeps standby power supplied to the Node Bec...

Страница 38: ...can be used to locate a particular system within a rack When one of these buttons is pressed the system status indicator on the rear flashes until one of the buttons is pressed again Table 2 DXi4700 N...

Страница 39: ...types l 10 GbE optical cable lengths of up to 300 meters with OM3 cables and up to 100 meters with OM2 cables Quantum recommends using the two 10 meter LC to LC type optical cables that are shipped wi...

Страница 40: ...Chapter 2 Basic Operations DXi4700 Node Quantum DXi4700 User s Guide 40 Figure 17 DXi4700 G1 Node Rear View Figure 18 DXi4700 G2 Node Rear View...

Страница 41: ...m identification connector Not used 3 iDRAC port For Quantum service use only 4 Serial connector For Quantum service use only 5 VGA connector Use of connected peripheral devices such as a USB keyboard...

Страница 42: ...onal 2 x 10 GbE Ethernet ports For data ingest read Cannot be used with 2 x 10 GBase T Ethernet ports 15 Multi Protocol configurations only 2 x 8 Gb Fibre Channel ports For PTT ingest read 16 VTL and...

Страница 43: ...ax ports The 10 GbE adapter with dual optical or Twinax ports has two LED indicators for each 10 GbE port see Figure 20 below Link indicator l Off Indicates the port is not connected to the network l...

Страница 44: ...ted to the network at less than its maximum port speed Activity Indicator l Blinking green Indicates network data is being sent or received Figure 21 DXi4700 10 GBase T Ethernet Port LEDs 1 Activity I...

Страница 45: ...is green Figure 22 DXi4700 Node Power Supply LED 1 Power supply status indicator and handle DXi4700 Expansion Module The DXi4700 Expansion modules JBODs are used to provide additional capacity backup...

Страница 46: ...Indicators l DXi4700 Expansion Module Power Supply Indicators DXi4700 Expansion Module Front Panel Features and Indicators Figure 23 below shows the controls indicators and connectors located behind t...

Страница 47: ...al Troubleshooting on page 379 2 Power LED The power LED lights when at least one power supply is supplying power to the enclosure 3 DXi4700 G1 only Split mode LED Not used 4 System identification but...

Страница 48: ...osure management module EMM 1 4 600 watt hot swappable power supply P SU 1 5 Power switches 2 Figure 25 below shows the connectors located on the rear panel of the DXi4700 G2 Expansion module Figure 2...

Страница 49: ...n 1 System status indicator Blinks blue when the system identification button is pushed You can identify a particular enclosure in a rack using the system identification indicator 2 Debug port Not use...

Страница 50: ...nctioning properly Lights amber when the enclosure does not boot or is not properly configured Blinks green quickly when a firmware download is in progress Blinks green slowly when a peer auto update...

Страница 51: ...whether a power fault has occurred see Figure 28 below l DC Power Lights green when the DC output voltage is within the limit l Power supply cooling fan fault Lights amber when a fault with the power...

Страница 52: ...ring this time l Blinks green two times per second Identify drive preparing for removal l Blinks green amber and off Drive predicted failure l Blinks amber four times per second Drive failed l Blinks...

Страница 53: ...em power on the DXi4700 system components in the following order 1 Turn on both power switches on the back of each Expansion module JBOD see Figure 30 below Wait 30 seconds for the Expansion modules t...

Страница 54: ...de Serial Number You need this number for a Node replacement component Expansion Module JBOD Serial Number You need this number for an Expansion module replacement component You can locate the system...

Страница 55: ...Chapter 2 Basic Operations Locating DXi4700 Serial Numbers Quantum DXi4700 User s Guide 55 Figure 32 DXi4700 Node Information Tag 1 Information Tag Pullout with System Serial Number...

Страница 56: ...ual tape library and Fibre Channel status and configuration display only for DXi4700 VTL and Multi Protocol configurations Similarly management pages and information related to NAS network attached st...

Страница 57: ...me 40 or later l Microsoft Internet Explorer 11 Web Browser Tips l If you are experiencing browser issues please update to the latest browser version l For correct operation of the remote management c...

Страница 58: ...gement console l Service Allowed to view and change information on the DXi4700 remote management console Password changes are not allowed l LDAP AD Allows users assigned system access through a Lightw...

Страница 59: ...ocal or LDAP and there were previous unsuccessful DXi4700 logins a dialog box appears indicating the previous number of unsuccessful login attempts see Figure 35 below Click OK to continue Figure 35 U...

Страница 60: ...e same time it is possible that one Administrator s changes will overwrite the other s Always coordinate configuration changes with other Administrator users Logging Off of the DXi4700 When you are do...

Страница 61: ...t page Status Displays the operating state of the DXi4700 l Normal Green The system is operating correctly l Attention Yellow There is a problem with the system Note The state displays Attention durin...

Страница 62: ...up disk space see Space Reclamation on page 346 Logout Click to end your remote management session User Username assigned to the user local or LDAP Role Role assigned to the local user Admin Monitor o...

Страница 63: ...ree up disk space see Space Reclamation on page 346 Space reclamation and compaction end when the DXi4700 exits the Low Space state When the DXi4700 enters the Critical Reserve Space state backup inge...

Страница 64: ...licking Attention displays the message A previous unclean shutdown of the DXi has required a data verification to commence While in this condition the DXi is operational but performance may be severel...

Страница 65: ...g page Some pages include sub tabs that display pages with additional information and options To view a graphical map of all remote management pages click Map on the main menu see On the map click the...

Страница 66: ...ected to do so by the documentation do not use your Web browser s Back Forward or Refresh buttons when navigating in the remote management console Doing so may have unintended effects Instead always u...

Страница 67: ...e the wizards to quickly configure the most important features of the system including storage presentation and data replication Each wizard leads you step by step through the configuration process Th...

Страница 68: ...system see Replication Wizard on page 88 Users Helps you configure the DXi4700 to manage users for Application Specific shares OST storage servers PTT Backups Share Administrators and Workgroup Users...

Страница 69: ...B NFS or Application Specific protocols The wizard also provides a link for downloading and installing an Application Specific Plug in on your backup host Additional Information l The NAS Wizard is av...

Страница 70: ...on a Windows network Note To disjoin a domain see Windows Domain on page 198 2 In the Domain Workgroup Name box enter the name of the domain or workgroup the DXi4700 is joining 3 Active Directory only...

Страница 71: ...e Domain Admins group has the right to join the domain In addition any user can join the domain if they are specifically delegated this right by a member of the Administrators group Administrator Pass...

Страница 72: ...n a UNIX or Linux network l Application Specific Select the Application Specific option to create an Oracle RMAN share Enable deduplication CIFS SMB NFS shares only Select the check box to enable data...

Страница 73: ...igure 44 on the next page If necessary click Previous to return to a previous step to make changes 2 To make changes to a NAS share you added first select the share and click Delete to delete the shar...

Страница 74: ...fic RMAN Plug in click Client Plug in Download see Figure 45 on the next page On the download page download the correct RMAN Plug in for your backup application and operating system Also on the downlo...

Страница 75: ...overing hosts and mapping partitions to hosts Additional Information l The VTL Wizard is available in DXi4700 VTL and Multi Protocol configurations only l You cannot use the VTL wizard to edit or add...

Страница 76: ...Quantum DXi4700 User s Guide 76 Figure 46 VTL Wizard About Step 2 Add Partition 1 Under Partition Settings enter information about the partition see Figure 47 on page 78 Partition Setting Description...

Страница 77: ...on If you select Quantum DXi4700 the host and backup application recognize the device as a Quantum DXi4700 Note Quantum recommends that you set the library model to Quantum DXi4700 for best compatibil...

Страница 78: ...deduplication Quantum recommends that you enable data deduplication to optimize disk usage Note Data deduplication is enabled by default You cannot enable or disable data deduplication after the part...

Страница 79: ...the cartridge sequence You can enter any alpha numeric string for the starting barcode Subsequent barcodes are incremented accordingly For example if you enter AA the cartridges are numbered AA0000 AA...

Страница 80: ...ot see the world wide name WWN of the host make sure the host is connected to a Fibre Channel port on the DXi4700 and click Discover Remote Hosts again The Backpanel Locations section displays a graph...

Страница 81: ...ssociate with the group Remote Host Select the host initiator to associate with the group Target Select the target port to associate with the group Note The Backpanel Locations section displays a grap...

Страница 82: ...e you enable this option 3 Click Add 4 Optional To map additional hosts repeat Steps 1 3 5 Click Next to continue Figure 50 VTL Wizard Map Remote Hosts Step 6 Confirm 1 Review the settings you selecte...

Страница 83: ...nformation l The OST Wizard is available in DXi4700 NAS and Multi Protocol configurations only l If you plan to use Concurrent Optimized Duplication you should complete the Replication wizard before b...

Страница 84: ...about the storage server see Figure 53 on the next page Storage Server Information Description Name Enter the name of the storage server Caution Do not use an underscore _ in the name of the storage s...

Страница 85: ...as already been replicated to the target storage server Note To configure the target DXi see Replication Wizard on page 88 Note When Concurrent Optimized Duplication is enabled all data on the storage...

Страница 86: ...s the Available Capacity option you cannot change the LSU to use the Specific Capacity option Instead you must delete the LSU then add a new LSU and choose the Specific Capacity option see Deleting an...

Страница 87: ...ervers Added LSUs Added and Users Added tables If necessary click Previous to return to a previous step to make changes 2 To make changes to storage servers or LSUs you added click Previous to return...

Страница 88: ...ted data to another DXi system as part of disaster recovery plan The wizard can also help you configure the DXi4700 to receive replicated data from another DXi system Sources send replicated data and...

Страница 89: ...o pause replication to the target and then click Delete to remove the target Before specifying a target make sure you have completed the Replication wizard on the target DXi The target DXi must be con...

Страница 90: ...ource IP Address field enter the IP address that is used to uniquely identify the source DXi to the target This may be different than the actual network IP address of the source DXi If the target syst...

Страница 91: ...gure the share to replicate its data to another DXi system enter the following information under Send a Select the Enable replication for selected share check box to enable replication for the share b...

Страница 92: ...following information under Receive a Optional Select the Enable Directory File based replication to this DXi check box to enable Directory File Based Replication for the share and then enter a Sync I...

Страница 93: ...partition b Optional Select the Enable Cartridge based replication to target check box to enable Cartridge Based Replication for the partition and then enter a Sync ID in the box With Cartridge Based...

Страница 94: ...escription Locked The partition is not allowed to receive new Cartridge Based Replication data Unlocked The partition is allowed to receive new Cartridge Based Replication data Note You cannot configu...

Страница 95: ...Application Specific Oracle RMAN users l Path to Tape PTT users DXi4700 Muliti Protocol configuration only The wizard can also create and configure Share Administrators for use with Active Directory A...

Страница 96: ...ain Step 2 Add Authorized Backup Users 1 Enter information about the authorized user see Figure 64 on page 98 User Information Description Username Enter the name of the authorized user Password Enter...

Страница 97: ...to Tape PTT The following applications are supported for backup application specific path to tape l Veritas NetBackup l Veritas Backup Exec l EMC Networker Note EMC NetWorker 8 1 and later do not sup...

Страница 98: ...being locked out of shares or directories 2 Click Apply The user displays in the Authorized Backup Users Summary table 3 Optional To add additional users click Add and then repeat Steps 1 2 To remove...

Страница 99: ...ick Next to continue Figure 65 Users Wizard Add Share Administrators Step 3 Confirm 1 Review the users you created to make sure they are correct see Figure 66 on the next page The users to be added di...

Страница 100: ...Authorized Backup Users Added and Share Administrators Added tables If necessary click Previous to return to a previous step to make changes 2 To make changes to the users you added click Previous to...

Страница 101: ...bout sending e mail alerts see Email on page 273 To begin the Email Alerts wizard on the Wizards menu click Email Alerts Step 1 About 1 Read the information about the wizard see Figure 68 below 2 Clic...

Страница 102: ...configured check box to have system generate administration alerts to notify you if an e mail server is not configured 5 Recommended Select the Enable automatic emails to Quantum check box to periodi...

Страница 103: ...that a serious problem occurred and needs to be resolved but it does not necessarily need to be fixed immediately The operation and performance of the DXi4700 may be degraded l All Send e mail notific...

Страница 104: ...Recipients Step 4 Confirm 1 Review the settings you selected to make sure they are correct If necessary click Previous to return to a previous step to make changes see Figure 71 on the next page 2 Af...

Страница 105: ...stem with DXi The wizard also guides you through other tasks that will aid DXi customer support in assisting you such as downloading StorageCare Guardian and creating a system log To begin the Support...

Страница 106: ...n You must register your DXi4700 to receive service and support from DXi 1 Click the link for Quantum s Product Registration site see Figure 73 below 2 Follow the onscreen instructions to register you...

Страница 107: ...tion on the StorageCare Guardian download page 3 When you are finished switch back to the Support wizard 4 Click Next to continue Figure 74 Support Wizard Guardian Step 4 System Log This system diagno...

Страница 108: ...cates for some licenses may be included with the DXi4700 For more information about licensed features see License Keys on page 349 1 Select the DXi system serial number displayed under Enable Licensed...

Страница 109: ...he Support wizard 7 Enter the license key in the New Key box and then click Add The license key is added to the system and the new feature is enabled 8 Optional To add additional license keys repeat S...

Страница 110: ...management console is the Home page see Figure 77 on the next page Use the Home page to see important performance information at a glance including disk usage data reduction statistics and replication...

Страница 111: ...ivity on page 119 Note Disk usage statistics data reduction statistics replication statistics and current activity are updated every 30 seconds Figure 77 DXi Home Page System Overview The DXi System O...

Страница 112: ...on indicates if a software upgrade is available for the DXi4700 Click to upgrade the software see Checking For Software Upgrades on page 356 Data at Rest Encryption The status of Data at Rest encrypti...

Страница 113: ...ght side of meter indicates available disk space The left side of the meter changes color based on the amount of remaining free disk space and the state of the DXi4700 For more information see Low Spa...

Страница 114: ...a Not Intended for Deduplication The amount of data on DXi that do not have deduplication enabled System Metadata The amount of disk space used for internal operations of the DXi including system conf...

Страница 115: ...Cartridge Based Replication or incoming data from Failback replication Shares Partitions The amount of data stored on the DXi via local I O This includes incoming data from Directory File or Cartridge...

Страница 116: ...Cumulative Statistics The Send Settings Cumulative Statistics section displays statistics for all data sent from the system since system installation or since Send cumulative replication statistics we...

Страница 117: ...as automatically paused replication due to a problem for example low disk space or a problem on the target system To see more information about the problem that occurred click Admin at the top of the...

Страница 118: ...un configured and configured again The replication send statistics for a particular target are reset when it is un configured Only new replications to the target will be considered when calculating av...

Страница 119: ...eive Rate The average receive rate in MB s of data received over the network during replication or failback actual size of data sent over the network divided by the amount of time required to complete...

Страница 120: ...nel VTL and Multi Protocol configuration only The amount of data received In and sent Out by all Fibre Channel ports in MB s Click to view details statistics for Fibre Channel performance in Advanced...

Страница 121: ...tilization was reduced by using Optimized Duplication Space Reclamation The status of space reclamation Not running or Percent complete Click to start or stop space reclamation see Space Reclamation o...

Страница 122: ...r recovery plan Replication allows you to configure the DXi4700 to create a copy of your data on another DXi system at scheduled intervals or manually as needed In the event of a disaster in which the...

Страница 123: ...om Veritas l Data Protector from HP l Data Protection Manager from Microsoft l NetBackup from Veritas l NetWorker from EMC l Simpana from CommVault l Tivoli Storage Manager from IBM l Veeam Backup and...

Страница 124: ...ed snapshot After you recover a share or partition it is recreated on the target system and is available for use Once the source system becomes available again you can perform a failback operation to...

Страница 125: ...LSU for Automatic Image Replication For information about configuring and using OST optimized duplication and Automatic Image Replication see Replicating OST Data on page 232 Multiple Target Replicati...

Страница 126: ...original location see Task Overview Performing a share or partition Failback on page 128 l Recover data from a lost or damaged share or partition see Task Overview Recovering a Replicated Share or Par...

Страница 127: ...et system in the background to optimize the replication process a snapshot that preserves the complete structure of your data is sent to the target system only when a scheduled or manual replication j...

Страница 128: ...tem using a received snapshot When you recover a share or partition it is recreated on the target system just as it was at the point in time when the snapshot was saved To recover a replicated share o...

Страница 129: ...partition on the original source system see Performing a Failback For a Share on page 141 or Performing a Failback For a Partition on page 151 The share or partition is now available on the original s...

Страница 130: ...cating a Share or Partition on page 135 l Synchronize a share or partition configured for Directory File or Cartridge Based Replication see Synchronizing a Share or Partition on page 136 l View replic...

Страница 131: ...ets l Clicking the toggle next to Shares or Partitions will turn replication on or off for all shares or partitions Replication Jobs Information Description Target The hostname or IP address of the co...

Страница 132: ...tition are displayed Replication and Synchronization Status A replication job can have one of the following statuses In Progress The replication job is in progress Partial A replication job was partia...

Страница 133: ...or partition will be removed 4 Select the check box for each replication target you want to replicate the share or partition to You must select at least one target When the share or partition is repl...

Страница 134: ...re or partition must match the Sync ID for the target share or partition If Cartridge Based Replication is enabled for a VTL partition the following media behaviors apply l When a cartridge is exporte...

Страница 135: ...ox for each replication target you want to replicate the share or partition to You must select at least one target When the share or partition is replicated its data will be sent to all selected targe...

Страница 136: ...escribed above When synchronization is manually initiated for a share or partition the replication queue for that share or partition is cleared All file write and delete requests are queued after the...

Страница 137: ...cation state for the file directory or cartridge Progress The percentage complete for replication of the file directory or cartridge Estimated Duration The estimated time it will take to complete repl...

Страница 138: ...llows you to manage incoming replication activity for NAS shares You can recover a replicated share on the target system if the source system is unavailable Once the source system becomes available yo...

Страница 139: ...e Figure 87 below Figure 87 Received Snapshots Page Tasks Use the Received Snapshots page to perform the following tasks l View information about received snapshots see Snapshots List on the next page...

Страница 140: ...lay detailed information about the most recent replication job Note Click a column heading to sort the rows in the table by that column Click the column heading again to reverse the sort order Recover...

Страница 141: ...Perform a failback of a NAS share if a source system that was previously unavailable becomes available again When you failback a share you select a received snapshot The DXi4700 copies the snapshot f...

Страница 142: ...Caution Select 128 bit encryption if you are sending data to a DXi running a system software version prior to DXi 2 1 Software Note AES encryption options are available only if the Data in Flight lice...

Страница 143: ...ted with the snapshot see Enabling Replication For a Share or Partition l On the target system delete the source system associated with the snapshot from the list of allowed replication sources see De...

Страница 144: ...ived from Started The time the recovery job was started Finished The time the recovery job finished Status The status of the recovery job Success In Progress or Failed To delete information for a reco...

Страница 145: ...e following tasks l To delete information for a failback job select it in the Snapshot Failback Jobs section and click Delete Job Info l To abort a failback job that is in progress select it in the Sn...

Страница 146: ...Eligible to Receive Directory File Based Data The Shares Eligible to Receive Directory File Based Data section displays information for all NAS shares on the DXi4700 that are eligible to receive Dire...

Страница 147: ...ng Directory File or Cartridge Based Replication To configure a target share for Directory File Based Replication 1 Select the share and click Edit The Edit Share Settings page displays see Figure 93...

Страница 148: ...le or directory to be replicated State The replication state of the file or directory Click Refresh to update the statistics in the Unpack Queue Click OK to return to the Directory File Based page Rec...

Страница 149: ...on is received from a source system it is saved as a snapshot The snapshot contains all of the data necessary to fully recover or failback the partition to the point in time when the snapshot was save...

Страница 150: ...the most recent replication job finished Status The status of the most recent replication job see Replication and Synchronization Status Click the status to display detailed information about the mos...

Страница 151: ...When a VTL partition is recovered on a target system a new serial number is created for the partition l After you recover a partition if you want to continue backing up data to the partition you must...

Страница 152: ...encryption when sending the snapshot to the destination Caution Select 128 bit encryption if you are sending data to a DXi running a system software version prior to DXi 2 1 Software Note AES encrypti...

Страница 153: ...delete a snapshot if a failback operation is in progress for the snapshot Wait for the failback operation to complete or abort the operation see Failback Jobs on the next page To delete a snapshot 1 D...

Страница 154: ...was received from Started The time the recovery job was started Finished The time the recovery job finished Status The status of the recovery job Success In Progress or Failed To delete information fo...

Страница 155: ...perform the following tasks l To delete information for a failback job select it in the Snapshot Failback Jobs section and click Delete Job Info l To abort a failback job that is in progress select it...

Страница 156: ...to Receive Cartridge Based Data The Partitions Eligible to Receive Cartridge Based Data section displays information for all VTL partitions on the DXi4700 that are eligible to receive Cartridge Based...

Страница 157: ...Cartridge Based Replication 1 Select the partition and click Edit The Edit Partition Settings page displays see Figure 101 below Figure 101 Edit Partition Settings Page 2 Select the Enable to receive...

Страница 158: ...he following information Barcode The barcode of the cartridge to be replicated State The replication state of the cartridge Click Refresh to update the statistics in the Unpack Queue Click OK to retur...

Страница 159: ...eplication Performance on the next page Replication Service The replication service controls replication and failback traffic on the DXi4700 You can pause each replication target independently l Click...

Страница 160: ...s completed the system disables replication The system will not be able to replicate data for any shares or partitions until you click Enable Note To disable replication for a single share or partitio...

Страница 161: ...enu and then click the Reports tab see Figure 104 below Figure 104 Reports Page Use the Reports page to perform the following tasks To generate a new replication report click Generate New l To downloa...

Страница 162: ...tus 177 Activity Log 178 Status The Status page allows you to view status information for the DXi4700 hardware as well as disk usage information Note Status information is gathered by the system every...

Страница 163: ...system board host bus adapters network ports and storage arrays To access the Hardware page click the Status menu and then click the Hardware tab The Hardware page contains the following tabs Summary...

Страница 164: ...component name to see detailed information see Details below Component Status The overall status of the main component Details The Details page allows you to view detailed information about the hardw...

Страница 165: ...de 165 Figure 106 System Board Page The System Board page displays the following information Component The name of the component on the system board Type The component type Sensor Fan or Power Supply...

Страница 166: ...cess the Host Bus Adapters page on the Details page click the Host Bus Adapters tab see Figure 107 below Figure 107 Host Bus Adapters Page The Host Bus Adapters section displays the following informat...

Страница 167: ...ork Ports page on the Details page click the Network Ports tab see Figure 108 below Figure 108 Network Ports Page The Network Ports page displays the following information Component The number of Ethe...

Страница 168: ...specific manufacturer version number or release date for the item Click Update to refresh the table with the latest information Note In some cases when updating firmware versions the remote management...

Страница 169: ...escription Free Space The disk space that can be used for new deduplicated or non deduplicated data Reclaimable Space The disk space that is occupied by outdated deduplicated data and which will be au...

Страница 170: ...AS and Multi Protocol configurations only The amount of data stored in deduplicated shares configured in Network File System NFS format for Linux systems This includes incoming data from Directory Fil...

Страница 171: ...TL Status page allows you to view information about virtual tape library VTL components including tape drives storage slots and cartridges You can view a physical or logical representation of VTL comp...

Страница 172: ...slots in the VTL see Storage and I E Slots below 4 Click Hide I E Slots or Show I E Slots to hide or show the virtual I E slots in the VTL see Storage and I E Slots below Tape Drives The Tape Drives...

Страница 173: ...space on the cartridge expressed as a percentage of the total capacity Used Capacity x 100 l Click a cartridge to view detailed information about the cartridge l When the storage system is degraded a...

Страница 174: ...l native raw data size because the data is compressed before it is written to the media Used Percent The amount of currently used space on all cartridges in the partition expressed as a percentage of...

Страница 175: ...formation for that drive Performance write The average write speed to the partition in MB s Note Click the Information button i next to a partition to display detailed information about the partition...

Страница 176: ...ers Bandwidth Reduction The percentage by which network bandwidth utilization was reduced by using RMAN or enabling Accent Statistics for individuals media servers display in the tables in each sectio...

Страница 177: ...OST Status page click the Status menu and then click the OST tab see Figure 115 below Figure 115 OST Status Page Combined Concurrent Optimized Duplication statistics for all media servers display at...

Страница 178: ...the Logs tab see Figure 116 below Figure 116 Activity Log Page Tasks Use the Activity Log page to perform the following tasks l View information about activities that have been recorded in the log see...

Страница 179: ...To rearrange the order of the columns click and drag a column heading left or right To show or hide columns click the arrow to the right of a column heading In the pop up menu point to Columns then se...

Страница 180: ...g l To delete a log entry select the entry and click Delete l To delete all entries in the activity log click Delete All Downloading the Activity Log Use the toolbar above the Administrative Activity...

Страница 181: ...hable violation of the law Artico Be Certain and the Q brackets design DLT DXi DXi Accent DXi V1000 DXi V2000 DXi V4000 DXiV Series FlexSpace FlexSync FlexTier Lattus the Q logo the Q Quantum logo Q C...

Страница 182: ...Figure 119 Admin Alerts Page The Admin Alerts page displays the following information about administration alerts Alert The name of the administration alert Library The library or partition where the...

Страница 183: ...ree priority levels Priority Level Description Low A minor problem occurred and needs to be resolved but the operation and performance of the DXi4700 are not significantly affected Middle A serious pr...

Страница 184: ...iority The priority level of the service ticket Low Middle or High Last Update The date when the service ticket was last updated by the system Details A brief description of the service ticket Close A...

Страница 185: ...page 189 Viewing a Service Ticket View a service ticket to see detailed information about the problem that caused the system to generate the ticket and to view recommended actions To view a service ti...

Страница 186: ...ew Recommended Actions to view instructions for resolving the problem The recommended actions display in a new Web browser window see Figure 122 on the next page Follow the instructions to resolve the...

Страница 187: ...u have taken or a record of calls made to Quantum customer support The additional information is saved with the service ticket and remains associated with the ticket even after it is closed To modify...

Страница 188: ...ticket to send the ticket details to an e mail address You can also add optional comments to the e mail Note To enable the DXi4700 to send e mail you must specify an outgoing e mail server see Server...

Страница 189: ...the caused the system to generate the ticket is resolved You can also close all service tickets that are currently open Note You can still view and modify a ticket after it has been closed To close a...

Страница 190: ...uration 253 PTT Configuration 262 Scheduler 265 Notifications 272 System 290 Contacts 335 DXi4700 Configuration Overview The Configuration page allows you to configure the features of the DXi4700 incl...

Страница 191: ...u can also join the DXi4700 to a Windows domain or workgroup and manage users Best Practices Guides The following DXi Best Practices Guides are available at www quantum com DXi4700BPG l Backup Exec fr...

Страница 192: ...access the NAS Summary page on the NAS page click the Summary tab see above and Figure 125 below Figure 125 NAS Summary Page Tasks Use the NAS page to perform the following tasks l View information ab...

Страница 193: ...rmation about changing the commit type of NFS shares see the DXi Series Command Line Interface CLI Guide Export Path The export path of the share different for CIFS SMB NFS and Application Specific RM...

Страница 194: ...ity of the DXi4700 as a NAS share that is compatible with standard backup applications You can add up to 128 shares When you add a share you must specify whether it uses the NFS protocol for Linux net...

Страница 195: ...on Specific option to create an Oracle RMAN share Hide from network browsing CIFS SMB shares only Select the check box to hide the share from network browsing If selected you cannot see the share when...

Страница 196: ...rver is set up in a fully trusted environment Editing a NAS Share Edit a NAS share to modify the settings for the share for example to change the description of the share or to select different option...

Страница 197: ...fter you add a user or host to the access list you cannot change their permissions Instead select the user or host in the access list and click Delete to remove them from the list Then add the user or...

Страница 198: ...323 To delete a NAS share 1 Select the share and click Delete You can select multiple shares to delete at once 2 Click Yes to confirm the deletion Windows Domain The Windows Domain page allows you to...

Страница 199: ...Additional Information When an SMB server is joined to a workgroup share security is managed directly from the remote management console For a CIFS SMB share security is provided through the read onl...

Страница 200: ...r the password for the user entered above 2 Click Apply Additional Information When the system is joined to the Active Directory domain share security is managed by the MMC Microsoft Management Consol...

Страница 201: ...n the NAS page click the Share Access tab see Figure 129 below and Figure 130 below Figure 129 Share Access Page Windows Workgroup Figure 130 Share Access Page Active Directory Tasks Use the Share Acc...

Страница 202: ...er has administrator privileges No if they do not Description A brief description of the workgroup user if available If the DXi4700 is joined to a Windows domain using Active Directory the Share Admin...

Страница 203: ...ns settings and prevents the workgroup user from being locked out of shares or directories 3 Click Apply After you create a workgroup user you can grant the user access to a NAS share see Share Access...

Страница 204: ...the workgroup user Confirm Password Enter the password again to confirm it Description Optional Enter a brief description of the workgroup user Grant Administrator Privileges Select the check box to a...

Страница 205: ...might not be available on the target system because the associated user and group do not exist there However common groups for example Administrators Users and Everyone are recognized on most Windows...

Страница 206: ...ell as create and work with virtual tape cartridges You can also map partitions to hosts Best Practices Guides The following DXi Best Practices Guides are available at www quantum com DXi4700BPG l Bac...

Страница 207: ...Use the Partitions Summary page to perform the following tasks l View information about existing VTL partitions see Partition List below l Add a new VTL partition to the system see Adding a VTL Partit...

Страница 208: ...Create to add media see Media Add on page 215 Slots The number of storage slots in the partition Deduplication The data deduplication state of the partition Enabled or Disabled Auto Export Auto expor...

Страница 209: ...is pre installed on all DXi4700 models To obtain a license for additional VTDs contact Quantum customer support l A virtual tape drive is considered active if a cartridge is loaded in the VTD Make su...

Страница 210: ...ation VTL Configuration Quantum DXi4700 User s Guide 210 Figure 136 Add VTL Partition Replication Settings Page 2 Under Partition Settings enter information about the partition Name Enter the name of...

Страница 211: ...tum DXi4500 or Quantum DXi8500 l Quantum DX3000 or Quantum DX5000 l Quantum PX500 or Quantum PX720 l ATL M2500 ATL P1000 or ATL P7000 If you select a library such as the ATL P1000 or ATL P7000 the DXi...

Страница 212: ...annot enable or disable data deduplication after the partition is added If data duplication is disabled then data compression is also disabled Enable Auto Export Select the check box to enable Auto Ex...

Страница 213: ...137 below Figure 137 Edit VTL Partition Replication Settings Page 2 If the partition is online click Offline to take the partition offline To edit a partition it must be offline 3 Under Partition Sett...

Страница 214: ...e Quantum recommends that you set the library model to Quantum DXi4700 for best compatibility If your backup application does not support the Quantum DXi4700 inquiry string select a different library...

Страница 215: ...Click Yes to confirm the deletion If the partition contains tape cartridges they are exported from the partition before it is deleted Changing Partition Mode Change the mode of a VTL partition to tak...

Страница 216: ...his case the total capacity of all media is more than the capacity of the DXi For guidance on selecting media quantity and size see Virtual Media How Many and What Size on page 23 To access the Media...

Страница 217: ...enter AA the cartridges are numbered AA0000 AA0001 AA0002 and so on If you enter a starting barcode with less than 6 characters zeroes are appended to the barcode to make it 6 characters long Media T...

Страница 218: ...he cartridges to work with Note Select UNASSIGNED to work with cartridges that are not assigned to any partition The table displays the following information for all virtual tape cartridges in the par...

Страница 219: ...Caution The Used value is not updated while the media is mounted Because of this the displayed Used value may be different from the real value for mounted media Capacity The total capacity of the tap...

Страница 220: ...20 to display all barcodes in the specified range Click the Quick Tip icon for additional examples 4 Select the cartridges to perform the action on The action is performed only for selected cartridges...

Страница 221: ...ber of cartridges displayed in the table enter a barcode or barcode range in the Barcode Filter box and click Apply Filter Use a hyphen to indicate a range and use an asterisk to indicate a wildcard S...

Страница 222: ...a partition the virtual devices are not visible from the host and drives cannot be destinations for move operations see Remote Host Access on the next page Caution If you unload a virtual tape cartrid...

Страница 223: ...ey are moved to the first available storage slot 8 Return the partition to an online state see Changing Partition Mode on page 215 Remote Host Access The Remote Host Access page allows you to configur...

Страница 224: ...s groups for each host To access the Remote Host Mapping page on the Remote Host Access page click the Remote Host Mapping tab see Figure 142 below Figure 142 Remote Host Mapping Page Tasks Use the Re...

Страница 225: ...ble by that column Click the column heading again to reverse the sort order Adding a Remote Host Access Group Add a host access group to associate a VTL partition with a host a Fibre Channel initiator...

Страница 226: ...ntrol LUN is not used in most environments This option is recommended for host access groups that contain an HP UX host It can also be used if hosts that are not assigned to any host access group exis...

Страница 227: ...ou can also add or remove virtual media changers or tape drives To edit a host access group 1 Select the group and click Edit The Edit Remote Host Mapping page displays see Figure 145 below Note If yo...

Страница 228: ...tion Helper If there are more than 10 drives in the partition the drive selection helper appears see Figure 144 on the previous page Drives in the partition can be batch selected by specifying the Fir...

Страница 229: ...host is made known to the DXi4700 if you enter the host ID on this page or if the host logs on to one or more Fibre Channel target ports If you do not see the world wide name WWN of the host make sure...

Страница 230: ...raphical representation of the Fibre Channel and Ethernet ports as they appear on the rear of the system Note A mapped green status indicates the host is currently logged on to one or more Fibre Chann...

Страница 231: ...he port OST Configuration The OST page allows you to configure the DXi4700 to present its storage capacity as storage servers using OpenStorage OST technology You can add one or more Logical Storage U...

Страница 232: ...up and Replication To access the OST page click the Configuration menu and then click the OST tab The OST page contains the following tabs l Storage Servers on page 234 l LSU on page 241 l Manage Remo...

Страница 233: ...and remote LSUs reside in different NetBackup domains This differs from optimized duplication which occurs between two LSUs residing within the same NetBackup domain Note For more information about co...

Страница 234: ...ST Manage Remote Users page 6 On the source system create a storage server and LSU and enable the LSU for Automatic Image Replication see Adding a Storage Server on page 236 For Remote Storage Server...

Страница 235: ...g_Storage_Server Storage Server List The Storage Server List displays the following information for all storage servers on the DXi4700 Storage Servers The number of storage servers that have been adde...

Страница 236: ...heading again to reverse the sort order l The connections of a storage server that are used equals the data streams plus one for each LSU polling A backup job may generate more than one data stream i...

Страница 237: ...r names are not case sensitive For example if you create a storage server named ost1 you cannot create another storage server named OST1 because the system considers the names to be the same Descripti...

Страница 238: ...u add an available capacity LSU to a storage server you cannot add additional LSUs to that same storage server Note After you add an LSU that uses the Available Capacity option you cannot change the L...

Страница 239: ...and target DXi must reside in different NetBackup domains Note To configure the target DXi see Replication Send on page 129 Remote LSU Name The name of the LSU in the remote storage server that will...

Страница 240: ...torage server Additional Information l To configure the target DXi see Replication Send on page 129 l When Concurrent Optimized Duplication is enabled all data on the storage server is duplicated not...

Страница 241: ...SU page to perform the following tasks l View information about existing LSUs see Logical Storage Unit List below l Add a new LSU to the system see Adding an LSU on the next page l Edit properties for...

Страница 242: ...ick a column heading to sort the rows in the table by that column Click the column heading again to reverse the sort order l The connections of a storage server that are used equals the data streams p...

Страница 243: ...After you add an LSU that uses the Available Capacity option you cannot change the LSU to use the Specific Capacity option Instead you must delete the LSU then add a new LSU and choose the Specific Ca...

Страница 244: ...eplication target you want to replicate images to You can select only a single target When images are replicated data will be sent to the selected target 6 If Automatic Image Replication is enabled sp...

Страница 245: ...disabled by default If enabled data on an LSU is automatically replicated to a remote LSU that resides on a DXi in a different NetBackup domain The timing of the duplication as well as the backup imag...

Страница 246: ...n the Logical Storage Unit List You cannot delete an LSU if it has more than zero currently active connections The number of active connections is displayed on the LSU page see Logical Storage Unit Li...

Страница 247: ...Remote User on page 249 Manage Remote Users List The Manage Remote Users list displays the following information for all remote users Name The name of the remote user Description A brief description...

Страница 248: ...name can contain the following characters a z A Z 0 9 _ and New Password Enter the password for the remote user Confirm New Password Enter the password again to confirm it Description Optional Enter...

Страница 249: ...once Target IP Mapping The Target IP Mapping page allows you to map a target data IP address to route all network traffic sent to the data IP address to the specified replication IP address instead Th...

Страница 250: ...To switch from using the replication channel to the OST channel for optimized duplication replication must be unconfigured To access the Target IP Mapping page on the OST page click the Target IP Mapp...

Страница 251: ...update the list with the latest information click Refresh Mapping a Target IP Address Add mapping for a target data IP address to route all network traffic sent to the address to the specified replica...

Страница 252: ...f traffic sent to the target data IP address no longer needs to be routed to a replication IP address To delete a mapped IP address select the IP address and click Delete Note You can select multiple...

Страница 253: ...rgets and allowed replication sources on the DXi4700 A source sends replicated data to 1 or 2 targets and a target receives replicated data from up to 10 sources A DXi4700 can act as both a source and...

Страница 254: ...is List The Target DXis list displays the following information for each target DXi Target The IP address of the target system that the DXi4700 is configured to send data to Status The replication sta...

Страница 255: ...to hide a column Note The statistics in the Target DXis list are for each target DXi rather than a cumulative total for all targets as is displayed on the Home page Adding a Replication Target Add a r...

Страница 256: ...ght license is installed see License Keys on page 349 l If TLS with AES 256 is selected the factory installed certificates are inadequate for security The factory installed certificates should be cons...

Страница 257: ...cally added to existing replication schedules You must add or edit scheduled events to schedule replication to the new target see Scheduler on page 265 Editing a Replication Target Edit a replication...

Страница 258: ...m The default value is 0 0 0 0 Additional Information l The Source IP Address field does not accept fully qualified domain names You must enter a valid IP address Make sure this IP address is configur...

Страница 259: ...ue until replication is resumed When resumed the job will start and replication will occur l Trigger replication can be paused midway through a replication job When resumed the job will continue from...

Страница 260: ...set to the lowest value large replication jobs may fail Source DXis List The Source DXis list displays the following information for each source DXi Source The IP address of the source system that is...

Страница 261: ...ta fromup to 10 sources Additional Information l For more information about working with received snapshots see Receive NAS on page 138 or Receive VTL on page 148 l It is typical for the target DXi to...

Страница 262: ...an retain up to 32 snapshots for each replicated share or partition Once the maximum number of snapshots have been saved the oldest snapshot is deleted to make room for each new snapshot that is recei...

Страница 263: ...6 67079 Best Practices Guides The following DXi Best Practices Guides are available at www quantum com DXi4700BPG l Backup Exec from Veritas l Data Protector from HP l Data Protection Manager from Mic...

Страница 264: ...al number of the library or drive Vendor The vendor of the library or drive Product ID The product ID name of the library or drive State The state of the library or drive Enabled or Disabled Drive Typ...

Страница 265: ...rary must be enabled l To remove a physical library from the list first disconnect the Fibre Channel cables that connect the library to the DXi4700 and then click Scan l To update the libraries or dri...

Страница 266: ...cheduled Event on page 272 l Remove an event occurrence or event series from the schedule see Deleting a Scheduled Event on page 272 Viewing Scheduled Events The Scheduler page displays all replicatio...

Страница 267: ...n the next page Add a New Event l To add a new event click and drag on the schedule in the row for the type of event to add A new event is added where you dragged the cursor l To schedule replication...

Страница 268: ...he left or right edge of the event to adjust the start or end time 3 Enter a brief description of the event in the Description box This description will display on the schedule view 4 Specify options...

Страница 269: ...ion does not delete any scheduled replication events for that share or partition If you no longer want to schedule the share or partition for replication manually delete the schedule see Deleting a Sc...

Страница 270: ...he currently active replication throttle rate appears on the Home page under Current Activity 3 Optional Specify when and how often the event reoccurs see Setting Recurrence for a Scheduled Event on p...

Страница 271: ...are run Note For more information about enabling healthchecks see Healthchecks To configure a schedule for healthchecks 1 On the Scheduler page add or edit an event in the Healthchecks row see Schedu...

Страница 272: ...terval in weeks and select the days the event occurs on 3 For recurring events specify how long the recurrence continues forever for a certain number of occurrences or until a specific date Note For h...

Страница 273: ...tatus reports Note For more information about administration alerts and service tickets see Alerts on page 181 To access the Email page on the Notifications page click the Email tab The Email page con...

Страница 274: ...List displays the following information about e mail recipients Name The name of the recipient Email Address The e mail address of the recipient Notification Type The types of notifications sent to th...

Страница 275: ...ssarily need to be fixed immediately The operation and performance of the DXi4700 may be degraded l All Send e mail notifications for High Middle and Low service tickets as well as any administration...

Страница 276: ...Xi4700 are degraded and there is a risk of system failure or data loss l High and Medium Send e mail notifications for High and Medium service tickets Medium service tickets indicate that a serious pr...

Страница 277: ...ng e mail server To access the Server page on the Email page click the Server tab see Figure 171 below Figure 171 Server Page To specify the outgoing e mail server 1 In the Hostname or IP Address box...

Страница 278: ...this information to provide a better support experience in the future Note Automatic e mails contain configuration and status information only and do not contain any customer data stored on the syste...

Страница 279: ...who will receive all scheduled status data and configuration data reports Note To configure the schedule when e mail reports are sent use the Configuration Scheduler page see Scheduling E mail Reports...

Страница 280: ...Data To view a configuration data report 1 Under Email Type select Configuration data 2 Click View The System Configuration Report window displays 3 Optional Click Save to save a local copy of the re...

Страница 281: ...ou can specify the types of traps to send To access the Destinations page on the SNMP page click the Destinations tab see Figure 175 below Figure 175 Destinations Page Tasks Use the Destinations page...

Страница 282: ...on Failure Warning Informational Available or Unavailable Adding a Destination Add an SNMP destination to send traps from the DXi4700 to the destination Note You can add up to 5 destinations To add a...

Страница 283: ...page see Network on page 290 Name Enter the name of the destination 3 Select one or more traps to send to the destination Failure Sends failure traps Warning Sends warning traps Informational Sends in...

Страница 284: ...Sends warning traps Informational Sends informational traps Available Sends a trap when the system transitions from an unavailable to an available state Unavailable Sends a trap when the system trans...

Страница 285: ...ee SNMP Community List below l Add an SNMP community see Adding a Community on the next page l Edit an SNMP community see Editing a Community on page 287 l Delete an SNMP community see Deleting a Comm...

Страница 286: ...me box enter a unique Name for the community up to 20 characters Valid characters are letters numbers hyphens and underscores 3 Enter a valid IP Address and Network Mask pair A pair is valid if perfor...

Страница 287: ...l When entering IP addresses never use an address that is in a reserved IP address range To see a list of reserved IP address ranges click the quick tip icon located near the IP address field 4 In th...

Страница 288: ...access only from 10 40 166 87 10 40 166 87 10 40 166 87 Allows access only from 10 40 166 87 10 40 166 87 10 40 166 0 Invalid because the logical bitwise operation address AND mask is not equal to the...

Страница 289: ...nity status check box to enable the community Or clear the Community status check box to disable the community 6 Click Apply Deleting a Community Delete an SNMP community if you no longer want the DXi...

Страница 290: ...l App Environment on page 323 l Redirect Logging on page 333 l FC Initiators and Targets on page 334 Network The Network page allows you to view and change network configuration information for the DX...

Страница 291: ...for an interface to enable connectivity with devices on different subnets Note You can choose to allow any traffic type management replication or data on an interface In this case the routing of diffe...

Страница 292: ...to For example if the DXi4700 and its clients are on different subnets or you are using an external NTP server you must specify a default gateway DNS Suffix Search List Optional The domain list to se...

Страница 293: ...d must have the same link speed 1GbE or 10GbE 3 For each bonded device specify the bonding mode Note To maintain network connectivity the switch connected to the DXi4700 must be configured to use the...

Страница 294: ...only the MAC address of the active port is visible to the Ethernet switch the switch does not require additional configuration 4 Click Update to save the changes you made to the Bonding Details table...

Страница 295: ...bond0 2 Note A maximum of 10 IP addresses are allowed per device All IP addresses in the IP Address Table added or modified must be valid and unique and must have a valid gateway and netmask 2 In the...

Страница 296: ...4 Enter the following network information as provided by your network administrator all fields are required IP Address The IP address of the interface Netmask The network mask of the interface Gatewa...

Страница 297: ...Undo to revert all current IP Address Table changes to the last update Note When you add a network interface a default route via the default gateway is automatically created for the interface after ne...

Страница 298: ...the route Dest Netmask The network mask for the route Dest Gateway The gateway IP address used for outgoing traffic sent from the interface to a host or client This is usually not the same as the defa...

Страница 299: ...host route on the source DXi to make sure the replication interface is correctly selected when replicating data to the target DXi See the following examples for details Example 1 Segments and Target...

Страница 300: ...P address and the target DXi IP address are all on the same subnet 192 168 10 x l To make sure the replication segment is used when communicating with the target DXi you must add a host route in the R...

Страница 301: ...ateway 192 168 10 1 l In addition to enable communication with the target DXi by means of the gateway you must add a second host route in the Routing Details section on the source DXi In this example...

Страница 302: ...itional Information l Network Time Protocol NTP requires a continuous connection to an NTP server to maintain the correct time If the system does not have connectivity access it is recommended that yo...

Страница 303: ...address on the Network page see Network on page 290 Otherwise you must specify the IP address of the timeserver pool l Specify a Timeserver or Pool Type the name or IP address of the NTP server or po...

Страница 304: ...ote management console GUI Local Access Levels The DXi4700 has the following access levels for logging onto the remote management console or the GUI Local Access Level Description GUI Administrator Al...

Страница 305: ...ministrator password Changing GUI Administrator Password below l Enable or disable GUI access for the monitor account Enabling GUI Monitor Account on the next page l Enable or disable GUI access for t...

Страница 306: ...s Alphanumeric characters and special characters are allowed l Loss of this password will require Quantum service support 2 Click Apply Enabling GUI Monitor Account Use the GUI password when logging o...

Страница 307: ...sword Confirm New Password Enter the new password again to confirm it Additional Information l Passwords can be up to 32 characters Alphanumeric characters and special characters are allowed 3 Click A...

Страница 308: ...N An attribute that is commonly used to identify the name of Organizational Unit OU Example The SysAdmin group would have cn sysadmin Domain Component DC The domain of the directory which often identi...

Страница 309: ...P AD Enable LDAP AD below l Disable LDAP AD Disable LDAP AD on page 312 l Test LDAP AD settings Test LDAP AD Settings on page 312 l Test LDAP AD users Test LDAP AD User on page 312 Enable LDAP AD 1 Se...

Страница 310: ...ion l 14 days from expiration An admin alert is created see Admin Alerts on page 182 l 3 days from expiration If the local GUI Admin account is enabled an admin alert is created see Admin Alerts on pa...

Страница 311: ...dmin users allowed on the DXi system One one group Monitor or Admin is required for LDAP AD configuration Example cn sysadmin ou Group dc mycompany dc com Note OpenLDAP servers require the Slapo Membe...

Страница 312: ...ssful connection will be indicated by a Success dialog box see Figure 192 below A test connection that fails will be indicated by a Failure dialog box containing the reason for the failure see Figure...

Страница 313: ...r name Password Enter the user password 3 Click Test SSL TLS The SSL TLS page allows you to enable or disable SSL TLS on the DXi4700 You can also install a new SSL certificate to replace the Quantum d...

Страница 314: ...S Properties select the Enable SSL TLS option to enable SSL TLS Or select the Disable SSL TLS option to disable SSL TLS Note The default setting is disabled 2 Click Apply Server Authentication Warning...

Страница 315: ...re 196 below Figure 196 Install New Certificate Page 2 In the Certificate File box type the location and filename of the new SSL TLS certificate file Or click Browse to browse the system and locate th...

Страница 316: ...he factory installed certificates should be considered public domain and are provided only for convenience You must install new certificates for secure encryption l The DXi uses the TLS with AES 256 c...

Страница 317: ...stall the required TLS Certificate and key files on the DXi l Certificate File l Private Key File l Certificate Authority File l Certificate Revocation List Optional OST Media Server with TLS Encrypti...

Страница 318: ...te management console is inactive for the specified period of time the user is automatically logged off and must log back on to continue see Accessing Remote Management on page 57 To access the Login...

Страница 319: ...nd Oracle Recovery Manager RMAN After you create OST or RMAN user credentials enter them in the backup application to authenticate on the media OST or Oracle RMAN server Note When using OST Automatic...

Страница 320: ...Manage Users page on the System page click the Manage Users tab see Figure 200 below Figure 200 Manage Users Page Tasks Use the Manage Users page to perform the following tasks l View information abo...

Страница 321: ...entials are also required to enable the DXi to receive duplicated data using OST AIR To add an authenticated user 1 Click Add The Add User Credential window displays see Figure 201 below Figure 201 Ad...

Страница 322: ...ord Enter the password for the authenticated user Confirm New Password Enter the password again to confirm it Description Optional Enter a brief description of the authenticated user 3 Click Apply Del...

Страница 323: ...rver To download the OST Plug in click Client Plug in Download see Figure 203 below Oracle Recovery Manager RMAN Recovery Manager RMAN is an Oracle utility that can back up restore and recover databas...

Страница 324: ...ares Contact Quantum Service to have DAE installed and configured on your DXi system Veeam The Veeam feature on DXi4700 allows the system to perform backup and replication with Veeam software on VMwar...

Страница 325: ...chine VM NAS share must be created before DAE is enabled see Adding a NAS Share on page 194 Tasks Use the App Environment page to perform the following tasks l Enable DAE on the DXi see Enable DAE bel...

Страница 326: ...Click Apply A dialog box appears stating that the system will require a reboot Click Yes A reboot banner will display during the reboot Once the reboot is complete the login window will appear see Fi...

Страница 327: ...orrective Action System alerts Review any Admin Alerts see Admin Alerts on page 182 or Service Tickets see Service Tickets on page 183 that were generated when enabling DAE System memory Depending on...

Страница 328: ...for the first time a password will be required l Public keys cannot be configured until after Veeam has been enabled and the system has been rebooted Best Practices Guide The Best Practices Guide for...

Страница 329: ...Apply A dialog box appears stating that the system will require a reboot Click Yes The DXi will reboot and the login screen will appear see Figure 207 on page 326 Note The reboot takes approximately 2...

Страница 330: ...em Corrective Action System alerts Review any Admin Alerts see Admin Alerts on page 182 or Service Tickets see Service Tickets on page 183 that were generated when enabling Veeam System memory Dependi...

Страница 331: ...dd Public Key page displays see Figure 213 below Figure 213 Add Public Key Page 2 Enter an SSH Alias for the public key Additional Information l An alias can be up to 20 characters l Alias must be an...

Страница 332: ...key should be in the following form key type base64 encoded string see Figure 214 below l A public key length can be up to 16kb Figure 214 Sample Public Key Page 4 Click Apply The new SSH public key a...

Страница 333: ...login screen will appear see Figure 207 on page 326 Note The reboot takes approximately 20 minutes to complete 3 Navigate back to the App Specific page Configuration System App Specific Veeam will now...

Страница 334: ...to see all path to tape initiator and target ports and their associated World Wide Port Numbers WWPNs You can also change a Fibre Channel port to initiator or target mode Note Fibre Channel ports are...

Страница 335: ...e Editing the Fibre Channel Port Type Edit the port type to change the mode of a Fibre Channel port to initiator or target mode You can change the port mode only on inactive connections Additional Inf...

Страница 336: ...ny tab see Figure 218 below Figure 218 Company Page To enter company information 1 Enter the following information Company Name Enter the company name Street Enter the company street address City Ente...

Страница 337: ...e 219 below Figure 219 Primary and Secondary Pages To enter primary or secondary contact information 1 Enter the following information Name Enter the contact name Email Address Required Enter the cont...

Страница 338: ...ew The Utilities pages to perform maintenance tasks on the DXi4700 such as generating and downloading diagnostic files analyzing disk and network performance managing space reclamation and securely er...

Страница 339: ...k the Diagnostics tab The Diagnostics page contains the following tabs System Diag File The System Diag File page allows you to generate and download a system diagnostics file This file contains the d...

Страница 340: ...nostics file This can take several minutes 2 After the file finishes generating click the link to enable the Download Current button 3 To download the generated diagnostics file click Download Current...

Страница 341: ...it to the e mail or FTP address provided by Quantum Customer Support Healthchecks The Healthchecks page allows you to perform tests that verify the health and integrity of the data deduplication block...

Страница 342: ...lthchecks in progress click Stop Status The Status page allows you to view information about the most recent test results for each healthcheck You can also enable or disable a healthcheck The followin...

Страница 343: ...althcheck ended Status The status of the healthcheck Success or Failed Note If running a healthcheck results in the Contact Support status contact Quantum Customer Support for further assistance To en...

Страница 344: ...Network Analyzer below l Disk Analyzer on page 346 Network Analyzer The Network Analyzer page allows you to analyze network performance by measuring network throughput between the DXi4700 and another...

Страница 345: ...MB s Note It takes approximately 5 seconds to refresh the results Settings The Settings page allows you to enable or disable NetServer on the DXi4700 NetServer must be enabled on the target DXi4700 s...

Страница 346: ...ace Reclamation page allows you to manage space reclamation activity on the DXi4700 You can start or stop space reclamation You can also monitor the progress of space reclamation activity During space...

Страница 347: ...eclamation Status on the next page New or Normal Mode To increase performance when space reclamation is initiated on the Space Reclamation page or as a scheduled event only Stage 2 Calculating Deletio...

Страница 348: ...le space reclamation is running click Refresh Space Reclamation Status Space reclamation can have one of the following statuses Status Description Reclamation Completed Space reclamation completed wit...

Страница 349: ...Space License Keys The License Keys page allows you to add a license key to the DXi4700 to enable new functionality You can also view a list of available licenses and see the licenses that are instal...

Страница 350: ...see Available Licenses below Installed The state of the license Yes if the license is installed No if the license is not installed Date Installed If installed the date the license was installed Descr...

Страница 351: ...Data at Rest Encryption and Obtaining Premium Feature Keys on the next page Data in Flight Encryption Enables use of AES encryption 128 bit 256 bit or TLS with AES 256 when sending data to another sy...

Страница 352: ...Xi remote management console see Accessing Remote Management on page 57 6 Click the Utilities menu and then click the License Keys tab The License Keys page displays 7 Enter the license key in the New...

Страница 353: ...Rest Encryption for all hard drives in the DXi4700 see Security on page 304 b Make a backup copy of your encryption keys see Security on page 304 Secure Shred The Secure Shred page allows you to secur...

Страница 354: ...mation on page 346 3 Make sure all replication and backup jobs are completed see Replication on page 122 4 On the Secure Shred page click Start Shred A warning message displays 5 Click Yes The system...

Страница 355: ...secure shred process and reboot the DXi After the DXi finishes rebooting you can resume normal system operation Software Upgrades Software upgrades allow you to update the software running on the DXi4...

Страница 356: ...may be useful if you are upgrading multiple DXi systems as the file only needs to be downloaded once Also this method assures that all systems will be running the same software version following the...

Страница 357: ...ownloading and Installing Upgrades on the next page Automatically Checking for Upgrades The DXi4700 can automatically check for available software upgrades on a daily basis If a software upgrade is fo...

Страница 358: ...automatically or manually checking for upgrades a summary describing the upgrade displays on the Software Upgrade Utility To download and install an available software upgrade 1 On the Software Upgrad...

Страница 359: ...see your backup application Any backup jobs that are run during the upgrade will fail l Unmount all cartridges from VTL partitions using your backup application l Make sure all replication jobs are c...

Страница 360: ...ar your Web browser cache before logging on to the remote management console for the first time following the software upgrade This will ensure the remote management console displays correctly Uploadi...

Страница 361: ...tes that a software upgrade file has been uploaded see Figure 238 below Figure 238 Software Upgrade Page Software Upgrade File Uploaded 5 Click Install Additional Information l If necessary click the...

Страница 362: ...the instructions in each of the pre upgrade actions The pre upgrade actions can differ depending on the type of upgrade but typical actions include the following l Address and delete all outstanding...

Страница 363: ...tanding administration alerts or service tickets 8 To begin the upgrade process click Install Read the on screen information to learn what to expect during the upgrade The bottom status bar displays i...

Страница 364: ...ystem Action select an option Shutdown Shuts down the DXi4700 2 Click Apply 3 Close the browser window DXi Shutdown Time Shutting down the system can take up to 15 minutes Only the node will completel...

Страница 365: ...ing tables provide dimensions and other physical characteristics of the DXi4700 system components l DXi4700 G1 Physical Characteristics on the next page l DXi4700 G2 Physical Characteristics on the ne...

Страница 366: ...Weight stand alone 61 0 pounds 27 7 kg 62 6 pounds 28 4 kg Rack Space Required 2U 2U Air clearance Open 4 in 10 2 cm behind unit for proper air flow DXi4700 G2 Physical Characteristics DXi4700 Node D...

Страница 367: ...n and remote management Standard 3 x 1 GbE Ports l One to three 1 GbE Ethernet connections Optional 2 x 10 GbE ports or 2 x 10 GBase T Ports l Two 10 GbE Ethernet connections optical or Twinax l Two 1...

Страница 368: ...CAT6 Cable Fibre Channel Drops DXi4700 VTL and Multi Protocol configurations only 1 to 2 Fibre Channel connections for data transfer Power Outlets Node 2 USA type 3 prong power outlets Nema 5 15 or 2...

Страница 369: ...urations only 128 shares maximum NFS or CIFS OST backup target DXi4700 NAS and Multi Protocol configurations only 100 storage servers maximum Note NFS version NFSv2 and NFSv3 Note Samba version 4 1 12...

Страница 370: ...Supplies and Cords Node Expansion Module JBOD Two 2 hot swappable redundant power supplies Two 2 USA type 3 prong power cords with IEC320 C13 to Nema 5 15 connectors Two 2 C13 to C14 type 3 prong pow...

Страница 371: ...cal Characteristics Quantum DXi4700 User s Guide 371 Inrush Node 8 3A 100V 4 7A 240V Expansion Module JBOD 16 1A 100V 4 7A 240V Maximum Operating Node 4 4A 100V 1 8A 240V 440W 1501 BTU Hr Expansion Mo...

Страница 372: ...Supplies and Cords Node Expansion Module JBOD Two 2 hot swappable redundant power supplies Two 2 USA type 3 prong power cords with IEC320 C13 to Nema 5 15 connectors Two 2 C13 to C14 type 3 prong pow...

Страница 373: ...outage Quantum recommends that you connect the DXi4700 to a UPS uninterruptable power supply DXi4700 Environmental Specifications DXi4700 G1 Environmental Specifications DXi4700 Climatic Environment T...

Страница 374: ...tional axis 10 minutes psd 0 0002 G2 Hz Non operating Random 0 5 G s 5 350 Hz Operational axis 10 minutes psd 0 0007 G2 Hz Shock Vibration Operating 2 G s for 11 ms half sine input 3 shock pulses in b...

Страница 375: ...IEC 61000 4 2 Ed 2 0 2008 12 Electrostatic Discharge ESD IEC 61000 4 3 Ed 3 1 2008 04 Radiated RF Immunity IEC 61000 4 4 Ed 2 0 2004 07 Electrical Fast Transient Burst IEC 61000 4 5 Ed 2 0 2005 11 Su...

Страница 376: ...o 80 non condensing with a maximum humidity gradient of 10 per hour Shipping and storage 5 to 95 non condensing with a maximum humidity gradient of 10 per hour Altitude Operating 16m to 3048 m 50 to 1...

Страница 377: ...2 Ed 2 0 2008 12 Electrostatic Discharge ESD IEC 61000 4 3 Ed 3 1 2008 04 Radiated RF Immunity IEC 61000 4 4 Ed 2 0 2004 07 Electrical Fast Transient Burst IEC 61000 4 5 Ed 2 0 2005 11 Surge Immunity...

Страница 378: ...ns DXi4700 Status and Problem Reporting 378 General Troubleshooting 379 Common Problems and Solutions 380 DXi4700 Status and Problem Reporting To maintain system health and help you identify and corre...

Страница 379: ...service ticket l If the problem reoccurs the DXi4700 logs the number of times that it detects the problem in the existing report l If a different problem occurs with the same component the DXi4700 ad...

Страница 380: ...section covers the following topics l Start up Problems below l Hardware Problems below l Ethernet Network Problems on page 382 l Replication Problems on page 383 l Temperature Problems on page 383 St...

Страница 381: ...r service see Getting More Information or Help One fan is not operating Determine which fan has failed by reading the service ticket generated by the system Contact your Quantum Customer Support repre...

Страница 382: ...antum Customer Support department see Getting More Information or Help DXi4700 system is not visible on the Ethernet network Try to ping the DXi4700 system IP address from a host on the same network I...

Страница 383: ...ntil you click Enable Enabled replication on a NAS share and received the following Event No destination host is specified for replication You must configure the target system prior to configuring the...

Отзывы: