(&#/$
&
&)
»
Note:
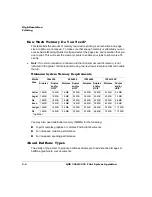
Printing at 600x600 dpi resolution on certain media sizes requires additional
memory. To print at 1200x1200 dpi you need to install an optional Multi-Res
daughterboard, and you may also need to add more memory. See the Options manual
for more information on the Multi-Res daughterboard.
$
Menu
Administration/Engine/Def Resolution
Choices
300 dpi—300x300 dpi resolution
600 dpi—600x600 dpi resolution
1200 dpi—1200x600 dpi resolution (1200x1200 dpi resolution with the optional
multi-res daughterboard installed)
Default
600 dpi
Notes
Whenever possible, set the print resolution through your application. If the print
resolution can’t be set through the application, you can set it through the
configuration menu, the printer driver, or QMS Document Option Commands
(DOCs).
If you want the printer to use a lower default resolution when you restore defaults,
set this option to your choice (and make any other necessary configuration
settings), and then use the Administration/Miscellaneous/Save Defaults menu to
save your custom defaults. See “Working with Custom Configurations” in chapter
2, “Printer Configuration,” of the Reference for more information.
In addition, after you lower the default resolution, you should reconfigure the
printer memory (using Quick Config or Manual Config under the Administration/
Memory configuration menu) to redistribute memory for that particular resolution.
For example, if you set the default resolution to 600 dpi when your printer has
enough memory to print at 1200x600 dpi, the frame buffer remains configured for
1200x600 dpi, which means that printer memory usage is not efficient. The
memory being reserved for frame buffer could be used to improve performance in
other memory clients.
Содержание 3260
Страница 1: ......
Страница 8: ......
Страница 9: ...Introduction on page 1 2 About This Manual on page 1 2...
Страница 12: ......
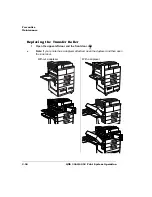
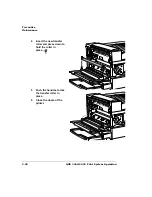
Страница 39: ...2 Lift up the handles to unlock the transfer roller 3 Remove the transfer roller...
Страница 46: ...1 Pull out the tray 6 2 Open the lower left door of the high capacity input feeder...
Страница 48: ......
Страница 87: ...2 3 2 1...
Страница 90: ......
Страница 106: ...4 5 8 1 Open the duplexer 2 Open the upper left door 3 Open the lower left door...
Страница 108: ...4 c Open the door below the multipurpose tray to check for jammed media d Pull out any jammed media...
Страница 111: ...4 4 5 8 1 Pull on the latch to open the duplexer 2 Open the cover inside of the duplexer...
Страница 114: ...4 3 Reinsert the enve lope feeder...
Страница 152: ......
Страница 153: ...Sources of Support on page A 2 QMS World wide Offices on page A 4...
Страница 172: ...3 Pull the HCOS away from the printer 4 Push the locking bar away from the HCOS to free it from the printer...
Страница 173: ...5 Unplug the power cable connected to the right side of the printer 6 Move the HCOS away from the printer...
Страница 184: ......
Страница 194: ......

