/$&
92
*
("%%'1
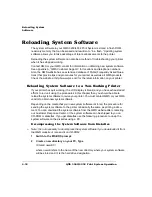
The system software in your QMS 3260/4032 Print System is stored in flash ROM,
read-only memory that can be erased and rewritten to “in a flash.” Updating system
software allows you to take advantage of future enhancements to the printer.
Reloading the system software can also be a method of troubleshooting your printer
when it has stopped working.
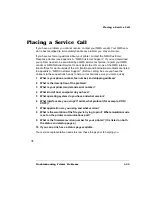
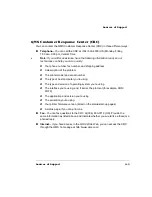
Contact QMS or your QMS vendor for information on obtaining new system software.
See appendix A, “QMS Customer Support,” for locations and telephone numbers.
Also, the QMS website has an extensive database of FAQs (Frequently Asked Ques-
tions) that provide tips and procedures for your printer as well as all QMS products.
Check the website at http://www.qms.com/ for the latest information on your printer.
&(0+,
If your printer has quit working ( the LCD display is blank) and you have exhausted all
efforts to revive it using the procedures in this chapter then you should be able to
reload the system software to revive your printer. You must contact QMS or your QMS
vendor to obtain new system software.
Depending on the media that your new system software is stored, the procedure for
sending the system software to the printer is basically the same as printing a docu-
ment. You can download the system software from the QMS website after contacting
our Customer Response Center, or the system software can be shipped to you on
CD-ROM or diskettes. If you get diskettes use the following procedure to unzip the
system software on the diskettes using a PC.
51715
»
Note: It is not necessary to decompress the system software if you downloaded it from
the QMS website or received it on CD-ROM.
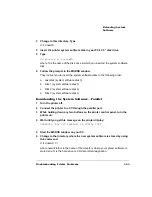
1
Switch to the MS-DOS prompt.
2
Create a new directory on your PC. Type
X
:\mkdir
newdir
↵
where
newdir
refers to the name of the new directory where your system software
will be stored and
X
: is the hard drive designation.
Содержание 3260
Страница 1: ......
Страница 8: ......
Страница 9: ...Introduction on page 1 2 About This Manual on page 1 2...
Страница 12: ......
Страница 39: ...2 Lift up the handles to unlock the transfer roller 3 Remove the transfer roller...
Страница 46: ...1 Pull out the tray 6 2 Open the lower left door of the high capacity input feeder...
Страница 48: ......
Страница 87: ...2 3 2 1...
Страница 90: ......
Страница 106: ...4 5 8 1 Open the duplexer 2 Open the upper left door 3 Open the lower left door...
Страница 108: ...4 c Open the door below the multipurpose tray to check for jammed media d Pull out any jammed media...
Страница 111: ...4 4 5 8 1 Pull on the latch to open the duplexer 2 Open the cover inside of the duplexer...
Страница 114: ...4 3 Reinsert the enve lope feeder...
Страница 152: ......
Страница 153: ...Sources of Support on page A 2 QMS World wide Offices on page A 4...
Страница 172: ...3 Pull the HCOS away from the printer 4 Push the locking bar away from the HCOS to free it from the printer...
Страница 173: ...5 Unplug the power cable connected to the right side of the printer 6 Move the HCOS away from the printer...
Страница 184: ......
Страница 194: ......

