


18
19
ADDING AND REMOVING CAMERAS IN YOUR DISPLAY
As stated earlier, your NVR will automatically show video from cameras connected to it directly
through the POE Block as they are connected - assigning them to channels sequentially
regardless of which port is used to connect them. Cameras sharing the network with the NVR
will not automatically connect. There are two ways to connect them - through the use of the
Add Camera
icon in the
Live View
window and the
Remote Device
window located in the
Main Menu
. The latter method will be covered in detail in
Section 4.5
.
PICTURE 2-7
PICTURE 2-8
Add Camera
Moving the cursor to the center of any empty
channel will reveal the
Add Camera
icon
shown in
Picture 2-7
. Clicking on this will
open a window listing available cameras.
Clicking on
IP Search
will refresh this list.
Simply click on the desired camera from the
list and it will become the camera for that
channel. Please note that it is possible to load
a camera which is already in use by another
channel. In which case, you will have two
identical channels.
REMOTE DEVICE
Filter
None
IP Search
Manual Add
Add
Cancel
2
IP Address
Port
Device ID
Manufacturer
Type
1
10.1.1.65
1 YZC2OC061966
Private
IPC-HFW210
2
10.1.1.67
2 YZCAU192012
Private
IPC-HFW321
Single Screen
4 Screens
8 Screens
9 Screens
16 Screens
BASIC OPERATION
CHAPTER 3
This chapter is intended to get your system operational in a baseline format now that you’ve
connected your system and turned it on after following the instructions on the Quick Start
Poster that came with your system. This chapter combines information and instructions on
several submenus and settings but may not mention all of the functions or options available
in a given menu. For many users, these basic operating instructions may be all they need to
operate their security system. But, because this system offers many more features, the next
chapters will cover additional and more advanced operations in greater detail.
3.1 OPERATION
This NVR can be controlled through the USB mouse, the remote control or by using the
buttons on the front of the device. For the purposes of this manual, instructions will be given
for using the mouse.
In operation, the mouse functions in the same manner as one would use a mouse attached
to a computer; point, click, right-click, and etcetera. In fields where data needs to be entered,
clicking on the field will bring up a virtual keyboard. (
See Section 2.3 Mouse Control
)
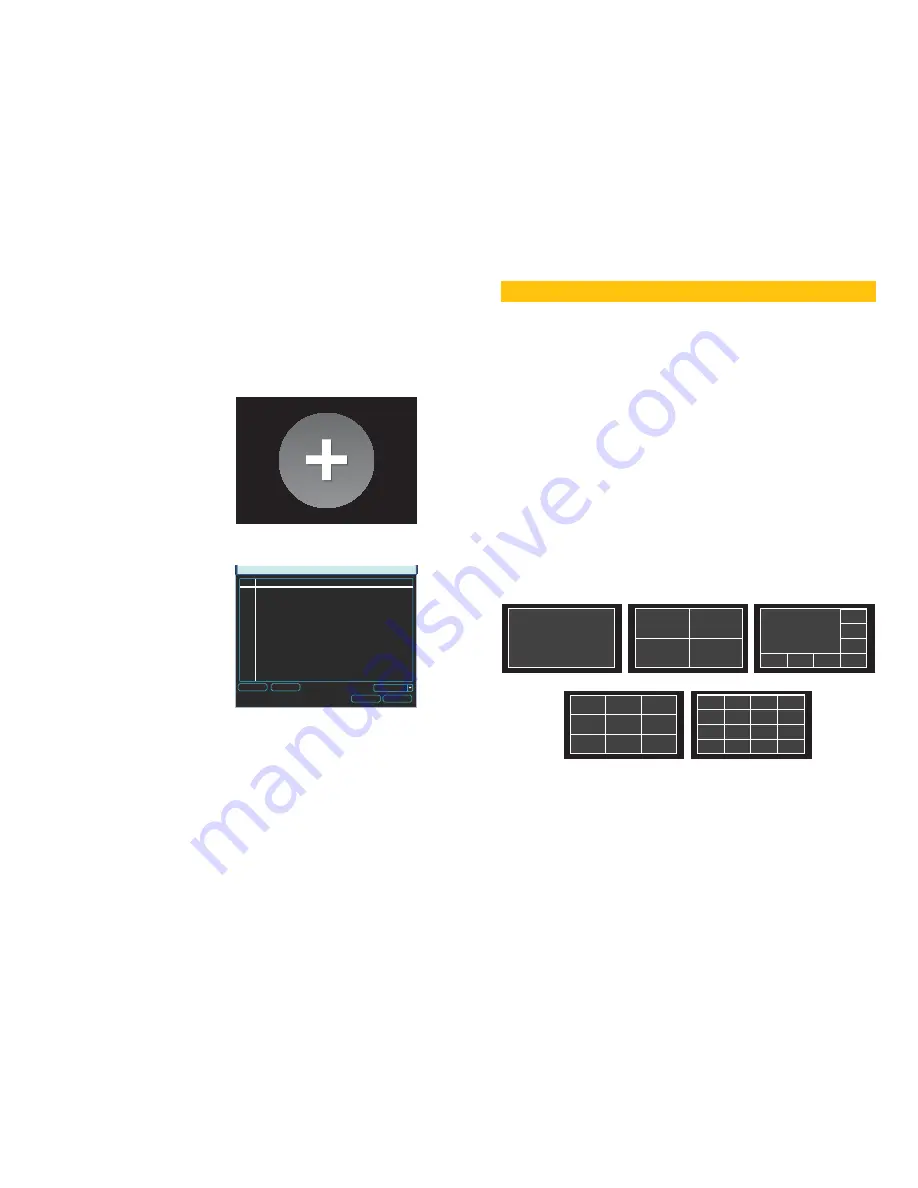
3.2 LIVE VIEW
Live View is the default mode for the NVR. It will display the video feeds from up to four, eight
or 16 cameras depending on model. You do not need to be logged into the NVR to view
or change the channel(s) on the screen. The actual number of channels displayed depends
on the number of cameras you own. You can view a single channel in full-screen mode or
multiple channels simultaneously in a variety of layouts.
PICTURE 3-1
Clicking on any one screen in multi-view mode will bring that screen to full-screen single-view
mode. The exception is in eight-view where clicking on one of the smaller displays will move it
to the larger display. You can also drag channels to a different position on the screen with the
displaced channel relocating to the position of the one that was moved.
In addition to selecting the viewing mode from the
Shortcut Menu
using the mouse, you can
also cycle through the modes using the up and down arrows on the remote or the front of
the NVR. The left and right arrows on both the remote and NVR front panel will cycle through
which channels are displayed.