Section 7: Installing and Using the PressPrint Software for Windows 95/98
65
Digital Label and Decal Press 2 UserÕs Manual
7.
Once you have highlighted the text you wish to serialize and/or selected the
replacement data file, click on the
OK
button of the Badge Setup window. The
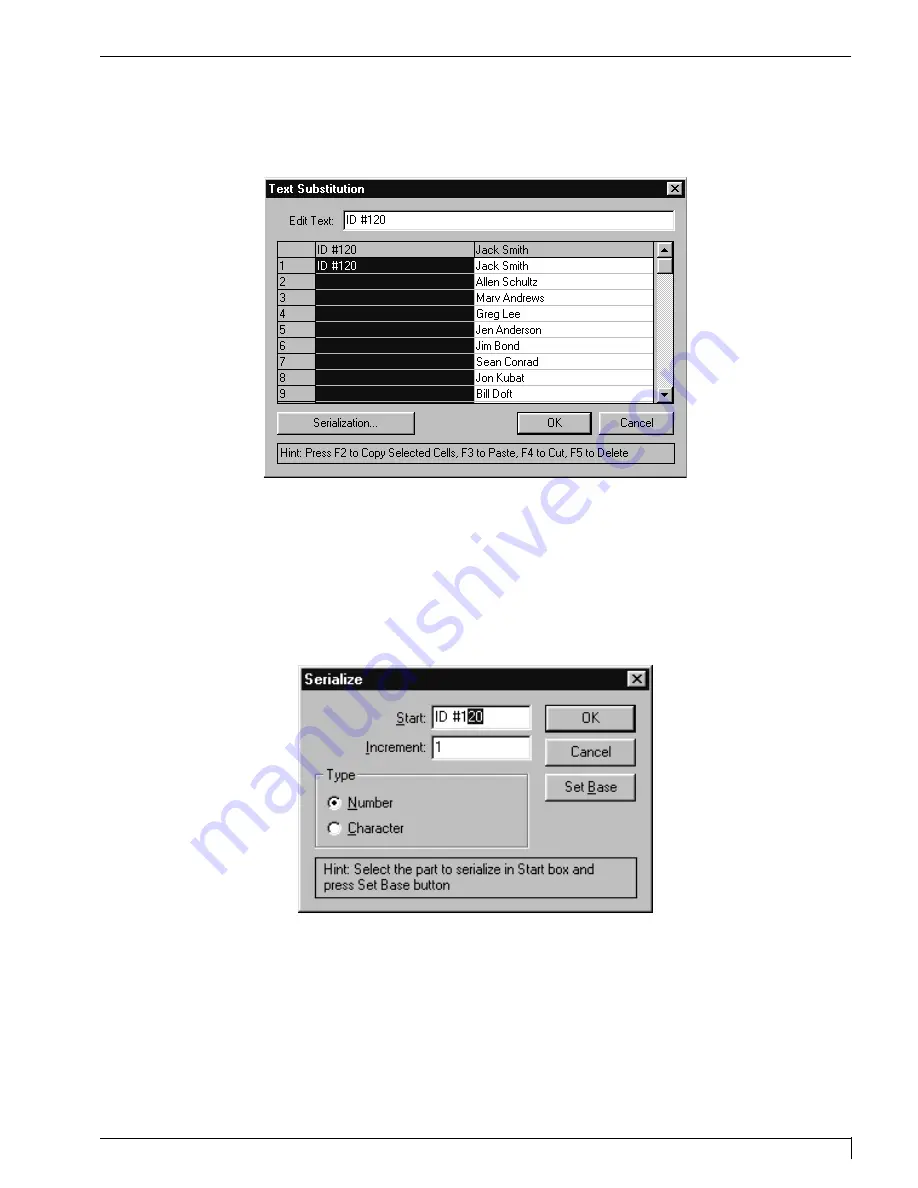
Text Substitution window appears.
8.
When the Text Substitution window appears, make sure the text from the
replacement data file is listed under the appropriate column. If not, use the
indicated ÒFÓ keys to cut and paste the data into the appropriate column.
9.
Click on the top gray cell of the numerical text as indicated to select all of the
cells. Then, enter the serialized text into the Edit Text box exactly as you would
like that text to appear on your first label, and click on the
Serialization
button.
The Serialize window appears.
10. Fill in the variable information as prompted by the instructions in the Serialize
window, and click on
OK
when finished. Select
OK
again in the Text
Substitution window to begin serializing and duplicating your labels. All
serialized text will appear in the font selected in your initial label design.
DLDP2.qxd 3/29/99 9:56 AM Page 65
Содержание Impressa 2
Страница 1: ......
Страница 9: ...4 Section 1 Introduction Digital Label and Decal Press 2 User s Manual...
Страница 14: ...Section 2 Safety Precautions 9 Digital Label and Decal Press 2 User s Manual...
Страница 15: ...10 Section 2 Safety Precautions Digital Label and Decal Press 2 User s Manual...
Страница 23: ...18 Section 3 Getting Started Digital Label and Decal Press 2 User s Manual...
Страница 35: ...30 Section 4 Ribbons and Print Media Digital Label and Decal Press 2 User s Manual...
Страница 41: ...36 Section 5 Connecting the Unit Digital Label and Decal Press 2 User s Manual...
Страница 89: ...84 Section 8 Maintenance Digital Label and Decal Press 2 User s Manual...
Страница 104: ...Printed in the United States of America P N 510183...


