background image

Creating Discs

  15 

Recommend for: Situations where you are having compatibility 

problems with the formatting created by the DVD/Blu-ray 

authoring software or with the media type of the master disc. This 

method removes some potentially complicating variables from the 

DVD/Blu-ray Video creation process. This method eliminates the 

need for a master disc. Error or incompatibilities can be introduced 

into your master by the drive burning the master, the disc the master 

is burned on or the software burning the master. Instead masters can 

be stored on a large hard drive. This allows you to burn additional 

copies at any time without locating the master. If a backup strategy 

is employed, hard drive storage is more reliable over the long term 

since it is not susceptible to scratching like a master disc.

Image Project

The Image Project allows you to copy any CD, DVD, or BDR master. 

A disc image is an exact copy of your disc that you can save on your 

hard drive for later use. You can use an existing image or create an 

image and then use it in the project.  The master disc is read from 

the specified drive to the hard drive of your computer. The master is 

stored in the Global Image format (*.gi) in a user specified location 

on your computer. PTPublisher uses this file to make all subsequent 

copies that are requested. The master disc is read only once to create 

the initial file.
Recommended for: All CD, DVD or Blu-ray content or disc types 

(Audio CD, Data CD, Software Install Disc, Video CD, DVD Video, 

Blu-ray Video: CDR, DVD-R, DVD+R, DVD-ROM, DVD+DL, DVD-

DL, BDR, BDR-DL, etc.). This is best used for jobs that are repeated 

on a regular basis where you will need  

to make additional copies of the master disc at a later time. This 

project type stores the master on your hard drive. This saves the 

time it takes to read in the master and reduces the possibility of 

defects being introduced into the master disc.

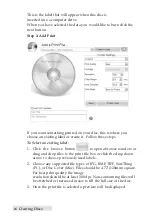
B2. Steps to any Project.

Step 1: Add Data
Depending on your job type this step will be different.  You may 

choose your master, choose data on your hard drive, choose tracks 

to your audio CD, choose your disc image or DVD or BDR video 

folders.  
On most job types a volume label can also be created at this step.  

Содержание DP-4202 XRP

Страница 1: ...101816 511446 User s Manual 2016 All rights reserved...

Страница 2: ...he user is encouraged to try to correct the interference by one or more of the following measures Re orient or relocate the receiving antenna Increase the separation between the equipment and receiver...

Страница 3: ...atus 21 B4 Backup Project PC Disc Publisher Only 22 B5 Rip Audio PC Disc Publisher Only 25 B6 PTProtect PC Disc Publisher Only 26 C Creating a Print Label Using SureThing PC 27 D Creating a Print Labe...

Страница 4: ...rovided by 2019 DTM Print GmbH More information dtm print eu DTM Print GmbH Mainzer Strasse 131 65187 Wiesbaden Germany Tel 49 0 611 92777 0 Fax 49 0 611 92777 50 Email sales dtm print eu Web dtm prin...

Страница 5: ...ide to quick ly and easily create discs with your new Optical Disc Publisher A separate Help file is provided with your Publisher that explains the operation of the PTPublisher Software Click the icon...

Страница 6: ...edia type to the list of available media to burn Important Note The Blu Blu ray units require a USB 3 0 port for the fastest possible burn speeds B CHOOSING A GOOD LOCATION Place the Publisher in a lo...

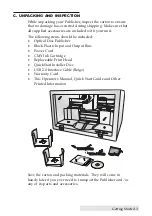
Страница 7: ...items should be included Optical Disc Publisher Black Plastic Input and Output Bins Power Cord CMY Ink Cartridge Replaceable Print Head QuickStart Installer Disc USB 2 0 Interface Cable Beige Warrant...

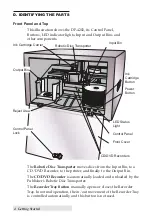
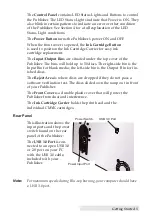
Страница 8: ...to the Output Bin The CD DVD Recorder is automatically loaded and unloaded by the Publisher s Robotic Disc Transporter The Recorder Tray Button manually opens or closes the Recorder Tray In normal ope...

Страница 9: ...he right side bin is the Input Bin for blank media the left side bin is the Output Bin for fin ished discs The Reject Area is where discs are dropped if they do not pass a software verification test T...

Страница 10: ...inkjet print able surface CD DVD media However different brands of discs have differ ent printable coatings Because of this you may need to adjust the printer driver settings to accommodate your speci...

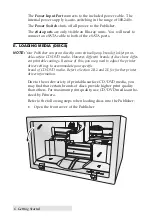
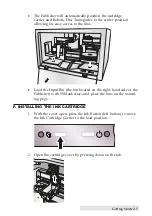
Страница 11: ...access to the bins Load the Input Bin the bin located on the right hand side of the Publisher with 50 blank discs and place the bins on the mount ing pegs F INSTALLING THE INK CARTRIDGE 1 With the co...

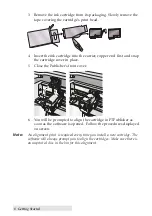
Страница 12: ...artridge cover in place 5 Close the Publisher s front cover 6 You will be prompted to align the cartridge in PTPublisher as soon as the software is opened Follow the procedures displayed on screen Not...

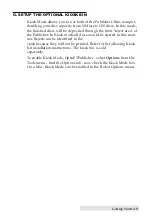
Страница 13: ...nt reject area of the Publisher In Kiosk mode all discs would be ejected in this man ner Rejects can be identified in the stack because they will not be printed Refer to the following Kiosk Kit instal...

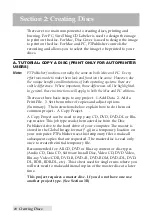
Страница 14: ...eps to any project 1 Add Data 2 Add a Print File 3 Set the number of copies and adjust options Summary The instructions below explain how to do the most common project A Copy Project A Copy Project ca...

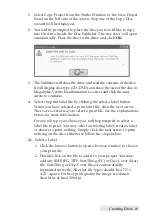
Страница 15: ...ect a label button When you have selected a print label file click the next arrow There are several ways to select a print file See the explainations below for more information For any job type you ch...

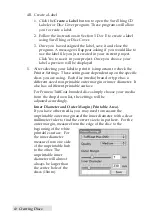
Страница 16: ...ettings are dependent upon the specific discs you are using Each disc media brand or type has a different sized non printable outer margin or inner diameter It also has a different printable surface F...

Страница 17: ...tically be selected for you Click the Go button to start the job B USING PTPUBLISHER PTPublisher allows you to record and print CDs DVDs and BDRs Blu ray using a variety of project types described bel...

Страница 18: ...io CD using WAV MP3 AIFF or WMA files Note this procedure is not for copying already created and mastered original audio CDs If you have already created a master audio CD in another application or thi...

Страница 19: ...image or create an image and then use it in the project The master disc is read from the specified drive to the hard drive of your computer The master is stored in the Global Image format gi in a user...

Страница 20: ...ect an exiting label 1 Click the browse button to open a browse window or drag and drop files to the print file box or click the drop down arrow to choose previously used labels 2 Choose any supported...

Страница 21: ...choices here that correspond to the speed of the print and the saturation of the image Higher quality slower print speed and more vibrant and crisp prints Outer Margin Discs from other manufacturers v...

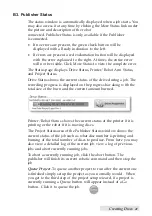
Страница 22: ...s information is incorrect use the back arrow at the bottom of the screen to go back to the appropriate window to correct it Change Robot This is only available with multiple robots connected Click it...

Страница 23: ...ettings to be the default for all projects of this type click Save as Defaults Recording Speed Set the recording speed with this option The fastest recording speed is determined by the lowest maximum...

Страница 24: ...systems use the ISO system Test Record If this option is checked the recorder tests a disc for record ability before burning The drive laser is set to read power and the entire surface is scanned for...

Страница 25: ...ress is displayed on the progress bar along with the total size of the burn and the current amount burned Printer Robot Status shows the current status of the printer if it is printing or the robot if...

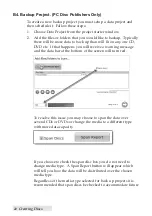
Страница 26: ...happens you will receive a warning message and the data bar at the bottom of the screen will turn red To resolve this issue you may choose to span the data over several CDs or DVDs or change the media...

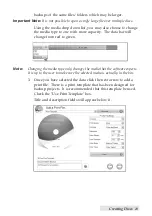
Страница 27: ...ta bar will change from red to green Note Changing the media type only changes the media that the software expects It is up to the user to make sure the selected media is actually in the bin 3 Once yo...

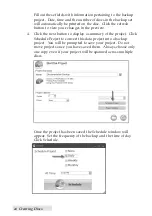
Страница 28: ...ew 4 Click the next button to display a summary of the project Click Schedule Project to convert this data project into a backup project You will be prompted to save your project Do not move projects...

Страница 29: ...from the sub menu Here you can view all scheduled projects edit the project or change the frequency or time of the automatic backup Note All backup runs are full backups PTPublisher does not do increm...

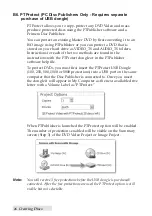
Страница 30: ...dongle or in the PTPublisher software help file To protect DVDs you must first insert the PTProtect USB Dongle 100 250 500 1000 or 5000 protections into a USB port on the same computer that the Disc...

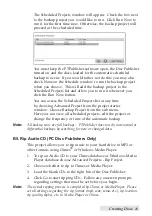
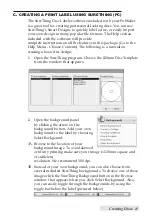
Страница 31: ...ureThing program Choose the 120mm Disc Template from the window that appears 2 Open the background panel by clicking the arrow on the background button Add your own background to the label by choosing...

Страница 32: ...el by clicking the arrow on the Pictures Clipart button Add any logos graphics or symbols to the label These graphics will appear on top of the background image You can size them appropriately by drag...

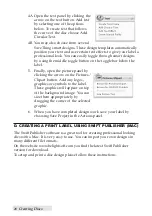
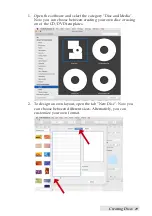
Страница 33: ...he category Disc and Media Now you can choose between creating your own disc or using on of the CD DVD templates 2 To design an own layout open the tab New Disc Now you can choose between different si...

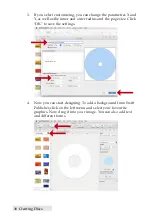
Страница 34: ...as well as the inner and outer radius and the page size Click OK to save the settings 4 Now you can start designing To add a background from Swift Publisher click on the left menu and select your favo...

Страница 35: ...u have to allow SwiftPublisher access to your images Then you can upload your design and drag it into your image until it fits 6 If everything is setup click File Print or the printer symbol on the ri...

Страница 36: ...to File Menu and click Save Then rename and save it 8 It is also possible to save your design as a template Therefore click File Save as template and rename it You will find it in your Swift Publisher...

Страница 37: ...in the Printer Settings area on this screen Below is a description of each Print Quality This setting affects the quality and speed of the print Ink consump tion is only slightly increased as you incr...

Страница 38: ...does not extend all the way to the edge of the disc Because of this you will not normally set this value to zero You may also want to adjust the inner diameter setting To use the preset outer diameter...

Страница 39: ...t this out of the drivers control The surface of the disc reacts with the ink in the cartridge to produce the color For this reason when printing the same image to different types of discs with differ...

Страница 40: ...nd become more accurate as the number of labels printed increases This is because the ink that is used for initial job starting cartridge maintenance is divided into a larger number of labels Calibrat...

Страница 41: ...4 When the second run of the print is complete you should have a test print that looks similar to the following 5 Along the Vertical axis of the printed disc find the number whose lines touch For exam...

Страница 42: ...d place in into the printer tray The Publisher will then print a simple pattern that will flush ink through the nozzles Multiple cleaning prints may be necessary If the nozzles are not fully clear aft...

Страница 43: ...inside the Publisher To accurately interpret what it means when these lights are on off or flashing please refer to the following Ink Cartridge Power LED LED Publisher off on solid Is ready to receive...

Страница 44: ...ing internal LED light states can be selected in the PTPublisher software Flash Enabled Default Errors are indicated in the manner described above Always On No errors are indicated Always Off No error...

Страница 45: ...he motions of picking and placing a disc to ensure proper working order This test may be performed without connect ing the Publisher to the PC Perform the test by doing the following steps Load some d...

Страница 46: ...utes the ink in the printhead nozzles may have dried If you are having print quality problems follow the steps below 1 Before moving on to the next step ensure that the Ink level of color cartridge is...

Страница 47: ...mple will be printed If the sample has missing colors or voids within a color strip remove the printhead from the printer and proceed to step 4 4 Prepare items needed for procedure Disc Publisher 4200...

Страница 48: ...conds Note Do not squeeze water from paper towels after removing from water 6 Place one paper towel on printhead nozzles Printhead Nozzles Place one paper towel on printhead nozzles Gently press paper...

Страница 49: ...tion indicated After wiping the printhead nozzles the paper towel should show all three colors If all three colors are present proceed to step 8 If the paper towel doesn t show all three colors then r...

Страница 50: ...scribed in step 2 To insure all water has been removed from the nozzles repeat this step twice 10 Verify printhead is now functioning properly by repeating the print assessment described in step 3 Aft...

Страница 51: ...tware Click on the SureThing Software Help files Open the software Click on the Help Menu Contents Email Support support primera eu Phone Support 49 0 611 92777 0 Mon Thu 9 a m 5 p m Fr 9 a m 3 p m CE...

Страница 52: ...ve space available USB 2 0 or 3 0 port Minimum MAC System Intel CPU running OS X version 10 7 or higher 1 GB RAM Free hard drive space of at least 10 GB Disc Capacity 50 disc input 50 disc output defa...

Страница 53: ...ect 10 13 Cost Estimator 35 Data Project 14 File System 20 Gallery 30 Identifying the Parts 4 Image Project 15 Inner Diameter 12 17 33 Input Bin 5 Internal Blue LED Lights 40 iTunes 25 Kiosk Setup 9 L...

Страница 54: ...33 Save Project 18 Schedule Project 19 Set Time and Date to Mastering Time 20 Span Discs 22 Specifications 48 Swift Publisher 10 28 Technical Support 47 Test Record 20 Transporting the Publisher 40 Tr...

Страница 55: ......

Страница 56: ...P N 511446...

Отзывы: