•
If you want your NVR to use a dynamic IP, select the “Obtain IP via
DHCP” radio button and your NVR will be assigned with any idle IP
address in your organization’s network.
•
If you want your NVR to use a static IP, select the “Use the following IP”
radio button and fill in the blanks for IP address, subnet mask and
Gateway.
2. Enter the HTTP port if needed. The default port is 80.
To enter the DNS address if needed:
You may
check “Obtain a DNS address automatically” radio button to obtain the DNS
address automatically. If you want the NVR to use a host name, you’ll need to enter
at least one (Primary) DNS address.
1. Enter the IP address of the “Primary DNS Address” provided by your ISP.
2. Enter the IP address of the “Secondary DNS Address” provided by your ISP.
Click “Next” to continue the settings.
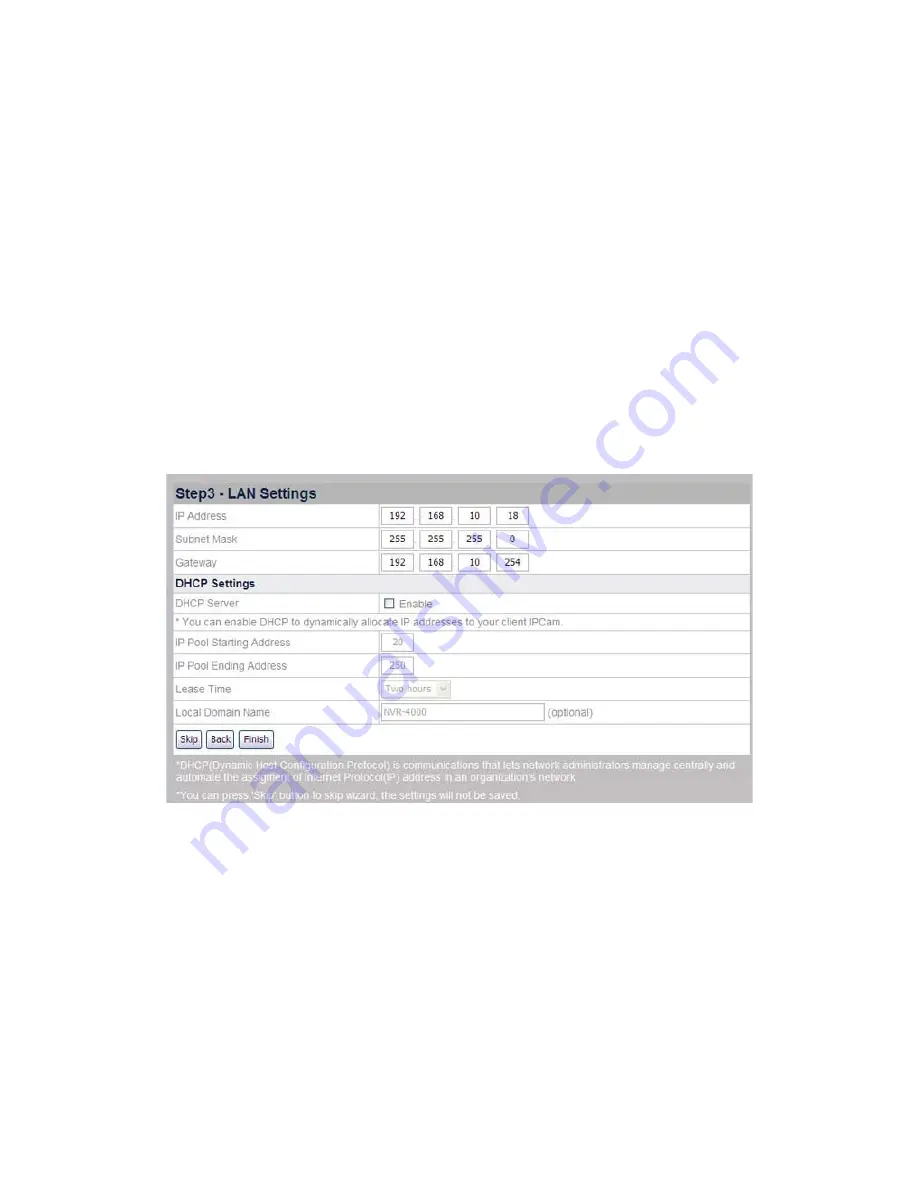
Step 3 – LAN Settings
To enable NVR as DHCP Server:
1. Check “Enable” if you want the NVR to serve as a DHCP Server and
dynamically allocate IP addresses to the IP Camera(s) connected.
2. Enter the Starting and Ending IP Pool Addresses to define the IP Address
range of the IP Camera(s).
3. Enter the “Lease Time”.
4. Enter the “Local Domain Name” for the NVR if you want to visit the NVR by its
Local Domain Name within the LAN.
Click “Finish” to complete the settings, it takes about 60 seconds to reboot the
system. Follow the on-screen instructions to install all software that your NVR
requires.
33


