Paramount User Guide
40
|
P a g e
8.
Once the cable has been passed all the way through the mount, make an 8-inch loop in the cable
and carefully tuck this loop inside the outer shaft of the declination assembly to allow the
declination axis to rotate completely without any interference from the cable itself (see Figure 9).
Rotating the declination axis from hard stop to hard stop more or less does the work for you, but
allowing additional slack in the cable is recommended.
Note that this procedure can be performed with a telescope in place.
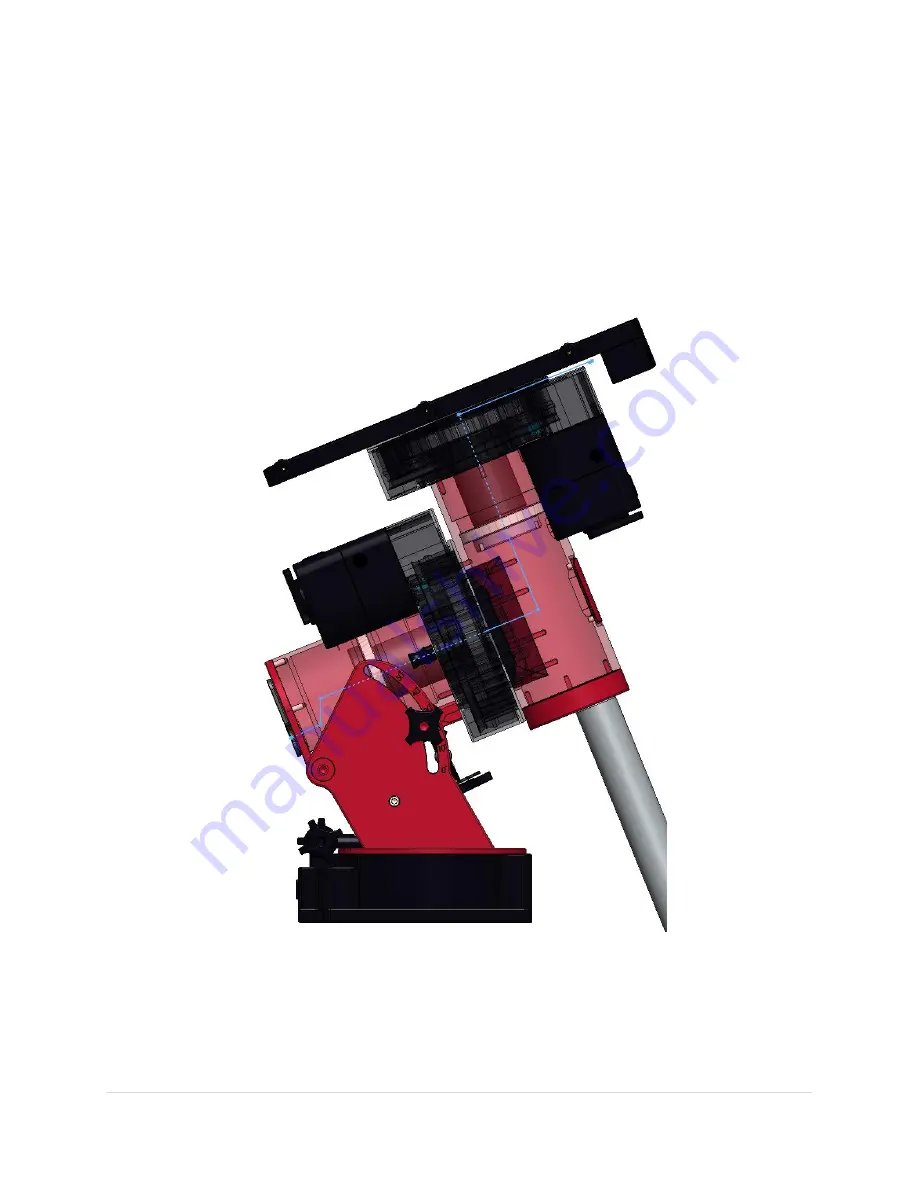
Routing Cables through the Paramount M
Y
T
Figure 12: Paramount M
Y
T cross section showing path of cable through the mount.
Compared to the both the Paramount MX, Paramount MX+, and Paramount ME II, routing custom cables
through the Paramount MyT is an even more relatively straightforward procedure.
1.
Remove the two Right Ascension Rear Cover (Figure 23) mounting screws and the cover.
Содержание ME II
Страница 56: ...Paramount User Guide 56 P a g e Paramount ME II Front View Figure 20 The front view of the Paramount ME II...
Страница 57: ...Paramount User Guide 57 P a g e Paramount MX Front View Figure 21 The front view of the Paramount MX...
Страница 58: ...Paramount User Guide 58 P a g e Paramount MX Front View Figure 22 The front view of the Paramount MX...
Страница 85: ...Paramount User Guide 85 P a g e Paramount ME II Rear View Figure 44 The rear view of the Paramount ME II...
Страница 86: ...Paramount User Guide 86 P a g e Paramount MX Rear View Figure 45 The rear view of the Paramount MX...
Страница 87: ...Paramount User Guide 87 P a g e Paramount MX Rear View Figure 46 The rear view of the Paramount MX...
Страница 103: ...Paramount User Guide 103 P a g e Paramount ME II Side View Figure 59 The side view of the Paramount ME II...
Страница 104: ...Paramount User Guide 104 P a g e Paramount MX Side View Figure 60 The side view of the Paramount MX...
Страница 105: ...Paramount User Guide 105 P a g e Paramount MX Side View Figure 61 The side view of the Paramount MX...


