background image

57

Recording

 (ENG) DVQX1376

Conditions for outputting a time code to HDMI output

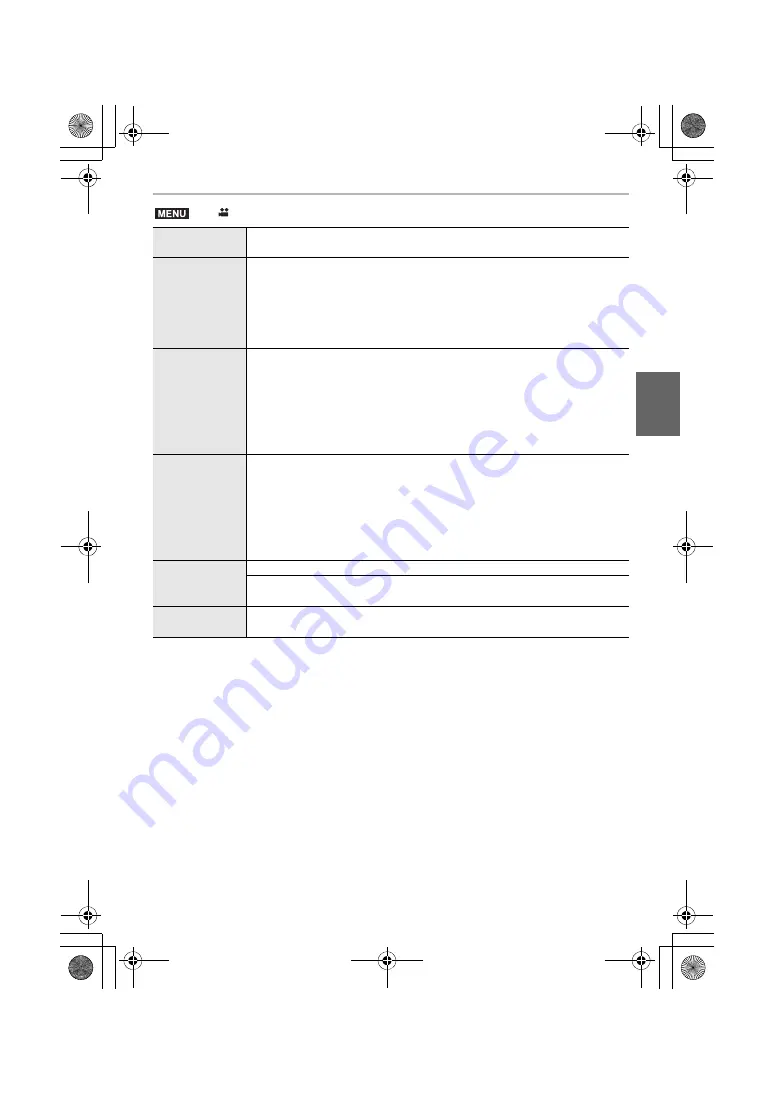
A time code is output to video from the HDMI output only when all the following conditions 
are satisfied.

>

 [Motion Picture] 

>

 [Time Code]

[Time Code 
Display]

Set whether or not the time code is displayed on the recording screen/
playback screen.

[Count Up]

Sets the time code count method.

[REC RUN]:

Counts the time code only when recording motion pictures.

[FREE RUN]:

Counts the time code even when not recording (including when this unit is 
turned off).

[Time Code 
Value]

Sets the start point (starting time) for the time code.

[Reset]:

Sets to 00:00:00:00 (hour: minute: second: frame)

[Manual Input]:

Manually input hour, minute, second and frame.

[Current Time]:

Sets hour, minute and second to current time and sets frame to 00.

[Time Code 
Mode]

Sets the time code recording method.

[DF] (Drop Frame):

The camera modifies the difference between recorded time and time code.
• Seconds and frames are separated by “.”. (Example: 00:00:00.00)

[NDF] (Non-Drop Frame):

Records the time code without drop frame.
• Seconds and frames are separated by “:”. (Example: 00:00:00:00)

[HDMI Time 
Code Output]

Generates time code for images output through HDMI.
• [HDMI Time Code Output] can only be set in Creative Video Mode.
• The device screen may go dark depending on the connected device.

[External TC 
Setting]

Sets up time code synchronisation with an external device.  (P58)

In recording

• When [HDMI Time Code Output] is set to 

[ON].

• In Creative Video Mode.
• When [Rec Format] is set to [AVCHD], [MP4 

(LPCM)] or [MOV].

In playback

• When [HDMI Time Code Output] is set to 

[ON].

• When playing back a motion picture recorded 

with Creative Video Mode.

• When [HDMI Mode (Play)] in [TV Connection] 

is set to [AUTO].

MENU

DC-GH5SGN-DVQX1376_eng.book  57 ページ  2017年12月4日 月曜日 午前9時44分

Содержание DCGH5SGNK

Страница 1: ...ns carefully before using this product and save this manual for future use More detailed operating instructions are available in Operating Instructions for advanced features PDF format To read it down...

Страница 2: ...battery pack Do not heat or expose to flame Do not leave the battery ies in a car exposed to direct sunlight for a long period of time with doors and windows closed WARNING To reduce the risk of fire...

Страница 3: ...data may be damaged or pictures may be distorted by strong magnetic fields created by speakers or large motors Electromagnetic wave radiation may adversely affect this unit disturbing the pictures an...

Страница 4: ...gh or too low the operating time of the battery will become shorter The battery becomes warm after using and during and after charging The camera also becomes warm during use This is not a malfunction...

Страница 5: ...es While Adjusting a Setting Automatically Bracket Recording 47 Image Stabiliser 49 Raising the telescopic effect 50 Taking Pictures with the External Flash Optional 51 Recording Motion Picture 52 Syn...

Страница 6: ...r changing make sure their protective doors are securely closed If this camera is exposed to water sand or any other foreign material clean it as soon as possible taking the necessary precautions that...

Страница 7: ...t the dealer or Panasonic if you lose the supplied accessories You can purchase the accessories separately 1 Battery Pack Indicated as battery pack or battery in the text Charge the battery before use...

Страница 8: ...DHC SDXC memory cards This unit is compatible with SDHC SDXC memory cards compliant with Video Speed Class 60 of the UHS II standard Operation has been confirmed with a Panasonic card rated at Video S...

Страница 9: ...latest information on the firmware or to download the firmware visit the support site below http panasonic jp support global cs dsc This Site is English only To check the firmware version of the inter...

Страница 10: ...ne with your finger Doing so may make sound difficult to record 16 Hot shoe Hot shoe cover P51 Keep the hot shoe cover out of reach of children to prevent swallowing 17 Drive mode dial P38 18 Flash sy...

Страница 11: ...buttons P18 Function button P26 3 Fn17 1 Fn18 4 Fn19 2 Fn20 48 Control dial P18 49 MENU SET button P18 24 50 Card slot 1 P14 51 Access lamp card 1 P14 52 Card slot 2 P14 53 Access lamp card 2 P14 54 C...

Страница 12: ...or supplied USB connection cable for charger and battery that are designed for exclusive use with the camera 3 Attach the battery paying attention to the direction of the battery until it clicks The C...

Страница 13: ...g time is for when the battery has been discharged completely The charging time may vary depending on how the battery has been used The charging time for the battery in hot cold environments or a batt...

Страница 14: ...the card into from the card slot 2 B push the bottom side of the card Card access indicators During access i e while the access lamp is lit up or is displayed do not turn this unit off remove the bat...

Страница 15: ...rotated 180o forward 3 Return the monitor to its original position When rotating the monitor be careful not to apply too much force Doing so may cause damage The clock is not set when the camera is s...

Страница 16: ...he dial is locked if the mode dial lock button is depressed A Each press locks unlocks the dial The settings of the main functions are adjusted automatically 1 Hold the camera gently with both hands k...

Страница 17: ...he shutter button fully push it in further and take the picture Be careful not to move the camera when you press the shutter button Pictures cannot be taken until focus is achieved when Focus Release...

Страница 18: ...ther settings when in modes Rotating the control dial Selection of items or setting of values etc is performed The operation of rotating the control dial is illustrated as below in these operating ins...

Страница 19: ...e up down left and right of the joystick are expressed as 3 4 2 1 Moving Pressing Mode dial Selecting a Recording Mode Intelligent Auto Mode P28 Intelligent Auto Plus Mode P28 Programme AE Mode Record...

Страница 20: ...ed by the aperture value and the shutter speed which are manually adjusted Aperture value B Shutter speed C Creative Video Mode P62 Custom Mode Use this mode to take pictures with previously registere...

Страница 21: ...ng in Economy P83 Press DISP You can select separate screen display styles for the viewfinder and the monitor Live View Finder style display layout Example of viewfinder style display LVF button Switc...

Страница 22: ...N With information Without information With information tilt sensor display Without information tilt sensor display Turned off On monitor recording information In Playback Mode With information Detail...

Страница 23: ...n To cancel the function touch or Touch screen Touch operations Touch Shutter Just by touching the subject you want as your point of focus the camera will focus on the subject and take the picture aut...

Страница 24: ...s Motion Picture P78 This menu lets you set motion picture settings Custom P78 Operation of the unit such as displaying of the screen and button operations can be set up according to your preferences...

Страница 25: ...ton to select the setting and press MENU SET Depending on the menu item its setting may not appear or it may be displayed in a different way Menu items that are not available are displayed in grey Whe...

Страница 26: ...ons Fn10 to Fn20 With Video Record you can start stop recording a motion picture in the same way as with the motion picture button When set to Focus Area Set it is possible to display the position set...

Страница 27: ...r Speed HDR Shutter Type Flash Mode Flash Adjust Wireless Flash Setup Ex Tele Conv Digital Zoom Stabilizer 4K Live Cropping Motion Pic Rec Format Motion Pic Rec Quality Variable Frame Rate Picture Mod...

Страница 28: ...e rich in gradation Switching between Intelligent Auto Plus Mode and Intelligent Auto Mode Intelligent Auto Plus Mode allows you to adjust some settings such as the brightness colour tone and defocus...

Страница 29: ...e blurriness by rotating the rear dial To return to the recording screen press MENU SET To cancel the setting press Fn4 on the blurriness setting screen Setting brightness 1 Press 2 Rotate the rear di...

Страница 30: ...t moves while the shutter button is pressed halfway the focus is readjusted automatically according to the movement of the subject You can switch the setting with AFS AFF in the Rec Motion Picture men...

Страница 31: ...tion Sets the level at which object motion detection is activated in response to a change in the speed of the subject Face Eye Detection A person s face eyes and body the entire body or the upper half...

Страница 32: ...focus and exposure automatically to the specified moving object Dynamic Tracking When Metering Mode is set to Aim the AF tracking area over the subject to be tracked and press the shutter button half...

Страница 33: ...same way as will be set You can change the size of the AF area by rotating the front rear dial Press the joystick to switch between the default AF area position and the position you have set The enla...

Страница 34: ...cus is to the near side or to the far side MF Guide You can perform the following operations 5 Press the shutter button halfway You can also perform the same operation by pressing MENU SET When using...

Страница 35: ...fully A AE Lock indication Compensating the Exposure Applicable modes Use this function when you cannot achieve appropriate exposure due to the difference in brightness between the subject and the ba...

Страница 36: ...Custom Exposure menu is set to AUTO AUTO The ISO sensitivity is automatically adjusted according to the brightness Maximum ISO6400 1 2 Intelligent The camera automatically sets the optimum ISO sensit...

Страница 37: ...lance adjusts the colour of white according to the light source to make the overall colour hue closer to what is seen by the eye 1 Press 2 Rotate the rear dial or front dial to select the White Balanc...

Страница 38: ...uce the original colours of the subject more accurately The same tones as AWB may be applied in a bright environment AWB and AWBc apply the same tones under light sources where reddish tones may not o...

Страница 39: ...e shutter button fully to activate the Burst Mode 4K PHOTO P39 Performs 4K photo recording Post Focus P43 Performs Post Focus recording Self Timer When the shutter button is pressed recording takes pl...

Страница 40: ...4 minutes or if the file size exceeds 96 GB 4K Burst For capturing the best shot of a fast moving subject Burst recording is performed while the shutter button is pressed and held A Press and hold B...

Страница 41: ...2 minutes Approximately the last 10 minutes up to approximately 12 minutes will be saved The preceding part will be deleted 1 Select an image with the icon on the playback screen and press 3 If the im...

Страница 42: ...r rolling shutter effect when you save them 1 On the save confirmation screen in step 4 on P41 touch Reduce Rolling Shutter Return to the confirmation screen if it cannot produce any correction result...

Страница 43: ...cluding the edges of the screen If no areas on the screen can be brought into focus the focus display A will flash Recording is not possible in this case 3 Press the shutter button fully to start reco...

Страница 44: ...ctures and save the resulting picture The picture will be saved in JPEG format The camera may automatically correct the misalignments of pictures caused by camera shake If they are corrected the angle...

Страница 45: ...Set the drive mode dial to 2 Select the menu 3 Press 3 4 to select an item and set 4 Press the shutter button halfway to exit the menu 5 Press the shutter button fully The recording starts automatical...

Страница 46: ...follow the steps below 1 Select the methods for creating a motion picture The recording format is set to MP4 2 Press 3 4 to select OK and then press MENU SET Creating Stop Motion Pictures Stop Motion...

Страница 47: ...racket Bracket Type Exposure Bracket Press the shutter button to perform recording while adjusting the exposure P48 This is disabled when recording using the flash Aperture Bracket Press the shutter b...

Страница 48: ...res Exposure Bracket Step Sets the number of pictures to be taken and the exposure compensation range 3 1 3 Takes three pictures with an interval of 1 3 EV to 7 1 Takes seven pictures with an interval...

Страница 49: ...I S switch of the lens is set to ON is set at the time of purchase Set the image stabiliser White Balance Bracket Horizontal A to B Vertical G to M White Balance Bracket Colour Temperature A lens whi...

Страница 50: ...ton is pressed again or a certain amount of time passes Fixing the zoom magnification at the maximum level E Stabilization Video Jitter during motion picture recording is corrected along the vertical...

Страница 51: ...ion When using the electronic shutter When an image effect in Filter Effect of Filter Settings is set When Silent Mode is set to ON When HDR is set to ON Changing Flash Mode Rec Flash Flash Mode Force...

Страница 52: ...tion pictures are recorded using the values you have set for the ISO sensitivity and Dual Native ISO Setting in the Custom Exposure menu in other modes they are recorded using AUTO AVCHD You can conti...

Страница 53: ...2 0 8 bit Long GOP FHD 17M 60i 1920k1080 59 94i 17 Mbps 4 2 0 8 bit Long GOP FHD 24M 30p 1920k1080 59 94i 2 24 Mbps 4 2 0 8 bit Long GOP FHD 24M 24p 1920k1080 23 98p 24 Mbps 4 2 0 8 bit Long GOP FHD...

Страница 54: ...3840k2160 23 98p 400 Mbps 4 2 2 10 bit ALL Intra 4K 10bit 150M 24p 3840k2160 23 98p 150 Mbps 4 2 2 10 bit Long GOP 4K 8bit 100M 24p 3840k2160 23 98p 100 Mbps 4 2 0 8 bit Long GOP FHD ALL I 200M 60p 19...

Страница 55: ...2 2 10 bit Long GOP 4K 8bit 100M 24p 3840k2160 24 00p 100 Mbps 4 2 0 8 bit Long GOP FHD ALL I 200M 24p 1920k1080 24 00p 200 Mbps 4 2 2 10 bit ALL Intra FHD 10bit 100M 24p 1920k1080 24 00p 100 Mbps 4 2...

Страница 56: ...amera automatically keeps focusing on subjects during recording OFF The camera maintains the focus position at the start of recording MF ON OFF You can focus manually Customising the operation setting...

Страница 57: ...e and sets frame to 00 Time Code Mode Sets the time code recording method DF Drop Frame The camera modifies the difference between recorded time and time code Seconds and frames are separated by Examp...

Страница 58: ...sh synchro socket cap in the direction of the arrow to remove it 1 2 Be careful not to lose the flash synchro socket cap 2 Insert the BNC conversion cable 3 and rotate the locking screw in the directi...

Страница 59: ...TC Input Doing so may cause the camera to malfunction 5 Press MENU SET to receive the incoming time code signal 6 Press MENU SET to synchronise the time codes When the time code is synchronised it app...

Страница 60: ...reen and images output via HDMI will appear darker overall LUTs Look Up Tables can be used for post production editing You can download LUT data from the support site below http panasonic jp support g...

Страница 61: ...em to which you want to register the data and press MENU SET Selecting the LUT file to be used and enabling V Log L View Assist This item is available only when Photo Style is set to V Log L When the...

Страница 62: ...on or shutter button again to stop recording Slow motion pictures overcrank recording Set a frame rate that provides more frames than the frame rate in Rec Quality does Example If you set FHD 8bit 100...

Страница 63: ...from the one that appears during normal motion picture playback Actual playback time Actual elapse of time during which you recorded the motion picture Only available when Rec Format is set to MP4 LPC...

Страница 64: ...6 Press MENU SET To register focus positions to other items repeat steps 2 through 6 Set the items below as needed 7 Press 3 4 to select Start and then press MENU SET To return to the setting screen p...

Страница 65: ...e automatically changes to FHD Hold the camera firmly in place while recording 1 Set the mode dial to 2 Select the menu 3 Set the cropping start frame A Cropping start frame When making settings for t...

Страница 66: ...at by setting Photo Style to Hybrid Log Gamma With this format you can record bright images susceptible to overexposure with more natural colours than is possible with conventional formats Button oper...

Страница 67: ...ttings select Hybrid Log Gamma during HDMI output Rec Format MP4 LPCM or MOV Rec Quality Motion pictures in C4K 60p or 4K 60p C4K 50p or 4K 50p format 4K 60p Bit Mode 4K 50p Bit Mode in HDMI Rec Outpu...

Страница 68: ...t long Attaching the cable holder The cable holder prevents the HDMI cable or USB connection cable from getting disconnected by accident and the HDMI or USB socket from being damaged Example Attaching...

Страница 69: ...Quality is set to an item for motion pictures in C4K 60p or 4K 60p C4K 50p or 4K 50p format and Creative Video Mode is used Recording Mode Aspect ratio The output setting is determined by the Rec Qua...

Страница 70: ...tion can be output only when outputting a time code to video from the HDMI output during recording Control information is output when pressing the motion picture button or shutter button even if the m...

Страница 71: ...ly LUT Look Up Table data to images that are output to an HDMI device when Photo Style is set to V Log L This item is available only when Photo Style is set to V Log L When the camera is in Playback M...

Страница 72: ...fer to the operating instructions of the external microphone By attaching an XLR microphone adaptor DMW XLR1 optional to the camera you can use a commercially available XLR microphone to enable the re...

Страница 73: ...orded by connecting a commercially available headphones to this unit Adjusting the headphone volume 1 Select the menu 2 Connect headphones and rotate the control dial while the recording screen is dis...

Страница 74: ...1 The fast forward rewind speed increases if you press 1 2 again 2 When a motion picture recorded with AVCHD is rewound frame by frame its frames will be shown in intervals of approximately 0 5 secon...

Страница 75: ...screen 12 screens 30 screens Calendar screen display A Card slot Playback is performed separately by card slot You can switch the card selected for playback by pressing Fn3 If the rear dial is rotated...

Страница 76: ...ll the pictures Picture groups are treated as a single picture All the pictures in the selected picture group will be deleted You can only delete images on one card at a time 1 In Playback Mode press...

Страница 77: ...ame Rate SS Gain Operation Focus Transition Anamorphic 4 3 WFM Vector Scope 4K Live Cropping Loop Recording video Anamorphic Desqueeze Display Synchro Scan HLG View Assist Custom Mode Creative Control...

Страница 78: ...MF Assist Display Video Guide Line ISO Increments Center Marker Extended ISO Operation Highlight Exposure Comp Reset Fn Button Set Zebra Pattern Q MENU Expo Meter Focus Release Shutter Dial Set MF Gu...

Страница 79: ...n Sensor Cleaning Headphone Volume System Frequency Level Gauge Adjust Economy Language Format Monitor Display Speed Version Disp My Menu My Menu Setting Playback Slide Show Light Composition Stop Mot...

Страница 80: ...is 16 9 Settings Image size Settings Image size L 10M 3680k2760 L 9M 4016k2256 M 5M 2592k1944 M 4 5M 2816k1584 S 2 5M 1824k1368 S 2M 1920k1080 When the aspect ratio is 3 2 When the aspect ratio is 1 1...

Страница 81: ...sures the most suitable exposure by judging the allocation of brightness on the whole screen automatically Centre weighted This is the method used to focus on the subject on the centre of the screen a...

Страница 82: ...be taken with 0 255 The screen is displayed brighter than the image recorded so that you can check the composition in low light environment such as at night Select SET to specify the Recording Mode in...

Страница 83: ...reens in red It reduces the difficulty in seeing the surroundings caused by brightly lit screens at night or in any low light environment 1 Press 3 4 2 1 to select ON for the red display setting of th...

Страница 84: ...r changing the System Frequency setting motion pictures may not be recorded or played back if you continue to use the card that was inserted in the camera We recommend that you replace the card with a...

Страница 85: ...der name setting Change Allows you to redefine the 5 digit user defined segment before creating a new folder A new folder with an incremented folder number is created File Name Setting Folder Number L...

Страница 86: ...en New File has been selected the name of the file to be saved is displayed on the screen OK Saves the file with an automatically created name displayed on the screen Change the file name Allows you t...

Страница 87: ...or Tone Brightness correction Hue Filter Effect Photo Style Noise Reduction i Dynamic i Resolution Contrast Sharpness Highlight More Settings Shadow Button operation Touch operation Description of ope...

Страница 88: ...to the item selection screen 2 Press 3 4 to select a setting and press MENU SET Recorded motion picture and 4K burst files can be divided in two It is recommended for when you want to divide a part y...

Страница 89: ...6 Controlling with a Smartphone Tablet P95 Recording with a smartphone P96 Playing back or saving images stored on the camera or uploading them on social media sites P98 Explore more enjoyment possibi...

Страница 90: ...ived via radio waves may be intercepted by a third party Do not use the camera in areas with magnetic fields static electricity or interference Do not use the camera in areas with magnetic fields stat...

Страница 91: ...he Image App refer to the support site below http panasonic jp support global cs dsc This Site is English only When downloading the app on a mobile network high packet communication fees may be incurr...

Страница 92: ...after connected via Wi Fi Pairing needs to be set up only for the first connection For the second and subsequent connections P93 is displayed on the recording screen during Bluetooth connection When...

Страница 93: ...that supports Bluetooth low energy by following the same steps You can easily set up a direct connection to your smartphone without entering a password A SSID When the camera is ready to be connected...

Страница 94: ...ID displayed on the camera 3 Enter the password displayed on the camera into the smartphone For first time connection only 4 Start Image App On your smartphone At the time of purchase Wi Fi Password i...

Страница 95: ...connecting to a smartphone Terminating the Wi Fi connection Setup Wi Fi Wi Fi Function Yes Wireless connectivity required Support for Bluetooth low energy Indicates that the function can be used with...

Страница 96: ...martphone to change the setting Turning off the camera with the smartphone When you turn on the camera with the smartphone the status indicator will flash When Remote Wakeup is set to ON the Bluetooth...

Страница 97: ...rations with both the camera and the smartphone during remote recording The camera s dial settings etc cannot be changed with the smartphone Smartphone Allows you to perform operations only with the s...

Страница 98: ...he camera with Remote operation or Transfer image Shutter Remote Priority Shortens the time required to wake the camera with Shutter Remote Control Playing back saving images stored on the camera or u...

Страница 99: ...t can automatically transfer images and will be displayed on the recording screen 5 Take pictures on the camera While sending a file is displayed on the recording screen When Auto Transfer is set to O...

Страница 100: ...c net eng c lumix_faqs 1 The smartphone automatically connects to the wireless access point 2 Start up the Image App in foreground a state in which the app can be operated 3 The camera automatically t...

Страница 101: ...assword and log in to the service If you are required to register an email address operate following the on screen instructions 3 Select and register the cloud storage service you want to use in Cloud...

Страница 102: ...ked up are not saved to a new destination A backup job will stop in the following cases When you set the camera on off switch to ON When you remove or insert the card When the battery runs out of powe...

Страница 103: ...ocation information is not acquired so data cannot be written Positioning with the GPS on the smartphone may not be possible if the smartphone is in a location such as a building or a bag Move the sma...

Страница 104: ...folder you intend to use for receiving then click on the items in the following order File Get Info 2 Enable sharing of the folder For details refer to the operating instructions of your PC or Help on...

Страница 105: ...ase we recommend changing the name to one consisting only of 15 or less alphanumeric characters When Auto Transfer in Bluetooth is set to ON Wi Fi Function is not available Sending an image each time...

Страница 106: ...r region images may not be played back correctly Read the operating instructions for the TV Use a High Speed HDMI cable with the HDMI logo Cables that do not comply with the HDMI standards will not wo...

Страница 107: ...edit RAW format images Edited images can be saved in a format JPEG TIFF etc that can be displayed on a personal computer Check the site below to download and install the software http www isl co jp SI...

Страница 108: ...ut using PHOTOfunSTUDIO For Mac Even if you are using a Mac or in any situation where PHOTOfunSTUDIO cannot be installed you can still copy files and folders by connecting the camera to the computer a...

Страница 109: ...t straight out It may result in malfunction by the deforming of the terminal if it is plugged in obliquely Do not connect devices to incorrect terminals Doing so may cause malfunction Do not use any o...

Страница 110: ...quality P53 Recording format Recording quality P53 Variable Frame Rate P62 Picture size Aspect Ratio P80 Extra Tele Conversion when taking still pictures Image effect filter adjustment display Image...

Страница 111: ...ge 2 Location 3 Current date and time Travel destination setting 3 Exposure meter Focal distance display Step zoom Time Stamp Recording AFS AFF AFC MF AFS BKT AFL LOW STAR 4 AF area P32 Spot metering...

Страница 112: ...98 Number of recordable pictures r20 Maximum number of pictures that can be taken continuously Available recording time 1 Relay recording P85 Backup recording P85 Allocation recording P85 BKT AWB AWBc...

Страница 113: ...S C1 EXPS EXPS ISO A AUTO 0 0 WL 3 Single Burst 4K Photo P39 Post Focus P43 Self timer Focus Mode P30 34 AF Mode P31 A Quality P80 Picture size Aspect Ratio P80 Wi Fi Bluetooth P89 Function button set...

Страница 114: ...d Error This memory card cannot be used Use a card compatible with this unit P8 Insert SD card again Try another card An error has occurred accessing the card Insert the card again Insert a different...

Страница 115: ...not work properly when taking pictures especially in dark places We recommend using a tripod and the self timer when taking pictures with a slow shutter speed If you record a moving subject when usin...

Страница 116: ...change or horizontal striping may appear on the screen If you continue to use the same card after changing System Frequency P84 motion pictures may not be recorded To record with the same card reset S...

Страница 117: ...ommunication error is displayed If you place the camera on a metal table or shelf the radio waves may be adversely affected In such cases you may not be able to establish a connection Move the camera...

Страница 118: ...cess point is far Transmit closer to the wireless access point File format of the motion picture that can be sent differs depending on the destination It is a sound of lens movement or aperture operat...

Страница 119: ...Eye Detection Tracking 225 area focusing Custom Multi 1 area focusing Pinpoint Focus area selection is possible by touching or with the joystick Shutter type Focal plane shutter Burst recording Burst...

Страница 120: ...of a second When System Frequency is set to 59 94Hz NTSC or 1 25th When System Frequency is set to 50 00Hz PAL When the Interchangeable lens H FS12060 is used Shutter speed Still picture B Bulb Max ap...

Страница 121: ...s available Picture size Still picture When the aspect ratio setting is 4 3 3328k2496 pixels 4K photo 3680k2760 pixels L 2592k1944 pixels M 1824k1368 pixels S When the aspect ratio setting is 3 2 3504...

Страница 122: ...d Connect the supplied BNC conversion cable to the flash synchro socket Input 1 0 V to 4 0 V p p 10 k Output 2 0 V d0 5 V p p low impedance Dimensions Approx 138 5 mm W k98 1 mm H k87 4 mm D 5 45q W k...

Страница 123: ...20 MHz 36 40 44 48 52 56 60 64 ch 5500 MHz to 5700 MHz 100 104 108 112 116 132 136 140 ch 5745 MHz to 5825 MHz 149 153 157 161 165 ch Encryption method Wi Fi compliant WPATM WPA2TM Access method Infra...

Страница 124: ...NOTE Accessories and or model numbers may vary between countries Consult your local dealer For lens related optional accessories such as compatible lenses and filters refer to catalogues Web pages et...

Страница 125: ...on 2 1 LGPL V2 1 and or 5 open source software other than the software licensed under the GPL V2 0 and or LGPL V2 1 The software categorized as 3 5 are distributed in the hope that it will be useful b...

Страница 126: ...the Service Centre Locator for the name address of the nearest Authorised Service Centre Send or take the product to a Panasonic Authorised Service Centre together with your proof of purchase receipt...

Страница 127: ...ration Dolby Dolby Audio and the double D symbol are trademarks of Dolby Laboratories HDAVI Control is a trademark of Panasonic Corporation Adobe is a trademark or registered trademark of Adobe System...

Страница 128: ...rk of DENSO WAVE INCORPORATED Other names of systems and products mentioned in these instructions are usually the registered trademarks or trademarks of the manufacturers who developed the system or p...

Отзывы: