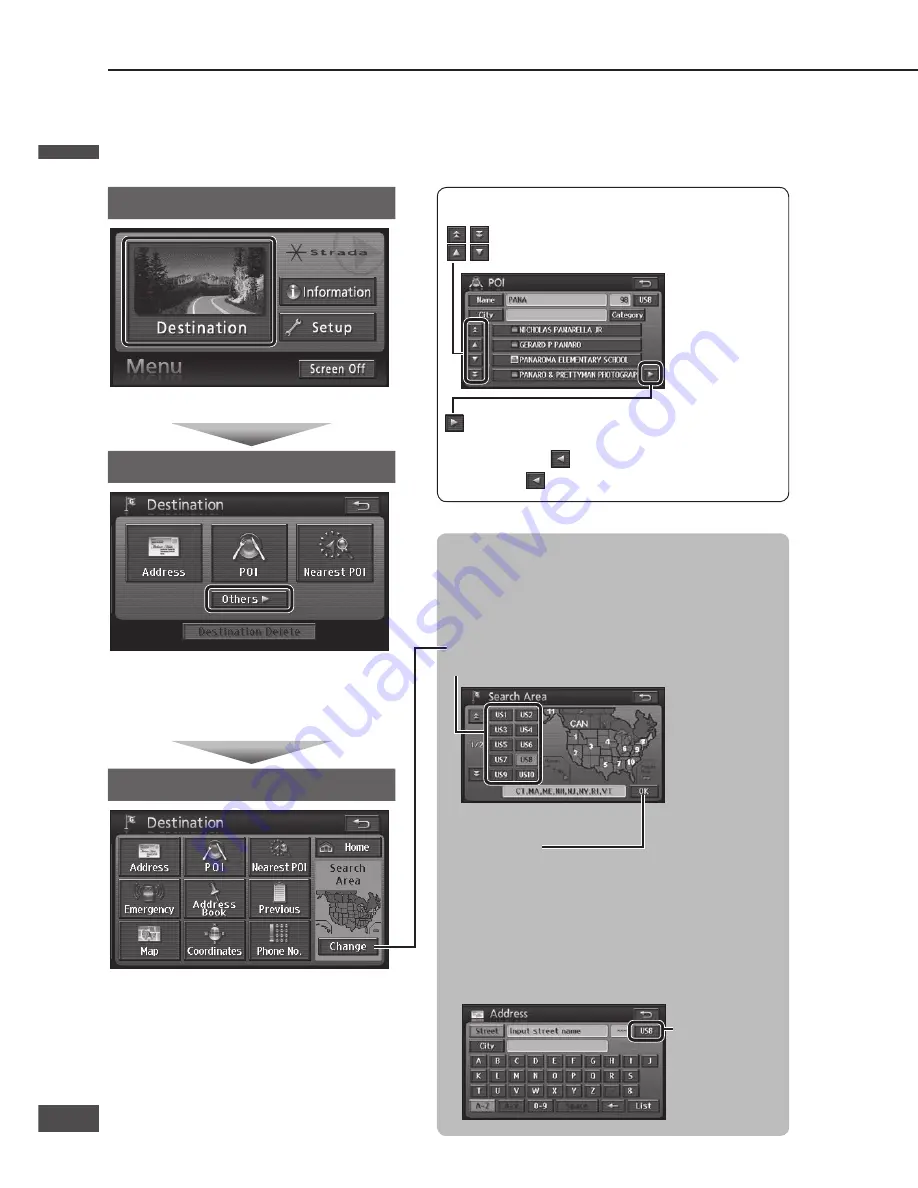
To switch the search area
The Search area function divides United States, Canada
and Puerto Rico into 14 areas, so that the search can be
narrowed to a specifi ed area. Areas other than the one
specifi ed are not subject to searching.
Touch [Change].
Touch the area to search.
<Search Area screen>
Select [OK].
The area to search switches.
Note:
The default is [US8].
Hawaii is [US12].
The Search Area screen is also displayed when [US8]
is selected from Address search (
page 40), POI
search (
page 42) or Phone No. search (
page 49).
Display the current
search area.
Choose this to
display the Search
Area screen.
Roads and distances used
The total route length is displayed, together with the
distances using highways, toll roads, time-restricted
roads, seasonally restricted roads, ferries and car trains.
To check the route
[3 routes]: Three types of routes to the destination
are displayed. (
page 38)
[Route]: The Change Route screen is displayed.
(
page 38)
Note:
If there are transit destinations (
page 52), [3 routes]
will not be displayed.
The demo starts if [Start] is touched for 3 seconds.
(
page 59)
The All route screen can be displayed even after
guidance starts. (
page 60)
The turn list cannot be displayed. To display the turn
list, display the All route screen manually after route
guidance starts. (
page 60)
There are cases where a part of the route that you set
is not displayed due to the scale of the map. However,
it does not affect the audio assist function.
Checking the route to be used
The route selection status for the route to use is displayed.
Example:
: Use
: Do not use
: Highway
: Time-restricted road
: Ferry
: Toll road
: Seasonally restricted road
: Car train
[Road preference]: The type of road to use can be
changed. (
page 58)
If the destination has been set
The following two touch keys will be displayed instead of
[Enter].
[New
]: The set destination is cancelled and a
new destination is set.
[Add to
]: A new destination is set in addition to
the previously set destination.
Note:
[Info.]: Information on the POI is displayed. Nothing
is displayed if there is no information.
(
page 50)
Create a route to the destination
1
Search for the destination on the Navigation menu.
Use the search function to search for the destination.
2
Touch [Enter] when the map
displaying the destination
appears.
A search is made for the route from the
vehicle position to the destination.
The destination (set location) is marked with
a
.
3
Touch [Start] when the All
route screen is displayed.
Route guidance begins.
Distance and time display
The distance and time (such as estimated arrival time
or remaining time) to the next destination are displayed.
Refer to page 39 for how to switch the time display.
Navigation menu
Touch [Destination].
Destination menu
Touch [Others].
Setting frequently used items on the Destination
menu makes it easier to search for destinations.
(
page 34)
Destination menu (All)
The Destination setting screen (a map of the
area around the destination) is displayed as the
result of the search.
The List screen
: Moves the cursor to the previous/next screen.
: Moves the cursor to the previous/next item.
: Scrolls to display the parts of names which cannot
be displayed fully at fi rst. Scrolling stops at the last
name, and
is displayed.
Touch to return to the previous display.
All route screen
Destination setting screen
English
English
36
37
37
36
Содержание CN-NVD905U - Strada - Navigation System
Страница 117: ...Memorandum 343 ...


