– 91 –
Chapter 5 Basic Operations — Memory
r
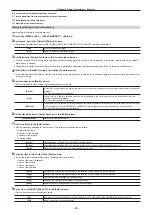
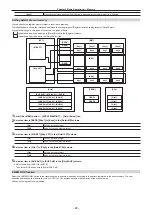
Playback target (when playing back with the multi‑selection panel)
f
Playback of [ME1] and [ME2]
The target selected at the start of playback is always played back.
-
When the target selected at registration is either one of [ME1] or [ME2]
The target selected at registration is played back even when either [ME1] or [ME2] is selected at the start of playback.
-
When there is no target selected at registration
[ME1] recorded at registration is played back even when either [ME1] or [ME2] is selected at the start of playback.
f
Playback of [DSK], [AUX], and [CBGD]
The target selected by both operations at registration and the start of playback is played back.
r
Playback target (when playing back with the menu panel)
f
Playback of [ME1] and [ME2]
The target selected at the start of playback is always played back.
-
When the target selected at registration is either one of [ME1] or [ME2]
The target selected at registration is played back even when either [ME1] or [ME2] is selected at the start of playback.
-
When there is no target selected at registration
[ME1] recorded at registration is played back even when either [ME1] or [ME2] is selected at the start of playback.
f
Playback of [DSK], [AUX], and [CBGD]
The target selected at the start of playback is always played back.
For the target which is not selected at registration, playback is performed with the setting at registration.
@
@
NOTE
t
The selection button for the background wipe preset menu in the multi-selection panel will move to top left (pattern 1) when shot memory is played
back.
t
Playback in selected mode is not possible for playback of [ME1] or [ME2] in the 3G mode or the 4K mode when the selection for playback is not
selected at the time of registration.
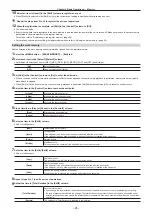
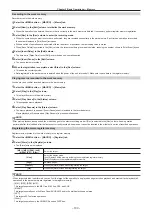
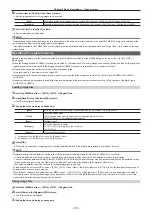
Editing register memories of the shot memory
Delete a registered register memory or change file names.
1
Select the <MEM> button
→
[SHOT MEMORY]
→
[Register] tab.
2
Select [Misc] in the [Register] column.
f
The [Misc] screen is displayed.
[Rename]
Select [Rename] after selecting a file icon to change the file name using the on‑screen keyboard.
[Delete]
Select [Delete] after selecting a file icon to delete the register memory.
[View]
Select the display mode.
[ALL]: Displays all the memory including the unregistered register memory.
[Exist]: Displays only the registered register memory.
[Page]
Switches pages.
[Close]
Closes the [Misc] screen.
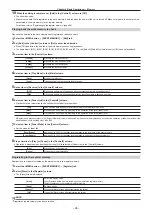
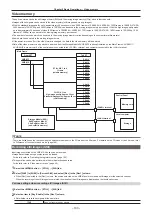
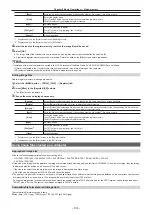
Setting effect dissolve
Switching from the current image settings to the image settings stored in the shot memory can be performed smoothly.
1
Select the <MEM> button
→
[SHOT MEMORY]
→
[Register] tab.
2
Select an item in [Effect Dissolve] in the [Mode] column.
f
Set the effect when switching images.
[On]
Switches the images using the dissolve effect.
[Off]
Switches the images using the cut effect.
3
Set the time for dissolve effect in [Dissolve Time] in the [Mode] column.
4
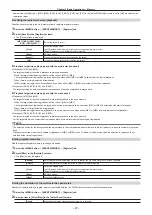
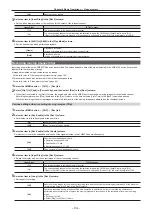
Select an item in [Hue Path] in the [Mode] column.
f
Select the effect when switching colors. The following Hue becomes the target.
- Colors of the color background
- Colors of the borders
- Colors of the edges
-
Colors of the fill matte
[Short]
Changes the colors in the direction where the variation of Hue is small on the vectorscope.
[Long]
Changes the colors in the direction where the variation of Hue is large on the vectorscope.
[CW]
Changes the Hue clockwise on the vectorscope.
[CCW]
Changes the Hue counterclockwise on the vectorscope.
[Step]
Changes with the cut effect.
Содержание AV-HS60C1E
Страница 5: ...Please read this chapter and check the accessories before use Chapter 1 Overview ...
Страница 32: ...This chapter describes basic operations and matters to be performed prior to use Chapter 4 Preparations ...
Страница 52: ...This chapter describes menu operations Chapter 5 Basic Operations ...
Страница 118: ...This chapter describes the input output signal settings Chapter 6 Input Output Signal Settings ...
Страница 129: ...This chapter describes how to operate the CONFIG menu displayed when the CONF button is pressed Chapter 7 CONFIG Menu ...
Страница 140: ...This chapter describes how to operate the system menu displayed when the SYS button is pressed Chapter 8 System Menu ...
Страница 162: ...This chapter describes the difference with the Standard mode Chapter 9 3G mode 4K mode ...
Страница 168: ...This chapter describes the terminals and signals of the unit Chapter 10 External Interfaces ...
Страница 173: ...This chapter describes the dimensions and specifications of this product Chapter 11 Specifications ...
Страница 184: ...This chapter describes the setting menu table and terms Chapter 12 Appendix ...
Страница 206: ...Web Site http www panasonic com Panasonic Corporation 2014 ...

