– 107 –
Chapter 5 Basic Operations — Video memory
Compatible file formats for moving image data
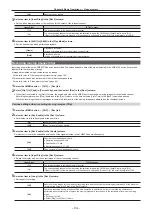
Moving image data handled by the unit is in the original format. “clp” is added to the extension of the file (clip file) for exchanging data using a memory
card or a computer.
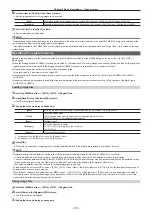
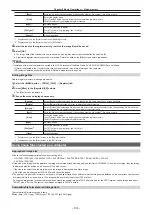
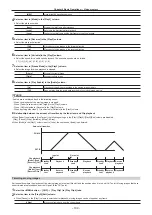
The sequential numbered still image files (TARGA format (tga)) can be converted to a clip file using a computer that has the AV‑HS6000 ClipConvert
software installed. Also, it can be made into a clip file with audio data when an audio file (WAV format (extension .wav)) is loaded at the time of
conversion.
For the AV-HS6000 ClipConvert software,visit the following website.
http://pro-av.panasonic.net/ (English only)
r
Operation screen of the ClipConvert software
1
6
7
2
3
4
5
1
“High”/“Standard”
Select the image quality of the clip file to be generated.
High: Approximately 200 Mbps, Standard: Approximately 100 Mbps (other than 1080/59.94p, 1080/50p)
High: Approximately 400 Mbps, Standard:Approximately 200 Mbps (1080/59.94p, 1080/50p)
2 “Frame”
Select the frame rate of the clip file to be generated.
The clip file with different frame rate from the AV‑HS6000 system format cannot be loaded by AV‑HS6000.
In the interlace mode and PsF mode, one file is expanded into two fields; and in the progressive mode, one file is equivalent to one frame.
3 “alpha”
Select this check box when converting images with key signals.
4
“Convert”
Select a TARGA file.
f
The TARGA files will be grouped when the TARGA files are in sequential number, and the name in front of the number will be displayed as the file
name. To recognize as TARGA files in sequential number, add four digit numbers starting with 0001 in sequence after the file name excluding the
file extension in advance.
f
To generate a clip file with audio data, save the audio file (extension .wav) in the same folder as the folder where the TARGA files are saved. At this
time, set the name of the audio file (part excluding the extension .wav) same as the name of the TARGA files (excluding the sequential number and
extension .tga). The audio file with different name from the TARGA files is not loaded, and audio data will not be embedded in the clip file.
f
Example) A clip file with audio data can be created by preparing following files and saving in the same folder.
-
picture0001.tga - picture0011.tga
-
picture.wav
5
“Save”
Specifies the destination and file name of the clip file to be generated.
The file name omitted in the display at the time the clip file is loaded to AV‑HS6000 when a file name exceeding 8 characters (excluding file
extension). It is recommended to specify the file name with 8 characters or less.
6 “Convert”
Executes the conversion. The clip file is generated when executed.
7 “Cancel”
Cancels the program.
@
@
NOTE
t
TARGA files compressed in the RLE format cannot be used.
t
Only the TARGA file in full color format can be used.
t
To use in the 1080p format, prepare even number of TARGA files. The clip file with even number of frames by copying the last frame is generated
when odd number of TARGA files are loaded.
r
Header formats of supported TARGA files
f
Numbers with H are in hexadecimal notation.
Offset
(bytes)
Length
(bytes)
Header
Description of setting
Setting
0
1
ID field length
―
0H
1
1
Color map type
No color map
0H
2
1
Image type
Full color
2H
3
2
Color map origin
No restrictions
―
5
2
Color map length
No restrictions
―
7
1
Color map entry size
No restrictions
―
Содержание AV-HS60C1E
Страница 5: ...Please read this chapter and check the accessories before use Chapter 1 Overview ...
Страница 32: ...This chapter describes basic operations and matters to be performed prior to use Chapter 4 Preparations ...
Страница 52: ...This chapter describes menu operations Chapter 5 Basic Operations ...
Страница 118: ...This chapter describes the input output signal settings Chapter 6 Input Output Signal Settings ...
Страница 129: ...This chapter describes how to operate the CONFIG menu displayed when the CONF button is pressed Chapter 7 CONFIG Menu ...
Страница 140: ...This chapter describes how to operate the system menu displayed when the SYS button is pressed Chapter 8 System Menu ...
Страница 162: ...This chapter describes the difference with the Standard mode Chapter 9 3G mode 4K mode ...
Страница 168: ...This chapter describes the terminals and signals of the unit Chapter 10 External Interfaces ...
Страница 173: ...This chapter describes the dimensions and specifications of this product Chapter 11 Specifications ...
Страница 184: ...This chapter describes the setting menu table and terms Chapter 12 Appendix ...
Страница 206: ...Web Site http www panasonic com Panasonic Corporation 2014 ...

