– 94 –
Chapter 4 Shooting — Setting the time data
Frame rate information recorded on user bits
Saving the frame rate values for the image information shot/saved according to the frame rate set in the main menu
→
[SYSTEM MODE] to user bits
allows you to use the editor (personal computer editing software).
Information is always saved in VITC UB.
In addition, selecting [FRAME RATE] in the main menu
→
[RECORDING SETUP]
→
[UBG MODE] saves the information also in user bits (LTC UB). In
playback of clips recorded in native format, the same values as the frame rate information obtained by playing back recorded user bits are also output
as HD SDI output signals or user bits of TC output from the <TC IN/OUT> terminal.
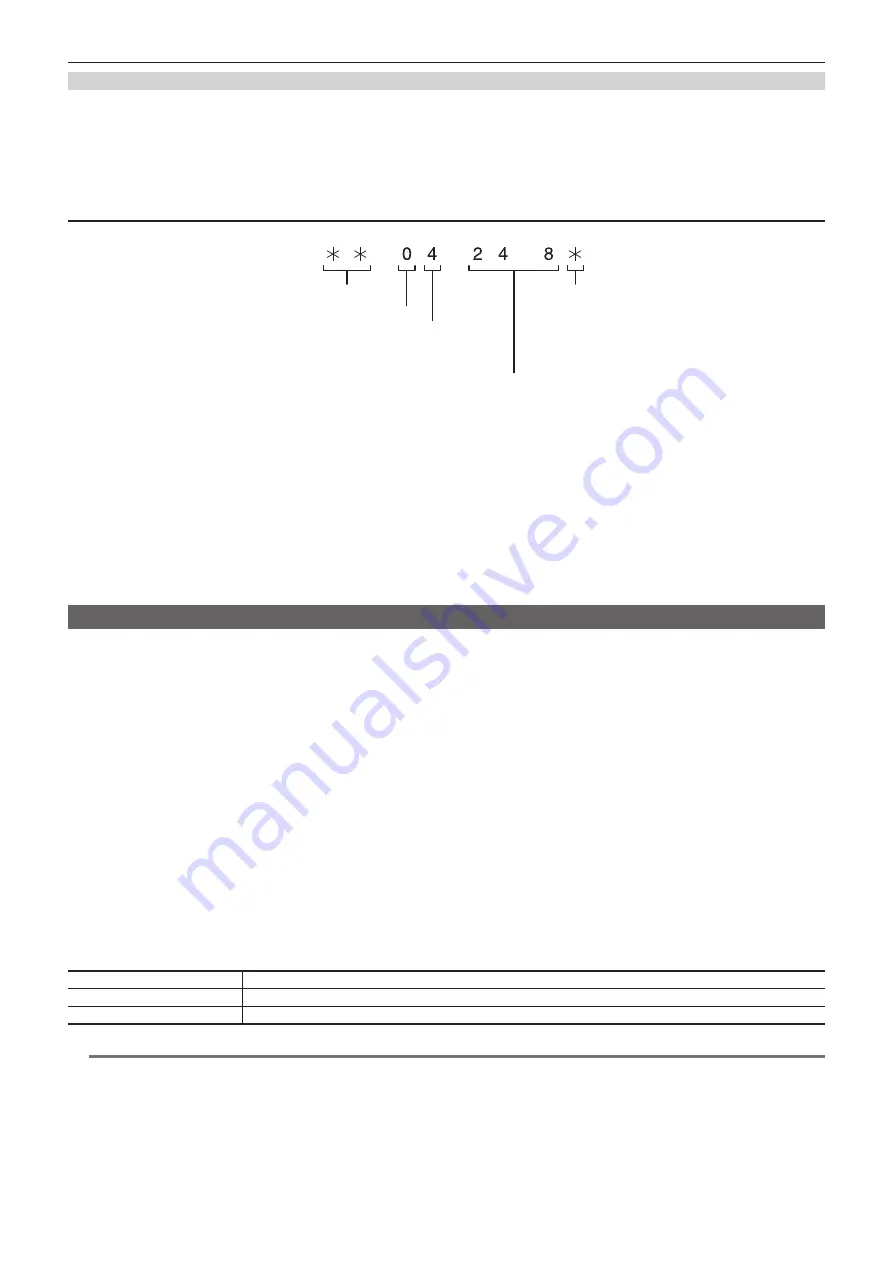
Frame rate information
The relationship between frame rates, image pull-down, and time codes/user bits is as follows.
・
60i
:
600
・
60P
:
608
・
30P
:
308
・
24P
:
248
・
24PN
:
24C
・
50i
:
502
・
50P
:
50A
・
25P
:
25A
・ **
P
:**
9
・ **
P
:**
1
・ **
P
:**
D
・ **
P
:**
B
・
・
Verification information on the right-hand six digits
Fixed values
Sequence No.
24P: 0 - 4
Other than the above: Fixed to F
Media management information
Updated frame flags and valid frame flags
REC mark
Camera image mode
Example)
(During shooting)
(VFR 30PN or over 60P)
(VFR over 60P)
(VFR24PN during shooting)
(VFR 25PN or over 50P)
Setting the time code
1
Set [DF] or [NDF] in the main menu
→
[RECORDING SETUP]
→
[DF MODE].
f
Set [DF] to advance the time code in the drop frame mode, and set [NDF] to advance it in the non-drop frame mode. However, note that the time
code runs by [NDF] at all times in the 24PN mode.
2
Press the <SETUP> button to display the [SET01:TC/UB] screen of SmartUI.
3
Press the <COUNTER> button to set the counter display to [UB].
4
Press the <
%
/REW> button to set [TCG] to [SET].
5
Set the time code.
f
Press the upper or lower buttons that correspond to the following screen displays.
- [
→
]: The digit to be set (flashing) moves to the right.
- [
+
]: The digit to be set (flashing) moves to the left.
- [
−
]: The value of the digit to be set (flashing) is incremented by one.
- [RST]: The value of the digit to be set (flashing) is decremented by one.
6
Press the <
%
/REW> button, enter the setting values of the time code, and exit the time code settings screen.
7
Press the <HOME> button to display the [HOME] screen of SmartUI.
Settable time code range
For 59.94 Hz (except for 24PN)
00:00:00:00 to 23:59:59:29
24PN
00:00:00:00 to 23:59:59:23
For 50 Hz
00:00:00:00 to 23:59:59:24
@
@
NOTE
t
When used in 24PN mode, the time code settings are adjusted in multiples of 4. For 720/30PN and 720/25PN, the time code settings are adjusted to
even numbers. Also, the time code cannot be set during recording.
t
If you exit the time code setting screen without pressing the <
%
/REW> button, the set values are disabled.
t
When the <RESET> button is pressed while in the time code setting screen, the value is reset to 0.
Содержание AJ-PX800G
Страница 9: ...Before using the camera read this chapter Chapter 1 Overview ...
Страница 153: ...Details displayed on the viewfinder are described Chapter 8 Display ...
Страница 177: ...This chapter describes how to use the camera by connecting to network Chapter 10 Network Connection ...
Страница 210: ...This chapter describes the specifications of this product Chapter 13 Specification ...


