– 120 –
Chapter 4 Shooting — Handling setting data
@
@
NOTE
t
SD memory cards can also be formatted from the thumbnail screen.
For details, refer to “Formatting SD memory cards” (page 139).
t
Data deleted as a result of formatting cannot be restored. Always check the data before formatting.
Saving and loading setup files
Specified menu items can be saved to SD memory cards and loaded to the camera.
There are two operations for saving to SD memory card: [SAVE] overwriting an existing file and [SAVE AS] creating a new file.
Overwriting a setup file on SD memory card
Select the type of menu to write beforehand in the main menu
→
[FILE]
→
[SETUP DATA SELECT].
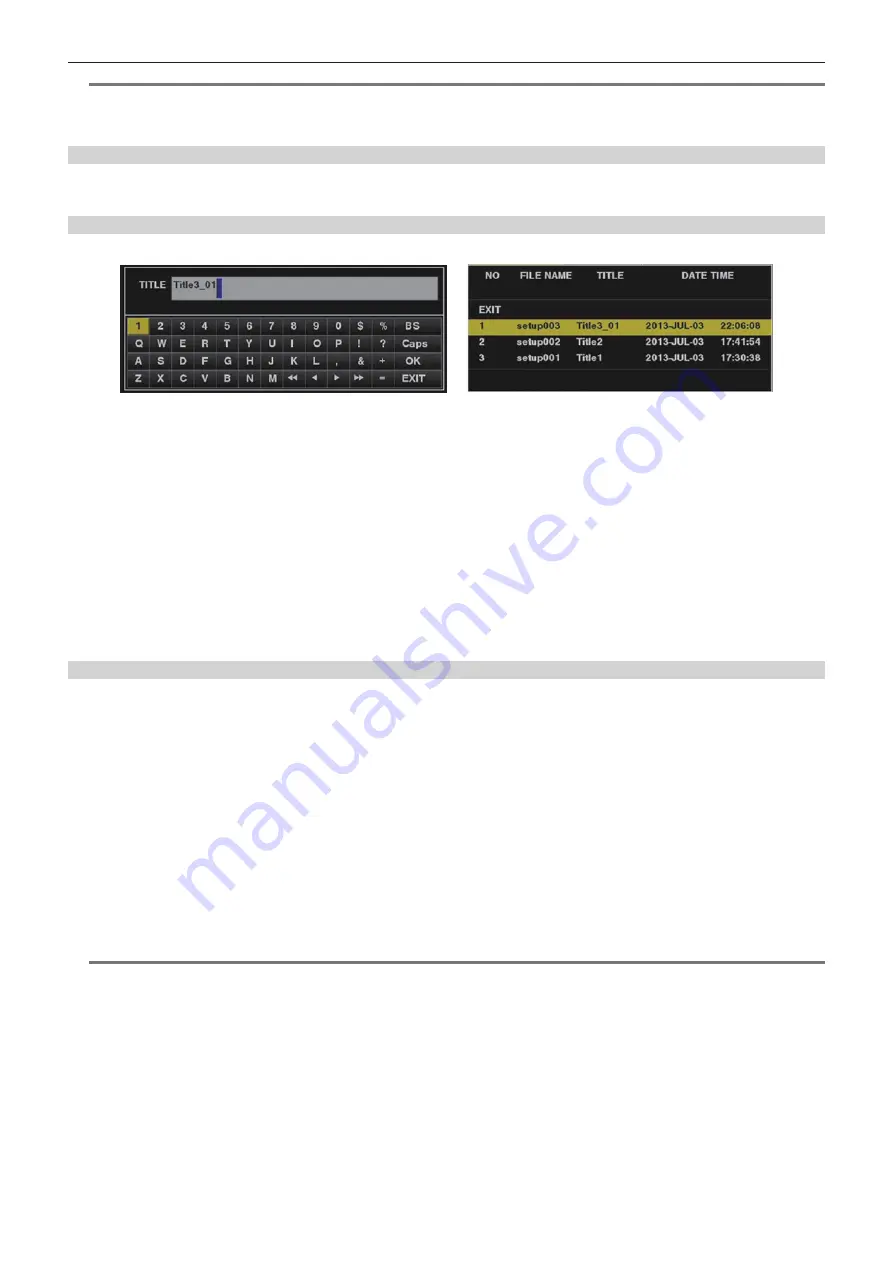
Fig. 1
Fig. 2
1
Select [SAVE] in the main menu
→
[FILE]
→
[SETUP DATA (SD CARD)], and press the jog dial button (or <SET> button).
The list of setup files currently saved on the SD memory card is displayed.
2
Select the file to overwrite from the list.
The title entry screen and keyboard are displayed.
3
Enter the desired characters with the keyboard. (Fig. 1)
4
Use the jog dial button (or cursor buttons
`
/
{
/
Y
/
I
) to select [OK], and press the jog dial button (or <SET> button).
The confirmation screen is displayed.
5
Select [YES], and press the jog dial button (or <SET> button).
The file is saved and the file list is updated. (Fig. 2)
For details on error messages if an error message is displayed, refer to “Warning/error displays in the thumbnail operation, menu operation, and
USB storage mode” (page 251).
Saving a new setup file on SD memory card
Select the type of menu to write beforehand in the main menu
→
[FILE]
→
[SETUP DATA SELECT].
1
Select [SAVE AS] in the main menu
→
[FILE]
→
[SETUP DATA (SD CARD)], and press the jog dial button (or <SET> button).
The file name, title entry screen, and keyboard are displayed. The month, day, hour, minute, title name, and file name are displayed in the factory
settings.
2
Enter the desired characters with the keyboard.
3
Use the jog dial button (or cursor buttons
`
/
{
/
Y
/
I
) to select [OK], and press the jog dial button (or <SET> button).
The confirmation screen is displayed.
4
Select [YES], and press the jog dial button (or <SET> button).
Saving of the file starts.
5
When the completion message is displayed, press the jog dial button (or <SET> button).
@
@
NOTE
t
Setup files saved on the camera cannot be used on other models.
t
Setup files saved on other models cannot be used on the camera.
Содержание AJ-PX5100G
Страница 11: ...Before using the camera read this chapter and check the accessories Chapter 1 Overview ...
Страница 225: ...This chapter describes how to use the camera by connecting to network Chapter 8 Network Connection ...
Страница 246: ...This chapter describes the warnings and error messages displayed in the viewfinder screen Chapter 9 Maintenance ...
Страница 254: ...This chapter describes the dimensions specifications and connector signals Chapter 10 Specification ...
Страница 263: ...Web Site http www panasonic com Panasonic Corporation 2018 ...


