


OnSSI NetDVMS Rev 6.5
Video Clients
On-Net Surveillance Systems, Inc. | 222 Route 59, Suite 303, Suffern, NY 10901 | T: 845-369-6400 | F: 845-369-8711 | www.onssi.com | [email protected] | page 193
Creating a View in a Shared Group
To create a view in a shared group, make sure the group in which you want to create the
view is selected in the Setup tab's Views section, and do the following:
3.
In the Setup tab's View Control section, type a name for the view in the
View Name field.
Tip: Bear in mind that since the view will appear in a shared group, it will also
appear in other users' NetGuards; therefore use a name which other users will
immediately be able to understand.
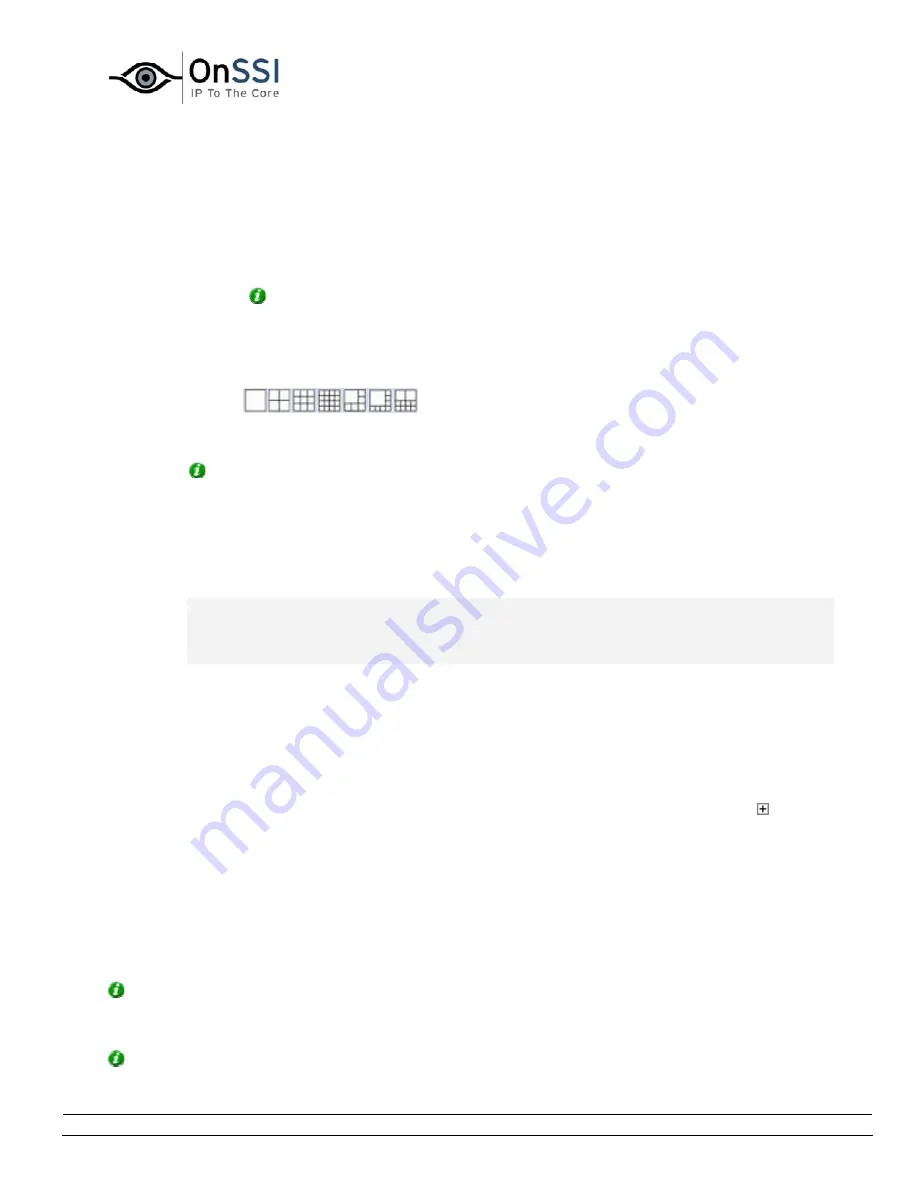
2.
Click one of the View Control section's seven available New View layouts:
Your new view is automatically added to the selected group:
Tip: A group, whether private or shared, can contain an unlimited number of views. More
than one private and shared group can exist.
Adding Cameras to the View
Having created a view within a group, you are able to specify which cameras should be
included in the view.
Note: Bear in mind that depending on their user rights not all users may have access to all
cameras on the surveillance system. Thus, even though you may be able to view images from
all cameras in a shared view, other users may not necessarily be able to view images from all
the cameras. Consult your system administrator if in doubt.
To add cameras to a view, do the following:
3.
In the Setup tab's Views section, select the required view.
When you select a view, the layout of the selected view is outlined in the main section of the NetGuard
window.
2.
In the Setup tab's System Overview section, click the plus sign next to
the required server to view a list of available cameras.
3.
In the list, select a camera and drag the camera to the required position in the view.
When you have dragged a camera to a position in the view, the name of the camera will appear in the
selected position. You will not see images from the camera yet, as the Setup tab is only for configuration,
not for viewing images.
Repeat for each camera required in the view.
Tip: If you want to use all of the cameras under a server, you may simply drag the required server to
the view; this will automatically place all of the server's cameras in the view, beginning at the selected
position. Remember to have sufficient positions available in the view.
Tip: You can always change the cameras in the view: Either drag the System Overview section's Clear
Содержание NetDVMS 6.5
Страница 2: ...This page intentionally left blank...


