21
ofs.com
imagine a place®
800.521.5381
Assembly instructions
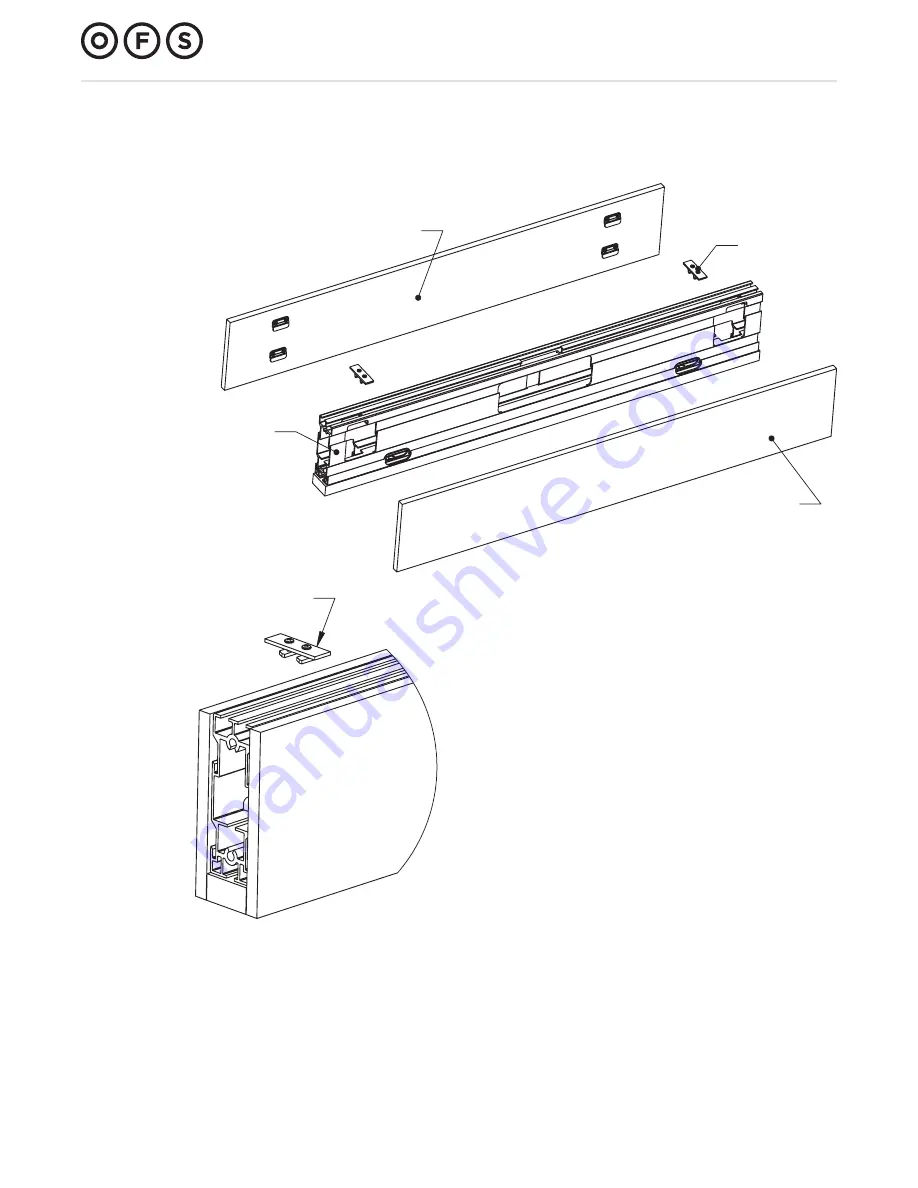
Obeya assembly instructions
1. Lift cladding panel up to beam face with top of cladding
approx. 1" above the top of the beam.
2. Apply light pressure to the face of the cladding panel and pull
downward engaging the hanging clips into the hangings slots
on the beam extrusion.
3. When seated the cladding panel should be flush with the top
of the extrusion and bottom of the wood trim rail at
the bottom.
4. Ensure cladding panel is engaged before releasing.
5. Slide cladding panel(s) left to right as needed to center
in the width of the wall leaving an approx. 1/8" vein line on
each end.
6. Secure cladding panels with 2 cladding clips for each panel.
Note:
one clip will secure cladding panels on both sides of
the extrusion.
7. Place the cladding clip assembly in the top of the extrusion by
aligning and inserting the rectangle nuts into the t-slots.
8. Position the clips approx. 6" from each end of each piece
of cladding.
9. Secure by tightening the (2) #8-32 x 1/2" machine screws in
each clip.
Beam
Cladding panel
Beam assembly
(cladding installed)
Cladding clip
Cladding panel w/
pre-installed hanging clips
Cladding clip
Cladding panel
Содержание Obeya
Страница 1: ...Obeya assembly instructions ...


