1.
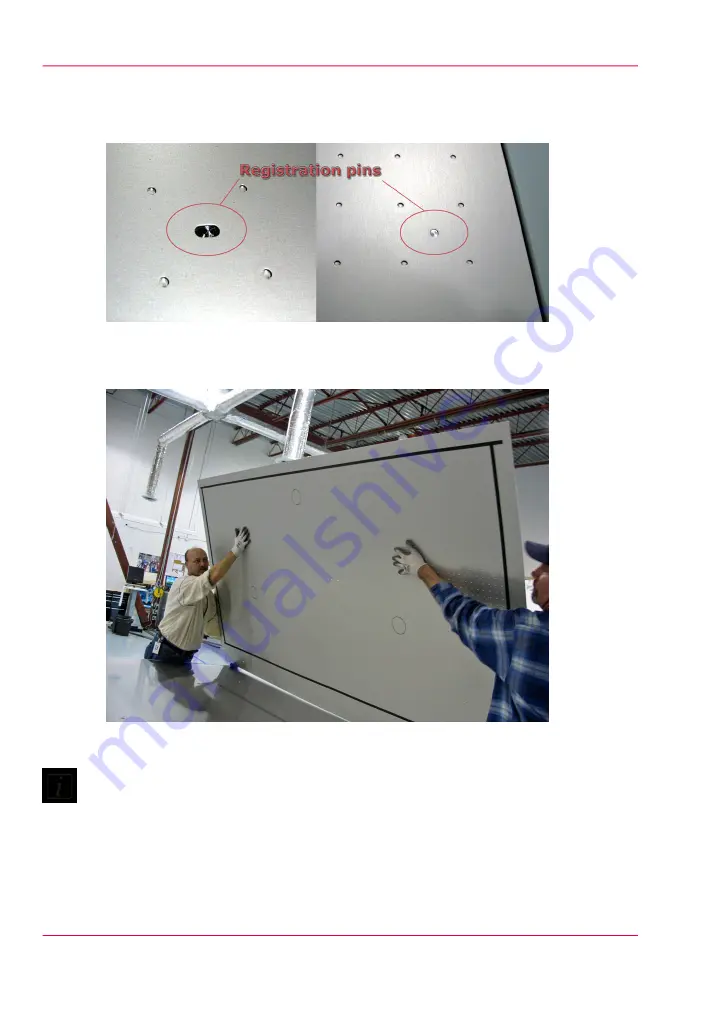
With the gantry in its home position, carefully lift the overlay up enough to release it
from the two registration pins (the pins are located on the Control side of the table near
the corners of the overlay: the side with the Print button and vacuum gauge).
[65] Registration Pins
2.
With one person at each end, carefully raise the overlay to the upright position on the
Control side edge of the table.
[66] How to Handle the Overlay
Note:
Make sure that you support the middle parts of the overlay so that you don't bend or
warp it, as shown in the photo. If it does warp you may have to turn it over and leave it
to settle for a while until it is completely flat.
3.
With one hand on the top and the other on the bottom, carefully flip the overlay over
and lay it down flat on the table (or another clean, flat surface).
Chapter 5 - How to Operate the Océ Arizona 550 GT
92
How to Create Custom Vacuum Zones
Содержание Arizona 550 GT
Страница 1: ...Océ Arizona 550 GT User Manual Version 1 0 Revision B Océ User Manual ...
Страница 6: ...6 Contents ...
Страница 7: ...Chapter 1 Introduction ...
Страница 15: ...Chapter 2 Product Overview ...
Страница 19: ...Chapter 3 Safety Information ...
Страница 43: ...Chapter 4 How to Navigate the User Interface ...
Страница 71: ...Chapter 5 How to Operate the Océ Arizona 550 GT ...
Страница 101: ...Chapter 6 How to Operate the Roll Media Option ...
Страница 135: ...Chapter 7 How to Use the Static Suppression Upgrade Kit ...
Страница 139: ...Chapter 8 How to Work With White Ink ...
Страница 179: ... 145 Parameters Chapter 8 How to Work With White Ink 179 How to Use Media Models ...
Страница 196: ...Chapter 8 How to Work With White Ink 196 How to Create and Use Quick Sets ...
Страница 197: ...Chapter 9 Ink System Management ...
Страница 205: ...Chapter 10 Error Handling and Trou bleshooting ...
Страница 209: ...Chapter 11 Printer Maintenance ...
Страница 257: ...Appendix A Application Information ...


