


1.
Create a box around your image using the Rectangle Tool or other appropriately shaped
box tool.
2.
Make sure this new box is selected and select Fill swatch located at the bottom of the Il-
lustrator toolbar. This will fill the box with color. By double clicking on this swatch a
dialog box will open allowing for color changes. Ensure that the chosen color does not
appear anywhere in your image. For this example we have used red (composed of 100%
Cyan and 100% Yellow).
3.
Place this rectangle behind your image data, either underneath or in a new layer below.
It is not necessary to choose Overprint attributes for this layer.
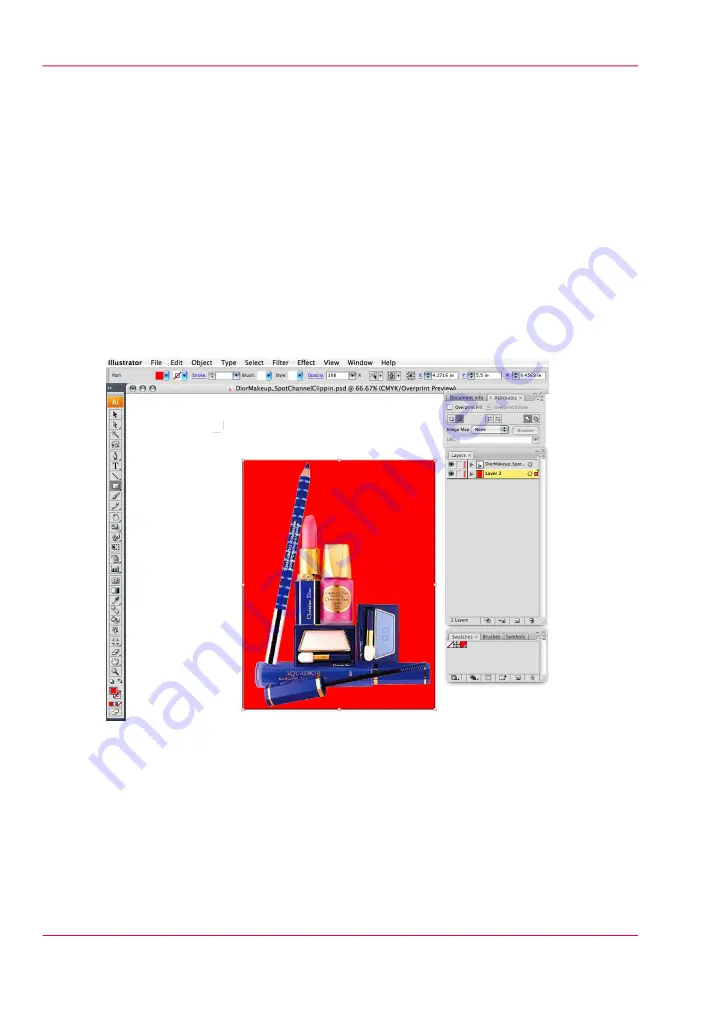
Result
The prepared file should look similar to the below example.
[124] Red Mask
Chapter 8 - How to Work With White Ink
168
How to Create White Spot Data in Illustrator
Содержание Arizona 550 GT
Страница 1: ...Océ Arizona 550 GT User Manual Version 1 0 Revision B Océ User Manual ...
Страница 6: ...6 Contents ...
Страница 7: ...Chapter 1 Introduction ...
Страница 15: ...Chapter 2 Product Overview ...
Страница 19: ...Chapter 3 Safety Information ...
Страница 43: ...Chapter 4 How to Navigate the User Interface ...
Страница 71: ...Chapter 5 How to Operate the Océ Arizona 550 GT ...
Страница 101: ...Chapter 6 How to Operate the Roll Media Option ...
Страница 135: ...Chapter 7 How to Use the Static Suppression Upgrade Kit ...
Страница 139: ...Chapter 8 How to Work With White Ink ...
Страница 179: ... 145 Parameters Chapter 8 How to Work With White Ink 179 How to Use Media Models ...
Страница 196: ...Chapter 8 How to Work With White Ink 196 How to Create and Use Quick Sets ...
Страница 197: ...Chapter 9 Ink System Management ...
Страница 205: ...Chapter 10 Error Handling and Trou bleshooting ...
Страница 209: ...Chapter 11 Printer Maintenance ...
Страница 257: ...Appendix A Application Information ...


