background image

68 / Programming

MICS-XC Norstar-Companion Installer Guide

P0881594 Issue 01

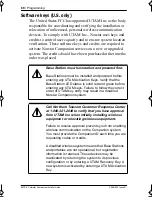
Software keys (U.S. only)

The United States FCC has appointed UTAM Inc. as the body 
responsible for coordinating and verifying the installation or 
relocation of unlicensed, personal wireless communication 
devices. To comply with UTAM Inc., Norstar uses keys and 
credits to control user capacity and to ensure system location 
verification. These software keys and credits are required to 
activate Norstar Companion services on a new or upgraded 
system. The credits should have been purchased at the time the 
order was placed.

Base Station must be installed and powered first.

Base Stations must be installed and powered before 
entering any UTAM Activation Keys. Verify that the 
Base Station LED status is solid red and green before 
entering any UTAM keys. Failure to follow the correct 
order of UTAM key entry may result in a disabled 
Norstar Companion system.

Call Northern Telecom Customer Response Center 
at 1-800-321-2649 to verify that you have approval 
from UTAM Inc. when initially installing wireless 
equipment or relocating wireless equipment.

Failure to receive approval prevents you from enabling 
wireless communication on the Companion system. 
You must provide the Companion ID each time you are 
requesting codes or credits.

A disabled wireless system means that Base Stations 
and portables are not operational, but registration 
information is retained. These devices may be 
reactivated by returning the system to its previous 
configuration or by entering a UTAM Recovery Key. A 
new system is activated by entering a UTAM Activation 
Key.

p0881594.book  Page 68  Tuesday, August 25, 1998  3:59 PM

Содержание Companion MICS-XC

Страница 1: ...rstar Meridian and Companion are trademarks of Northern Telecom Northern Telecom 1998 Norstar Companion MICS XC Installer Guide 1 800 4 NORTEL www nortel com norstar P0881594 Issue 01 Printed in Canad...

Страница 2: ......

Страница 3: ...l Forward No Answer enhancement 8 Wireless Twinning enhancement 8 Planning the installation 9 Planning checklist 9 Required equipment and supplies 9 Configuring Station Modules 9 Configuring expansion...

Страница 4: ...haracters on the display 52 The Norstar Programming Record 53 Exiting programming 53 Viewing your programming updates 53 Entering numbers 53 Template defaults 54 Passwords defaults 54 System prgrming...

Страница 5: ...only 81 To deregister the C3020 81 Measuring RSSI for a C3020 Canada only 82 Measuring undirected RSSI 82 Measuring directed RSSI 83 Measuring directed RSSI using your portable 84 After registering t...

Страница 6: ...0881594 Issue 01 Specifications 107 Norstar Companion system components 107 Remote Power Interconnect 107 Base Station 108 Upgrading your system 111 Adding Companion to a mini midi maxi or mega system...

Страница 7: ...15 subpart D DOC RSS 130 documents in Canada Do not install the Base Station in ducts plenums or hollow spaces used to transport environmental air Note In Canada Base Stations may be installed where...

Страница 8: ...orstar administration set and Base Stations must not be used as off premises equipment Installers must check the lightning surge arrestors at the cable entry point to the building with special attenti...

Страница 9: ...nsfer conferencing and voice mail Companion on Norstar consists of four main components ICS and Norstar XC software Norstar XC software manages the telephone traffic between Companion Base Stations an...

Страница 10: ...to the Companion Portable Telephone User Guide that is supplied with it Before the portables can be used in the United States portable credits must be obtained See Software keys U S only on page 68 Ad...

Страница 11: ...ICS XC Norstar Companion Installer Guide Note Versions 4 0 and 5 0 are also supported For information on how to access Norstar Voice Mail using your Norstar Companion portable refer to the Portable Te...

Страница 12: ...6 Norstar Companion basics MICS XC Norstar Companion Installer Guide P0881594 Issue 01...

Страница 13: ...in your system Hunt Groups are a group of Norstar sets that can be called by a single directory number The Hunt Groups feature ensures calls are easily routed to the appropriate people For informatio...

Страница 14: ...trolled by the ICS as they appear on the portable s display including both the display prompts and voice prompts from voice mail Norstar supports English French and Spanish For more information see th...

Страница 15: ...ce Companion ID Labels See Step 1 Obtain the Companion ID on page 69 Configuring Station Modules When installing wireless capabilities use only the last two or highest numbered ports for connecting th...

Страница 16: ...ote that the Key Service Unit KSU has been renamed the Integrated Communication System ICS The last two ports are reserved for Companion use only Note For each type of expanded system above Norstar Co...

Страница 17: ...n the ICS via a wiring distribution panel On a midi system On midi and maxi systems the highest numbered ports can be used for both Base Stations and Norstar sets Therefore sets and Base Stations can...

Страница 18: ...12 Planning the installation MICS XC Norstar Companion Installer Guide P0881594 Issue 01 Two port Expansion Cartridge ICS modules 1 and 2 TM4 SM3...

Страница 19: ...a maximum number of two Station Modules per Base Station See Six port Expansion Cartridge with Companion on page 13 If only one Station Module supporting Base Stations is required connect it to the h...

Страница 20: ...on an XC configuration For example a system expanded to 14 ports mega size includes two 6 port expansion cartridges with fiber ports numbered 3 to 14 on the expansion cartridges and 1 and 2 on the IC...

Страница 21: ...2 SM4 SM3 SM14 SM13 SM12 SM11 SM10 SM9 To Ac outlet To Ac outlet Fiber Cable Guide max 7 modules per power bar max 7 modules per power bar Note 1 Station modules 13 and 14 are used for Companion capa...

Страница 22: ...S numbering Non expanded system ICS alone numbering Module Lines Line ports B1 DN B2 DN DN ports Base Station ports Portable DN ICS 2 001 048 201 248 637 696 ICS 1 21 52 53 84 101 132 101 132 637 696...

Страница 23: ...073 096 301 312 253 268 317 332 301 316 301 316 637 696 ICS 2 001 048 201 248 ICS 1 221 252 285 316 101 132 Expansion module Lines Line ports B1 DN B2 DN DN ports Base Station ports Portable DN 8 049...

Страница 24: ...349 364 541 556 901 916 8 049 072 801 812 333 348 525 540 801 816 7 073 096 701 712 317 332 509 524 701 716 6 097 108 601 612 301 316 493 508 601 616 5 109 120 501 512 285 300 447 492 501 516 4 121 1...

Страница 25: ...the Expansion Cartridge and Trunk Cartridges as required connect the expansion modules complete the wiring install the emergency telephone s install the Norstar telephones install the single line tele...

Страница 26: ...Base Stations please see Configuring expansion modules on page 10 for more information on the installation rules involved The RPI unit should have the DC backup power supplied by a UL listed UPS The...

Страница 27: ...e maximum input power consumption of an RPI is 240 W If a UPS 48 V DC backup source is used the maximum input power requirement of the RPI is 135 W You can upgrade an RPI 8 BIX UL to an RPI 16 BIX UL...

Страница 28: ...and to prevent overheating leave a clearance of at least 125 mm 5 in around the RPI If you are mounting two RPIs one above the other leave a clearance of at least 300 mm 12 in between them to provide...

Страница 29: ...the right side You can remove the cover by lifting it off its hinges Opening the RPI cover 5 Hang the RPI on the two keyhole screws and tighten them 6 Install the remaining two screws 7 Feed the power...

Страница 30: ...e Station is 90 ohms You need one or two power pairs between the RPI and the Base Station depending on the wire size of the power pairs and the distance between the Base Station and the RPI Unplug the...

Страница 31: ...ctor Overview The following illustration shows where the input and output connectors are located on the RPI connector board RPI connector board Wire size Single pair Double pair 0 6 mm 22 AWG 450 m 1...

Страница 32: ...ower a Base Station connect one pair to PWR 1 and PWR 1 and the second pair to PWR 2 and PWR 2 Output connector pinout Input connections Feed the TCM input pairs from the ICS distribution frame throug...

Страница 33: ...IBIX1 1 2 TCM 1 OBIX1 3 4 TCM 2 OBIX2 5 6 TCM 3 OBIX3 7 8 TCM 4 OBIX4 IBIX2 1 2 TCM 5 OBIX5 3 4 TCM 6 OBIX6 5 6 TCM 7 OBIX7 7 8 TCM 8 OBIX8 IBIX3 1 2 TCM 9 OBIX9 3 4 TCM 10 OBIX10 5 6 TCM 11 OBIX11 7...

Страница 34: ...3 Green White 29 OBIX2 BS2 PWR White Brown 4 Brown White 30 TCM White Slate 5 Slate White 31 PWR Red Blue 6 Blue Red 32 OBIX3 BS3 PWR Red Orange 7 Orange Red 33 TCM Red Green 8 Green Red 34 PWR Red Br...

Страница 35: ...range 17 Orange Yellow 43 PWR Yellow Green 18 Green Yellow 44 OBIX7 BS7 PWR Yellow Brown 19 Brown Yellow 45 TCM Yellow Slate 20 Slate Yellow 46 PWR Violet Blue 21 Blue Violet 47 OBIX8 BS8 PWR Violet O...

Страница 36: ...een White 29 OBIX10 BS10 PWR White Brown 4 Brown White 30 TCM White Slate 5 Slate White 31 PWR Red Blue 6 Blue Red 32 OBIX11 BS11 PWR Red Orange 7 Orange Red 33 TCM Red Green 8 Green Red 34 PWR Red Br...

Страница 37: ...en 18 Green Yellow 44 OBIX15 BS15 PWR Yellow Brown 19 Brown Yellow 45 TCM Yellow Slate 20 Slate Yellow 46 PWR Violet Blue 21 Blue Violet 47 OBIX16 BS16 PWR Violet Orange 22 Orange Violet 48 TCM Violet...

Страница 38: ...Base Station where metalwork is near the antenna housings Be careful not to damage existing wiring or panels Do not position Base Stations in ducts plenums or hollow spaces used to transport environm...

Страница 39: ...install them with their covers at the bottom as shown in the following illustrations Allow for clearances around the Base Station as indicated in the following illustration Clearance for the Base Stat...

Страница 40: ...re it then fasten it under the strain relief 4 Connect the wires to the BIX connector on the bracket termination board as shown in the following illustration The polarity of the TCM connections is not...

Страница 41: ...a class 2 plug top power source only 8 Record the associated ICS port number in the space provided on the printed label affixed on the lower right corner of the mounting bracket Include the labeling...

Страница 42: ...Installing Base Stations on page 31 Companion Portable Telephones are installed differently than traditional Norstar sets There are no direct connections between the portables and the Norstar system...

Страница 43: ...urge arrestors The antenna should always be mounted vertically see figure on page 39 Use 8 12 mm to 50 mm 1 2 in to 2 in screws to mount the antenna bracket and lightning surge arrestor bracket to the...

Страница 44: ...tely necessary You must install a lightning surge arrestor for each outdoor external antenna FCC requirements In the United States the FCC requires that only certified antennas be connected to Compani...

Страница 45: ...se Station are special proprietary BNC connectors antennas are supplied with cables already attached and terminated with special proprietary BNC plugs to join with the connector on the Base Station ca...

Страница 46: ...install a lightning surge arrestor between an outdoor antenna and a Base Station Installing an outdoor external antenna To install an outdoor external antenna follow these steps 1 Drill a hole for th...

Страница 47: ...ing surge arrestor Install the lightning surge arrestor to protect the Companion components from electrical surges To install a lightning surge arrestor follow these steps 1 Mount the lightning surge...

Страница 48: ...s of ground rods If you cannot connect the ground lead to the building ground connect it to the steel frame of the building The connection should be no more than 1 8 to 3 m 6 to 10 ft You can also con...

Страница 49: ...ar Companion Installer Guide 2 Route and connect the coaxial cable from the outdoor external antenna to the lightning surge arrestor 3 Route and connect the coaxial cable from the lightning surge arre...

Страница 50: ...44 Installation MICS XC Norstar Companion Installer Guide P0881594 Issue 01...

Страница 51: ...ed the Administration Terminal shows BS 1 Dload Done Press CLEAR to clear the message Some Base Stations may not be powered up at the same time and this message repeats at the beginning of each downlo...

Страница 52: ...46 Powering up the system MICS XC Norstar Companion Installer Guide P0881594 Issue 01...

Страница 53: ...access is controlled by four passwords Installer password Allows you to see and change any item in programming System Coordinator Plus password Provides knowledgeable users with access to all but a f...

Страница 54: ...d control system services The Programming overview tables show the programming access for installers and system coordinators For information on programming the passwords see the Modular ICS Installer...

Страница 55: ...cess Progrming pswds Cards on KSU Capabilities Reg pswd Cards on Mod 3 Name Time Date Cards on Mod 4 User prefernces System prgrming Cards on Mod 5 Restrictions Change DNs Cards on Mod 6 Telco feature...

Страница 56: ...star guides you with step by step instructions on the telephone display while you are programming The programming overlay The programming overlay is a paper cutout that labels four telephone buttons u...

Страница 57: ...ext Show Norstar Programming Overlay Heading Back Next Show Norstar Programming Overlay Shows you the heading for the current level Moves you one item back at the current level Shows you the first set...

Страница 58: ...ns may be available at any one time Press one of the display buttons to select the function that you want Special characters on the display When a triangle is at the end of a programming heading or su...

Страница 59: ...ngs you do not need to save your changes Press The display briefly reads End of session Viewing your programming updates If any of the changes you have made to programming have not immediately taken e...

Страница 60: ...n describes only the defaults that apply to Companion programming For all other default settings refer to MICS Programming Record Note U S only Before registering Companion portable telephones you mus...

Страница 61: ...M7324 telephone dial pad by pressing which is the same as Setting PBX default DID default Registration Registration Portable DNs N Availble defaults same as PBX Radio data Re evaluation Status Schedul...

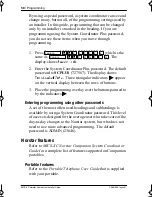
Страница 62: ...ssword the display shows Reset memory 1 Press YES to select a default template The display shows the current template 2 Press CHANGE to choose the appropriate template Entering programming After perfo...

Страница 63: ...the indicators Entering programming for system coordinators The person on staff who is in charge of making changes on the Norstar system is called the system coordinator The everyday Companion progra...

Страница 64: ...shows Terminals Sets Three triangular indicators appear on the vertical display between the rows of buttons 3 Place the programming overlay over the buttons pointed to by the indicators Entering prog...

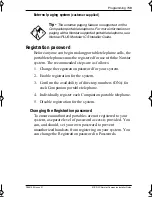
Страница 65: ...for each Companion portable telephone 4 Individually register each Companion portable telephone 5 Disable registration for the system Changing the Registration password To ensure unauthorized portabl...

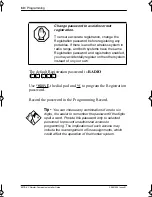
Страница 66: ...ny portables If there is another wireless system in radio range and both systems have the same Registration password and registration enabled you may accidentally register on the other system instead...

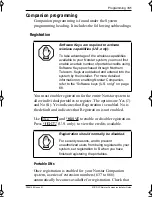
Страница 67: ...on is enabled for your Norstar Companion system a series of extension numbers 637 to 666 automatically becomes available for registration Check that Software Keys are required to activate wireless cap...

Страница 68: ...portable and in either an Installer or System Coordinator programming session Press to view registered and available DNs Note The DN range 637 to 696 can be used by either portable telephones or ISDN...

Страница 69: ...dio in a Base Station When adding or removing Base Stations Re evaluation needs to be applied to the system After installing Norstar Companion components and obtaining the proper number of UTAM activa...

Страница 70: ...red you can carry out the re evaluation by pressing CONTINUE and following the prompts Re evaluation Schedule This setting allows you to select whether to proceed or to schedule the next Re evaluation...

Страница 71: ...ou move around your office while on a call with your portable the call is handed off from one cell to another A call on a portable can be handed off from one cell to another only if those cells are pr...

Страница 72: ...ading allows you to view the 2 digit number of any cells that border a particular cell in a system You can then remove any of them or add more cells Press and enter the cell number to see the settings...

Страница 73: ...Hexadecimal characters can only range from 0 to 9 and A to E There are only two reasons to modify the system LID The site has multiple systems and you want users to be able to move from system to syst...

Страница 74: ...y UTAM Activation Keys Verify that the Base Station LED status is solid red and green before entering any UTAM keys Failure to follow the correct order of UTAM key entry may result in a disabled Norst...

Страница 75: ...e by calling the Nortel Customer Response Center You must provide the following information as shown on the Companion ID label your Companion ID number the zip code the number of radio credits already...

Страница 76: ...provide the following the Companion ID on the label the customer s zip code on the label and the System ID see Step 1 3 Indicate the number of radio credits you require You need two credits for every...

Страница 77: ...ysID 2 Press The display reads Password keys 3 Press The display reads Key 1 _ 4 Enter the 8 digit password number for Key 1 Use BKSP to make corrections The display reads Key 2 _ 5 Enter the 8 digit...

Страница 78: ...UTAM activation keys have been entered To verify whether or not the Base Stations have been properly recognized see Radio data on page 63 for information on the re eval process Register your Companion...

Страница 79: ...functions correctly C3050 Icons Some C3050 portable telephone icons for Canada and the United States are different but have the same functions The following table identifies these icons To register th...

Страница 80: ...637 and 666 The portable displays Enter name If the DN is incorrect the portable displays Invld DN If the registration fails the portable displays Reg failed If you try to register the C3050 to the sa...

Страница 81: ...s already selected 5 Press or You hear a dial tone and the portable displays If you do not hear a dial tone check that you have selected the correct system and try to register the portable again 6 Clo...

Страница 82: ...e using the Norstar administration set You could use this method if the portable was lost or stolen or if you wanted to assign it to another system This procedure does not clear registration data from...

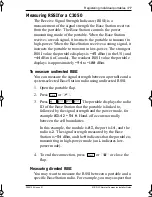
Страница 83: ...pproximately 94 to 100 dBm To measure undirected RSSI You can measure the signal strength between a portable and a system selected Base Station radio using undirected RSSI 1 Open the portable flap 2 P...

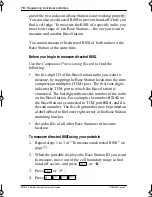
Страница 84: ...you want to measure by mapping the Base Station location to the time compression multiplex TCM port The first four digits indicate the TCM port to which the Base Station is connected The last digit i...

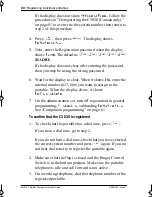
Страница 85: ...ndicates low power mode 6 To end the connection press or close the flap Registering the C3020 Canada only The following section describes the procedures involved in registering Companion C3020 portabl...

Страница 86: ...nternal number 637 666 you want to assign to the portable When the display clears it shows Reg n complete 7 On the administration set turn off registration in general programming Companion subheading...

Страница 87: ...odular ICS System Coordinator Guide For example you may want to deregister the portable before you assign it another number on the same system You can also deregister a portable using the administrati...

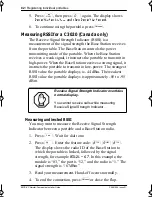
Страница 88: ...ble to transmit in low power The strongest RSSI value the portable displays is 44 dBm The weakest RSSI value the portable displays is approximately 85 to 95 dBm Measuring undirected RSSI You may want...

Страница 89: ...nd another Base Station Before you begin measuring directed RSSI Use the Companion Provisioning Record to find and note the following the five digit radio ID of the Base Station you want to measure by...

Страница 90: ...wed by the signal strength for example 03121 67 If you have not established a connection with the desired Base Station radio you hear a tone when you hold the portable to your ear 5 Read your measurem...

Страница 91: ...an register a portable to more than one system You cannot register a portable to more than one extension number per system You cannot register more than one portable to one extension number If a porta...

Страница 92: ...86 Registering individual portables MICS XC Norstar Companion Installer Guide P0881594 Issue 01...

Страница 93: ...lephone again 3 Verify that the portable telephone is using the correct registration slot 4 Verify that the portable telephone can make a call 5 Verify that the portable telephone has been assigned th...

Страница 94: ...ing the system coverage Using the undirected Received Signal Strength Indication feature on a portable telephone verify that the Base Stations are handing off calls and serving the coverage area as in...

Страница 95: ...that the portable is using the correct registration slot 5 Verify that the portable has been assigned the correct internal number by calling it from another telephone Problems with a Base Station 1 V...

Страница 96: ...s 90 ohms install a second power pair or power the Base Station with a plug top power supply The Base Station is faulty 4 Verify that the power cord of the RPI is properly connected to a working AC ou...

Страница 97: ...Station 3 If an external antenna is installed unplug its coaxial cable from the Base Station 4 Unplug the teledapt cable from the Base Station 5 While holding the Base Station to prevent it from fall...

Страница 98: ...dinator Guide 1 Press flfl 2 Press flfl the default Installer password 3 Press until you reach System prgrming 4 Press once 5 Press until you see Companion 6 Press The display shows Registration 7 Pre...

Страница 99: ...es that both radios on the Base Station are busy that the ICS is downloading data into the Base Stations or that one or both radios have not been assigned to a cell Verify that the red light is not fl...

Страница 100: ...keys U S only on page 68 Obtaining a Regression Key U S only You may need a Regression Key if one of the following conditions occurs a defective ICS is replaced an ICS has lost its System Identificat...

Страница 101: ...ntered the previous SysID is restored 7 Re enter all radio and portable credit keys recorded in MICS Programming Record 8 Verify that the correct number of Radio Credits is available see Verifying Rad...

Страница 102: ...tation download is complete Alarm 68 An upgrade has been performed A trunk or station module has been added to a system to which Base Stations are already connected The Base Stations must be moved to...

Страница 103: ...d This message occurs when a new Base Station is added to the system or is moved to a different port Run System Reevaluation immediately or schedule a System Reevaluation See Re evaluation on page 63...

Страница 104: ...page 94 UTAM test failed System is disabled This alarm appears only after a restart Ensure there is power to the Base Stations and RPI or plug top power supply Ensure that the location and number of...

Страница 105: ...credits See Verifying Radio Credits U S only on page 92 2 Remove the excess Base Stations and restart the system To determine the number of connected Base Stations to remove subtract the total number...

Страница 106: ...ng alarm code 53 occurs The Base Station on port 0103 in this case cannot be written to during data transfer Both radios belonging to the Base Station are disabled The Base Station s flash EEPROM is f...

Страница 107: ...case and another for the B2 channel radio A corresponding alarm code 53 occurs A recoverable RIM fault has occurred The RIM is reset If a link is active when this error occurs the link is dropped The...

Страница 108: ...only UTAM keys are required U S only UTAM test failed Evaluation override is finished Disablement test is active Disablement test is finished System initialization is beginning System initialization...

Страница 109: ...internal error System problem with locating portable telephones Wireless system access error Wireless system access error Trying to register an incompatible wireless device Wireless system software e...

Страница 110: ...error The Data Transfer server has been told by the Base Station that an error has occurred The Data Transfer server has been told by the Base Station that an error has occurred Invalid event for Data...

Страница 111: ...sage This occurs when you are trying to use a type of portable that the system does not support Wireless subsystem language loading error Firmware downloading to Base Station Basestation download is c...

Страница 112: ...e Wireless auto admin Re Eval subsystem has detected an error Sequencer functionality has detected an error The Wireless auto admin Re Eval Initial Intelligence component has detected an error The Wir...

Страница 113: ...t to the plug should be a minimum of 1 4 m 4 5 ft and a maximum of 4 2 m 15 ft Part no In the US RPI 8 NTE018AA A0627387 a RPI 16 NTE019AA A0627397 b a will be replaced with RPI 8 NTE023AA A0667940 b...

Страница 114: ...Base Station plug top power supply If a plug top power supply is required use only the power supply recommended for use with the Base Station Other usage invalidates any approval given to this appara...

Страница 115: ...condensation may occur Height 10 cm 4 in Width 10 cm 4 in Depth 6 cm 2 in Part no antenna NTAE50AA A0637293 Frequency range 1 92 to 1 93 GHz Peak power rating 13 5 dBm Peak antenna gain between 1 2 a...

Страница 116: ...52 MHz Peak power rating 10 mW minimum Peak antenna gain 4 dBi maximum Polarization vertical Input impedance 50 nominal Temperature 50 C to 55 C Humidity 0 to 100 Length 49 0 cm maximum Width 3 5 cm m...

Страница 117: ...connected to any other module On a maxi system 6 port expansion ensure that the Station Modules 7 or 8 or both are available to connect Norstar sets or Base Stations Base Stations cannot be connected...

Страница 118: ...nding straps the grounding plates and the power supply unit 4 Plug the output of the power supply unit into the connector board 5 Connect the jumper lead from PSU 1 to the lead from PSU 2 as shown bel...

Страница 119: ...tically assigned to a telephone when that telephone is assigned an Answer DN Answer DN The internal or directory number DN of a telephone that is monitored by an Answer button You can assign up to fou...

Страница 120: ...n its components and the Norstar system Companion Wireless provides mobility in the workplace Calls that used to ring just at your Norstar set can also appear and ring at your portable Companion ID An...

Страница 121: ...ssion They record a variety of events and activities in the Norstar system Expansion Cartridge A cartridge that allows you to connect Trunk Modules and Station Modules to the ICS to expand the system...

Страница 122: ...A button that provides access to internal lines used for calls within a Norstar system and access to external lines through a line pool or external code A telephone may be assigned zero to eight Inter...

Страница 123: ...able telephone Prime line The line on your telephone that is automatically selected when you lift the receiver press the Handsfree Mute button or use an external dialing feature A Prime Line is assign...

Страница 124: ...ion password a password that prevents unauthorized users from registering portables on the Norstar Companion system Regression Key U S only Restores the previous system security number so that previou...

Страница 125: ...telephones to your Norstar system System Coordinator password A one to six digit password that prevents unauthorized access to system programming The system coordinator password can be assigned and c...

Страница 126: ...nked to See also Receive Signal Strength Indicator UTAM Activation Key U S only Activates the wireless capability on a new system and in system upgrades involving a change to the number of Base Statio...

Страница 127: ...acket 41 external installation 37 43 outdoor installation 37 43 type selecting 65 B backup power 20 Base Station clearance 33 conducted emissions 1 configuring general 72 on a maxi system 11 13 on a m...

Страница 128: ...cell nghbrs 66 cell rad nghbr 66 cell radios 66 cells assignment 65 coverage area 3 Diagnostic Software 4 ID 68 portable telephone see portable telephone programming 47 72 Provisioning Record 31 re ev...

Страница 129: ...3 Evt 841 S5 103 Evt 842 S5 103 Evt 843 S5 104 Evt 848 S5 104 Evt 849 S5 104 Evt 850 S5 104 Evt 851 S5 104 Evt 852 S5 104 Evt 853 S5 104 Evt 854 S5 104 Evt 855 S5 104 Evt 856 S5 104 Evt 859 S5 105 Evt...

Страница 130: ...ansion modules 20 external antenna 37 43 lightning surge arrestor 37 43 planning 9 18 RPI 20 27 Station Module 9 Installer entering programming 57 password 56 installing equipment external antenna 37...

Страница 131: ...entering directory numbers 54 entering line numbers 54 P paging from portable telephones 59 password capabilities 47 defaults 54 Installer 56 System Coordinator 50 System Coordinator Plus 49 plug top...

Страница 132: ...ration C3050 portables 73 75 disabling 61 64 enabling 61 64 regulations radiated conducted emissions 1 Remote Power Interconnect see RPI replacing a Base Station 91 RPI Remote Power Interconnect backu...

Страница 133: ...ntifier 67 system prgrming defaults 55 T TCM connections Base Stations 34 polarity of 34 technical specifications Base Station 107 108 conducted emissions 1 plug top power supply 108 radiated emission...

Страница 134: ...3 Voice Mail system requirements 4 W wireless Call Forward No Answer 8 wireless capabilities see Companion wireless communication activation approval 1 68 94 regression key 94 95 wireless equipment 31...

Страница 135: ...the number provided or mail it to the address below Your comments will be used to make improvements Thank you We appreciate your time and consideration Nortel Product Training and Documentation Retur...

Страница 136: ...mation in this document 3 Have you found the information in this document to be technically accurate 4 Is this document clearly written 5 Is the information in this document complete for its purpose 6...

Страница 137: ......
Страница 138: ...e slots provided on the back cover Apr s avoir termin la programmation rangez la grille Norstar dans les fentes pr vues cet effet la fin de ce guide Cuando haya terminado de programar inserte en estas...

Отзывы: