SAFETY INSTRUCTIONS
Refer to front cover and page 1 of this guide.
MAINTENANCE
Poorly maintained humidification systems may
endanger health and affect proper operation.
Therefore it is mandatory to observe the specified
maintenance intervals and to carry out maintenance
work in strict accordance to the instructions. Please
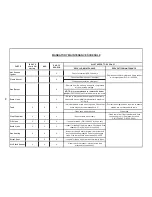
refer to the maintenance schedule on page 26.
Note: The water supplied to the GH Series
contains minerals which continuously accumulate
inside the water tank during the evaporation process.
To prevent excess accumulation the water tank must
be cleaned on a regular schedule.
DRAINING THE TANK
During extended periods of inactivity such as off
season or periods of very low demand, it is advisable
to drain the water from the tank. On all models this is
accomplished by switching the unit to “Drain”.
Note: It is recommended to wait until the water
temperature inside the tank is below local code
requirements before manually draining the unit.
MC models can also be programmed to drain
automatically after being inactive for a specified time.
Refer to the GHMC Display Unit Operating
Instructions, Form #XX-274.
Ensure that power is switched on again during
periods of demand.
CLEANING THE STAINLESS STEEL TANK
& FLOAT CHAMBER
CAUTION:
Water and scale may be hot enough
to cause burns. Turn off humidifier and allow it to cool
before cleaning.
The combustion chamber walls are usually self
cleaning. The mineral buildup flakes off, due to the
expansion and contraction and violent boiling action
during on/off cycles, and settles to the bottom of the
tank. A scale accumulation of up to 2" thick on the
bottom of the tank will not affect operation of the GH
unit.
It is recommended that the tank and float chamber
be cleaned at least once every season to maintain
optimum operation. It may be necessary to increase
the frequency of cleaning or increase the blowdown
setting in areas of hard water or prolonged annual
usage (see the “Blowdown Setting section of this
manual).
To clean tank, remove steam lines and remove
cabinet lid. Lid is held down by keyed lock at rear lip.
Remove tank lid by removing hold down knobs or nuts
being careful to not damage the insulation or gasket.
Do not remove the heat exchangers without consulting
NORTEC.
Scoop out loose scale with a small shovel such as
those used for gardening. Once loose scale is
removed, use a scraper such as a plastic windshield
scraper to remove scale adhering to the tank or
combustion chamber walls. DO NOT use a metal
scraper that will scratch the stainless steel surfaces of
the tank. Once all large pieces of scale have been
removed, vacuum the tank out with a shop vacuum, fill
part way with water, and flush remaining sediment
from the tank through the drain.
Due to the presence of polymer gaskets around
the heat exchangers, do not use any harsh cleaning
chemicals. Please consult NORTEC prior to using any
chemicals. Once the lid has been replaced, fill the unit
with water and examine for leaks.
Inspect the drain and fill lines assembly for scale
build-up and if necessary remove them from the
humidifier for cleaning. If the blowdown assembly
becomes blocked, scale build-up in the tank will be
accelerated and damage to the humidifier could result.
The drain pump may be opened and cleaned. Consult
NORTEC for proper procedure.
Reassemble the drain and blowdown if they were
removed. Re-install tank and cabinet lid making sure
tank cover gasket is intact. Do not over tighten hold
down knobs. If using a torque wrench do not exceed
10 ft-lb. Re-connect all steam and condensate lines.
Cleaning the float chamber is accomplished by
removing the hold down screws to access the floats
and using a small brush to gently clean the scale from
the floats and chamber. Ensure that floats are back in
place and o-ring is properly seated before tightening
screws on float chamber. Special attention must be
used when removing or re-installing the float chamber.
The switch board must be replaced into the same
position as before cleaning and the tie -wrap must be
used to hold the float chamber in position. For proper
installation see Figure #26.
COMBUSTION BLOWER
The combustion air blower motors are
permanently lubricated and require no other
maintenance.
- 19 -
Содержание GH 100
Страница 43: ... 39 ...

