


TriCaster Mini
Go Make Your Show Guide
45
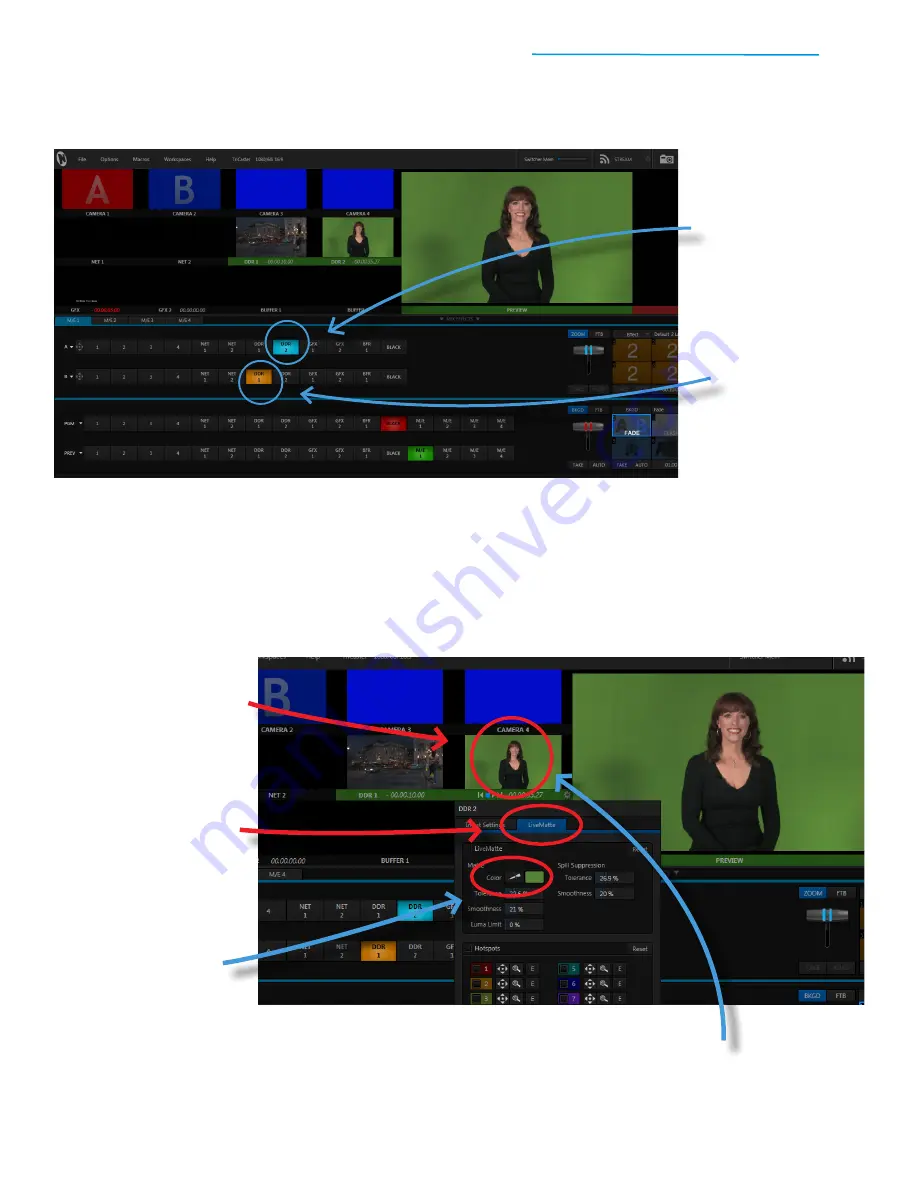
Now, follow these steps to set up M/E 1 for the layered effect:
You should now see the Kiki video clip cued up in the large Preview window. The London Bus video clip is
also there – you just can’t see it. With M/E 1 set for the Default 2 Layer effect, you have a foreground layer
(Kiki) and a background layer (London Bus), and right now, the foreground layer is completely covering the
background layer.
Let’s use LiveMatte to make the green screen disappear, so that we can see the London Bus video
behind Kiki.
#1
In row A of M/E 1,
click
on the DDR 2 button
#2
In row B of M/E 1,
click
on the DDR 1 button
–
if you’ve been following
along, you should
still have the
London Bus.mov clip
loaded, but if you don’t,
take the time to load the
clip into DDR 1
#1
Double-click the DDR 2
video window in the upper
left to open the DDR 2
configuration panel
#2
Click on the
LiveMatte tab
at the
top of the DDR 2
configuration panel
#3
Mouse over the
eyedropper next
to
Color
to change the
pointer to a pen
#4
Click the eyedropper and hold the
mouse button
, then drag the pen
to the green screen area of the
DDR 2 video window