TriCaster Mini
Go Make Your Show Guide
13
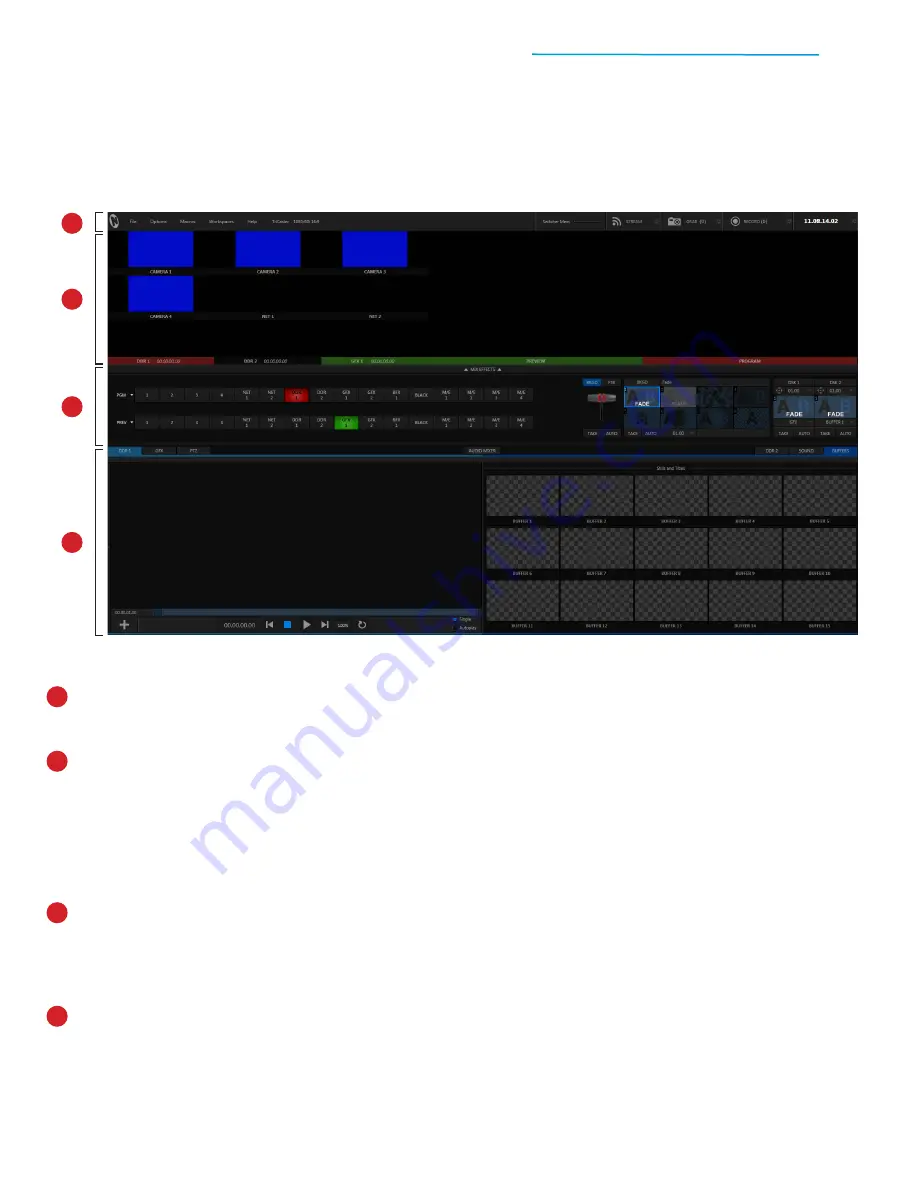
The
dashboard
is the menu bar at the top of the screen. It is home to various settings and controls,
Including live streaming and recording buttons.
The
multiviewer
is the collection of video windows that show the sources available for your production.
a. The smaller windows show the content of the
input sources
, such as live cameras, network feeds,
and stored sources.
b. The larger windows show
output video
from the switcher rows. The Program window is what
viewers see live, and the Preview window is what’s cued up for them to see next. “Now” and “next” is
an easy way to think of these.
The
video switcher
includes two rows of buttons for making Program and Preview selections for your live
show, transition controls for creatively mixing switcher sources, DSK overlay channels for layering graphics or
other visual elements over your live video, and M/E controls (which are currently hidden) for introducing more
advanced, composite effects and virtual sets.
The
control panel
is the series of tabbed panes for managing stored media sources, the multi-channel
audio mixer, and robotic Pan-Tilt-Zoom (PTZ) cameras.
Now that you’ve gotten to know your tools, let’s continue setting up for your first show –
starting with your camcorders.
You’ll now see the TriCaster user interface on your monitor, which is also called the Live Desktop. Think of it
as your palette for creating television! Let’s take a moment to explore the layout to see how the most essential
controls are organized.
1
2
3
4
1
2
3
4


