Installation and programming manual
Installation
35
BS100 transceiver (refer to
paragraph 3-3-4 Addressing FLEX5 expansions and the
Air2-BS100 transceiver
).
The second section shows the nBy/S and nBy/X reader addresses with the
corresponding combination of the reader LEDs (refer to
paragraph 3-3-5 Addressing
nBy readers
).
The section on the far right shows the addresses available for the keypads (refer to
paragraph 3-3-2 Addressing the keypads
).
For the Ivy sounderflasher and IB100 isolator addressing procedure, refer to the
respective Installation Guides.
It is possible to connect only one Nexus device to the SmartLiving control panels,
therefore, there no addressing procedure is required.
3-3-1
Fast addressing of
keypads and readers
If, within 4 seconds of inserting the maintenance jumper (
Table 4: Control panels -
description of parts, Q
), you press the open-tamper microswitch on the control panel
cover (
Table 4: Control panels - description of parts, V
), the SmartLiving system will
activate the fast addressing function for the keypads and readers.
All the keypads and readers connected to the I-BUS will be placed in address
programming status and assigned their addresses in sequential order.
At the point, you (the installer) can either change or confirm the assigned addresses
3-3-2
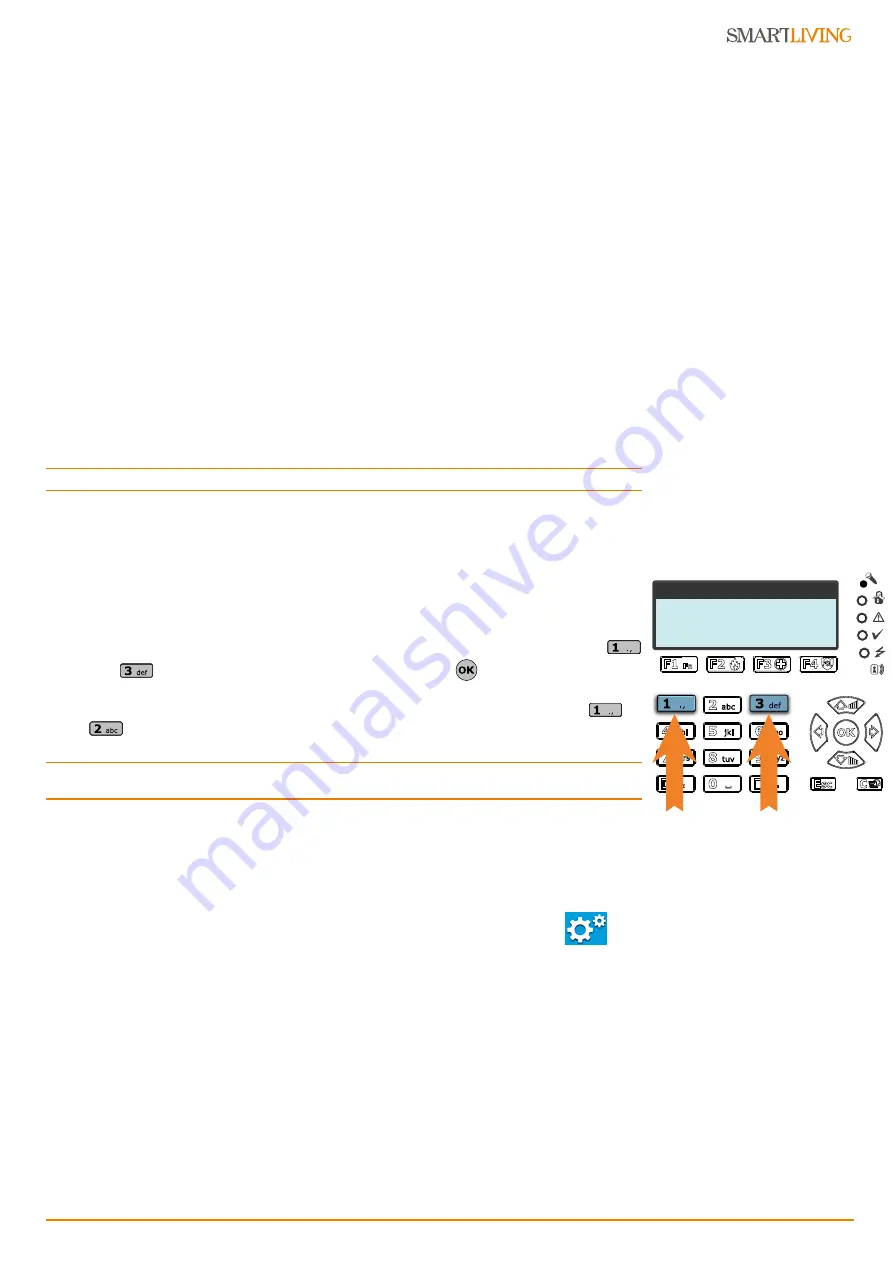
Addressing the keypads
To assign addresses to keypads, follow the procedure described in
paragraph 3-3-1 Fast
addressing of keypads and readers
or work through the following steps:
1. Put the control panel in “Maintenance” mode by inserting the respective jumper
(
Table 4: Control panels - description of parts, Q
).
2. On the keypad you wish to assign an address to, press
and release keys
and
simultaneously; set the address then press
(if the keypad firmware
version is 1.02 or higher, go to point 5).
3. You may also enable or disable the Keypad tamper protection by pressing
or
.
4.
Note
For security reasons, if the address is not assigned within 30 minutes of accessing “Maintenance”
mode (SERV jumper inserted), the keypad will exit the programming phase automatically.
3-3-3
Addressing the Alien keypad
Work carefully through the following steps.
1. Put the control panel in “Maintenance” mode (
paragraph 3-1-10 Maintenance sta-
tus
).
2. From the Alien keypad, access the “Settings” section by pressing the
, and
then access the “Alien” section. This section provides a list of the keypad param-
eters.
3. Set the parameters:
•PROXY ADDRESS - Alien keypad address
•PROXY ADDRESS - built-in reader address
•ALIEN TAMPER - keypad tamper enablement
4. This parameter can be changed by means of keys
+
and
-
.
5. Press
SAVE
to set the addresses and exit.
keypad address
_1
Min. 01
Max. 30


