SL2100 GETTING STARTED GUIDE
24
2-conductor connectors for extension
Philips head screwdriver
4 Wall Fixing plugs suitable for the type of wall
1.1.3
Replacing an Existing Telephone System
If you are replacing your existing telephone system with the SL2100, we recommend that you
check the following.
Do not disconnect all of the lines or extensions from your existing telephone system. If for any
reason you have problems installing the SL2100 you will need your old system in working
order to continue your business.
If you plan to use existing telephone cabling within your building, check :
The cable is twisted pair cable.
There are 2 wires (1 pair) available to each SL2100 system phone location.
You will need an RJ11 socket for each SL2100 system phone and DSS console.
Some of the wiring may be required for the modifications.
Move the exchange lines/analog telephones one at time and test each one before moving
over the next.
1.1.4
Unpacking
1.1.4.1
Unpack the IP7[ ]-4KSU-C1 Chassis
Unpacking the IP7[ ]-4KSU-C1 and check against the following list. Inspect for physical damage.
Items
Quantity
Remarks
IP7( )-4KSU-C1
1
•
Power Supply is initially equipped into the
IP7[ ]-4KSU-C1.
•
IP7[ ]-CPU-C1 board and other option boards
are not included.
AC Power Cord
1
IP7[ ]-4KSU-C1 without C does not including the
AC Power cord.
Screw(M4.1x25)
4
These four screws are for wall mounting.
Template for Wall
Mounting
1
This is the template for mount the chassis to the
wall.
1.1.4.2
Unpacking CPU board and each option board
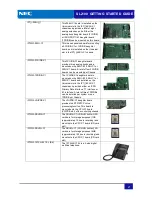
Unpack each board as required and check it against the following list. Inspect for physical damage.
Содержание UNIVERGE SL2100
Страница 18: ...SL2100 GETTING STARTED GUIDE 14 MEMO...
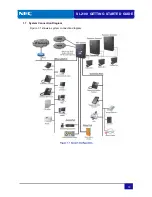
Страница 23: ...SL2100 GETTING STARTED GUIDE 19 1 7 System Connection Diagram Figure 1 1 shows a system connection diagram...
Страница 48: ...SL2100 GETTING STARTED GUIDE 44 5 Attach the phone to the wall...
Страница 77: ...SL2100 GETTING STARTED GUIDE 73 MEMO...
Страница 78: ...Getting Started Guide NEC Corporation Issue 1 0...

