SL2100 GETTING STARTED GUIDE
47
CPU card and the connected multiline telephone display shows the time and date and the
extension number.
Section 7 Test the System
Follow the procedures below to test the system.
7.1 Test the SL2100 2W Digital Multiline Terminals
Test each phone in turn.
1) Press
Speaker
.
If you hear system dialing tone the phone has initialized correctly. Press
Speaker
to clear.
If you do not hear dial tone, move to step 2.
2) Check the connections.
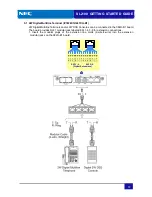
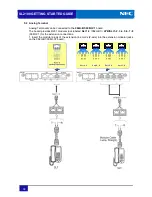
Check the connections from the phone to the SL2100. Ensure all 2 wires are connected as
shown in
5.1 2W Digital Multiline Terminal (IP7WW-12/24TXH-B1)
.
3) Plug the phone into the ESI connection port at the 082U-B1 board.
(The RJ61 socket (ESI 1/5-ESI 4/8) has four 2W-digital extension ports, therefore if you
connect a multiline terminal directly to an RJ61 socket, you can get the first port instead of
four port. However if you need the four port, you need to consider the wiring.)
If you have used telephone cable and RJ11 sockets to extend the connections,
plug the phone directly into the ESI connection port at the 082U-B1 board using the line cord
supplied with the system phone.
If the phone does not initialize correctly, move to step 4.
4) Swap the phone
Try another digital multline terminal plugged directly into the ESI connection port using the
line cord supplied with the phone.
7.2 Test the Analog Terminals (Test each phone in turn)
1) Lift the handset.
If you hear system dial tone the phone has working correctly.
If you do not hear dial tone, move to step 2.
2) Check the connections.
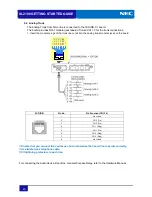
Check the connections from the phone to the SL2100 to ensure both wires are connected as
shown in
5.2 Analog Terminal
.
3) Plug the phone into the SLT connection port at the SL2100 board.
If you have used telephone cable and RJ11 sockets to extend the connections,
plug the phone directly into the SLT connection port at the SL2100 board using the RJ11 line
cord.
(Ensure the line cord connections are correct).
If you do not hear dial tone when you lift the handset, move to step 4.
4) Swap the phone.
Try another analog terminal plugged directly into the SLT connection using the RJ11 line cord.
7.3 Test the IP Multiline Terminal (Test each phone in turn)
1) Lift the handset.
If you hear system dial tone the phone is working correctly.
If you do not hear dial tone or there is no display, move to step 2.
2) Check the connections
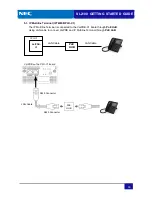
Check the connections from the phone to the SL2100 to ensure both LAN cables are
connected as shown in
5.3 IP Multiline Terminal (IP7WW-8IPLD-C1)
.
3) Plug the phone into the VOIPDB connection at the VoIPDB board through the PoE HUB.
(Ensure the LAN cable connections are correct).
If you do not hear dial tone when you lift the handset, move to step 4.
4) Swap the phone.
Try another IP multiline terminal plugged into the PoE HUB using another LAN cable.
Содержание UNIVERGE SL2100
Страница 18: ...SL2100 GETTING STARTED GUIDE 14 MEMO...
Страница 23: ...SL2100 GETTING STARTED GUIDE 19 1 7 System Connection Diagram Figure 1 1 shows a system connection diagram...
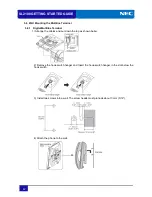
Страница 48: ...SL2100 GETTING STARTED GUIDE 44 5 Attach the phone to the wall...
Страница 77: ...SL2100 GETTING STARTED GUIDE 73 MEMO...
Страница 78: ...Getting Started Guide NEC Corporation Issue 1 0...

